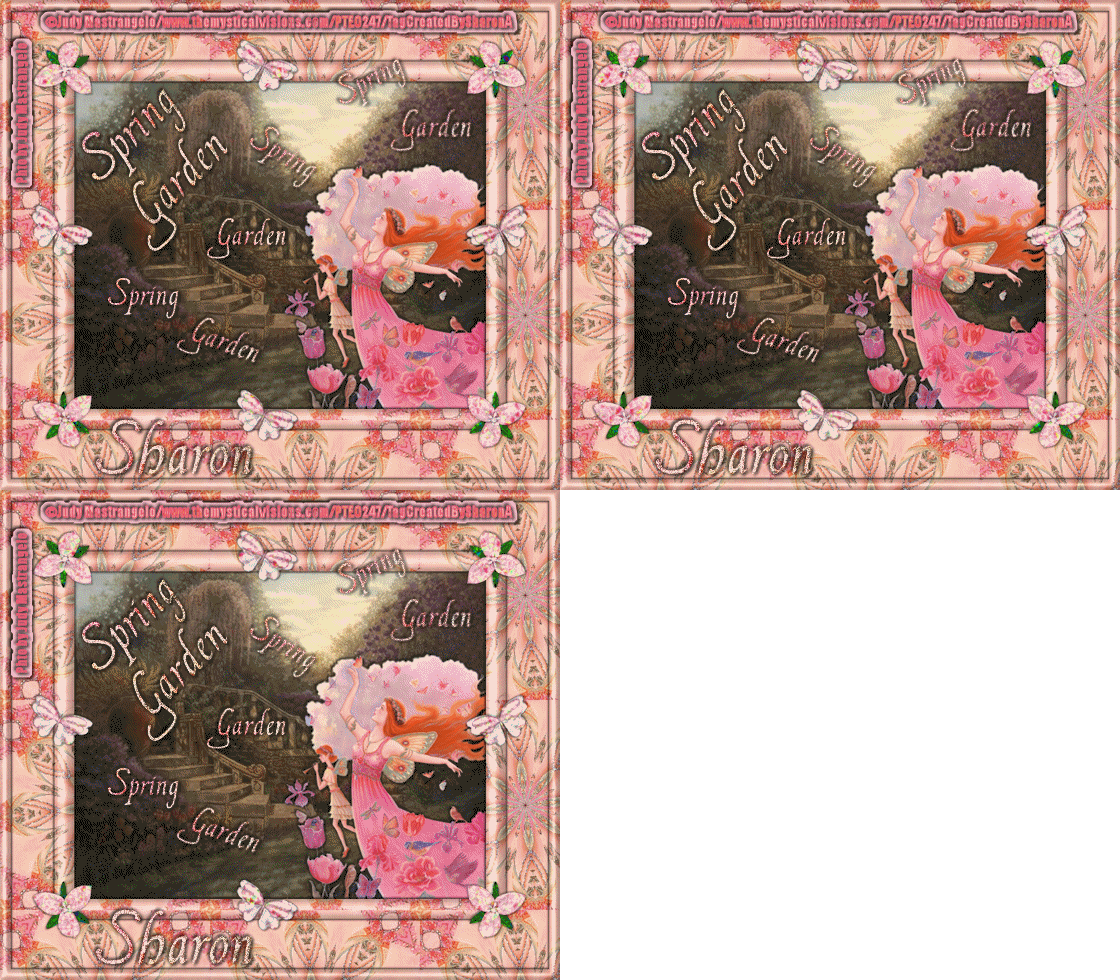
Click for larger view
This tutorial was written by Sharon A on April 8, 2012 & is copyright protected
For more info read my TOU
Supplies Needed
Butterfly, Flower & Pattern here
A Photo
The photo I used is called April Garden and is by Judy mastrangelo, you can purchase this photo at PTE here
Plugins
Eyecandy Texture Noise
DSB Flux Bright Noise
The tube I used Daylight Dance is by Judy Mastrangelo, you can purchase this tube from PTE here
The font I used is called FranciscoLucas Briosa
I used size 48 for my text & 60 for my name
For the smaller words I used size 30
Open a new transparent canvas 800x700, we will resize later
Floodfill with your pattern
Duplicate
Select all
Contract 15
Delete & deselect
Add inner bevel & drop shadow
Paste photo as a new layer
Resize if needed
Add drop shadow
Paste your tube as a new layer
Resize as needed
positon in a lower corner
Add drop shadow
Activate your rectangel shape tool
Foreground on your pattern, background null
Width 28
Draw a rectangle around your photo
convert to raster
Add inner bevel & drop shadow
Paste flower as a new layer
Resize to 35%
Position on a corner
Add drop shadow
Duplicate & mirror
Merge down
Duplicate & flip
Merge down
Paste butterfly as a new layer
Resize to 35%
Add drop shadow
Position at the top center of your frame
Duplicate
Positon at the center bottom of your frame
Duplicate
Position at the center left of your frame
Duplicate & mirror
Merge these layers
Merge with your flower layer
Duplicate 2 times
Apply eyecandy texture noise crinkle
Repeat on other 2 layers clicking on the random seed button each time
Resize all layers to 70%
Add your text, name & © info
Change your font to a smaller size
Add the words Spring & Garden
Add inner bevel & drop shadow
Rotate some of them
I rotated left & right 20
Positon in different areas of your tag
Merge all your text layers except the © layer
Duplicate 2 times
Apply dsb flux bright noise intensity 50, mix checked
Repeat on the other 2 layers changing the intensity to 55 & 60
Animation:
Hide middle & bottom animation layers
Merge visible
Copy & paste into animation shop
Undo your merge
Hide the top animation layers & unhide the middle ones
Merge & paste after current in animation shop
Undo your merge
Hide hide your middle animation layers & unhide the bottom ones
Merge visible & paste after current in animation shop
View your animation
Save as gif & you're all done!
I hope you enjoyed my tutorial
Your comments are very much appreciated either here on this post or on the chat box. I've made it easy for you to post on this tut by turning off the requirement of having to type in a confirmation code
I would love to post your © compliant result, just email it to me with ATT Sharon & the tut name in the subject line
You'll find my email blinkie on your left
:)


No comments:
Post a Comment
Please keep your language clean, thank you!