Tuesday, May 29, 2012

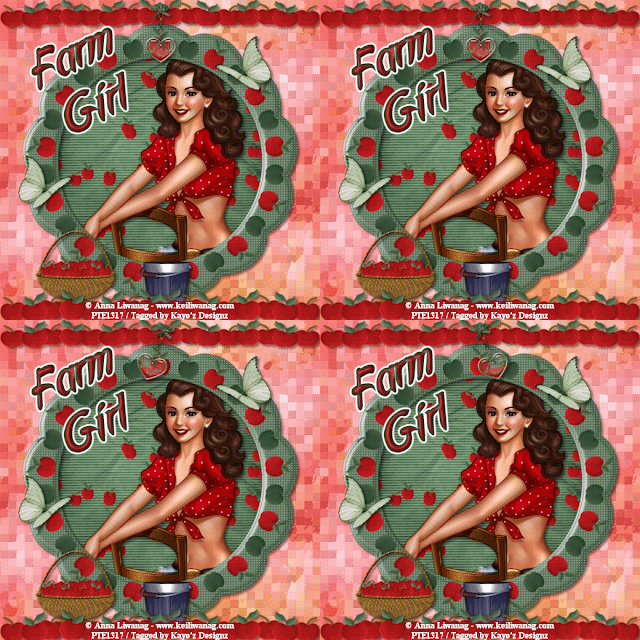
Farm Girl

Click for larger view

This tutorial was written by Sharon A on May 29, 2012 & is copyright protected
For more info read my TOU

Supplies Needed
Scrapkit Apple Picker by Vaybs here

Plugins
Xero Fritillary

The tube I used Vintage Pinup (PTE2389) is by Anna Liwanag, you can purchase this tube from PTE here

The name of my font is Applejuiced


Open a new transparent canvas 700x700, we will resize later
Select all
Paste paper 7 into selection
Deselect
Apply fritillary changing the top # to 18 & the bottom # to 24

Paste your tube as a new layer
Resize as needed
Add drop shadow

Paste frame (the last one with no #)
Click inside with your magic wand
Expand 10
Add a new raster layer
Paste paper 4 into selection
Deselect
Move to below your tube layer

Add a drop shadow to your frame

Paste element 4 as a new layer
Resize to 60%
Position on the left side of your frame
Add drop shadow
Duplicate & mirror
Move up a bit
Rotate left 10

Paste element 15 as a new layer
Resize to 60%
Add drop shadow
Position near the bottom left of your tag
Duplicate & mirror

Paste element 21 as a new layer
Position at the bottom center
Add drop shadow

Paste element 20 as a new layer
Resize the width (uncheck the lock aspect ratio button) to 140%
Position at the bottom center
Add drop shadow
Duplicate & position at the top of your tag

Make sure the bottom of your bucket & the baskets are covered by the apple line
Move up a bit if needed

Paste element 13 as a new layer
Resize to 35% (make sure to recheck the lock aspect ratio button)
Position near the top center
Add drop shadow
Duplicate 2 times

Rotate the middle one right 20
Realign the bow with the bow on the layer below

Rotate the bottom one left 20
Realign with the bow of the unrotated one

Resize all layers to 70%

Add your text, name & © info


Animation:

Hide the 2 rotated hearts
Merge visible
Copy & paste into animation shop

Undo your merge
Hide the unrotated heart & unhide the left rotation
Merge & paste after current in animation shop

In animation shop copy frame 1 & paste after frame 2

Undo your merge
Hide the left rotation & unhide the right
Merge visible & paste after frame 3 in animation shop

You'll have 4 frames

I set my frame properties at 30

View your animation

Save as gif & you're all done!

I hope you enjoyed my tutorial

Your comments are very much appreciated either here on this post or on the chat box.  I've made it easy for you to post on this tut by turning off the requirement of having to type in a confirmation code

I would love to post your © compliant result, just email it to me with ATT Sharon & the tut name in the subject line

You'll find my email blinkie on your left

:)


Result by Kaye W


Saturday, May 26, 2012

Sexy Pussy Cat

Click for larger view

This tutorial was written by Sharon A on May 26, 2012 & is copyright protected
For more info read my TOU

Plugins
DC Special Nylon
Eyecandy Texture Animal Fur
DSB Flux Bright Noise

The tube I used Pussy Gilore (15-3) is by Deacon Black, you can purchase this tube from CDO here

The name of the font I used is Honey Script Light


Open new transparent canvas 700x700, we will resize later
Floodfill with a color from your tube
Apply dc special nylon using default settings

Paste your tube as a new layer
Resize as needed & add drop shadow

Activate your elipse shape tool set on circle
Set your foreground to your floodfill color, width 60
Draw a circle around your tube
Resize if needed
Align center
Convert to raster
Move to below your tube layer
Effects>3D Effects>cutout with these settings


Use a darker shade of your color for the shadow & your color for the fill
Adjust>brightness/contrast
Brightness -25, contrast 12

Click inside your frame with your magic wand
Expand 5
Floodfill with the same color you made your frame with
Deselect
Move to below your frame layer
Apply eyecandy animal fur
Settings>leopard small spot
Pattern>change the base color to your floodfill color

Add drop shadow to your frame
Duplicate 2 times
Apply bright noise intensity 35, mix checked
Repeat on other 2 layers changing intensity to 40 & 45

From your top layer
Activate your circle shape tool again
Foreground any contrasting color, width 2
Draw a circle the same size as the outside of your frame
Align center

Add a new vector layer
Activate your text tool
I used size 60 with my font
Add your text
Add your effects
Delete the cirlce layer
Resize to 85%

Resize all layers to 70%

Add your name & © info


Animation:

Hide animation 2 & 3
Merge visible
Copy & paste into animation shop

Undo your merge
Hide animation 1 & unhide #2
Merge & paste after current in animation shop

Undo your merge
Hide animation 2 & unhide #3
Merge visible & paste after current in animation shop

View your animation

Save as gif & you're all done!

I hope you enjoyed my tutorial

Your comments are very much appreciated either here on this post or on the chat box.  I've made it easy for you to post on this tut by turning off the requirement of having to type in a confirmation code

I would love to post your © compliant result, just email it to me with ATT Sharon & the tut name in the subject line

You'll find my email blinkie on your left

:)


Result by Kaye W


Tuesday, May 22, 2012

Sexy Seniors

Click for larger view

This tutorial was written by Sharon A on May 22, 2012 & is copyright protected
For more info read my TOU

Plugins
Xero Fritillary

The tube I used Sexy Senior Area (PTE5950) is by Baron Von Lind, you can purchase this tube from PTE here

The name of my font is Honey Script Light


Open a new transparent canvas 700x700, we will resize later
Floodfill with a color of your choice
Apply fritillary changing the top & bottom #'s to 16

Paste your tube as a new layer
Resize as needed
Add drop shadow

Paste your other tube as a new layer
Resize smaller than your first one
I resized mine to 75%
Add drop shadow & position on one side
Duplicate & mirror

Back to your first tube
Duplicate & resize to 65%
Position on lower left side
Duplicate & mirror

Activate your pick tool
Look at the position x on your first duplicated tube
On your 2nd duplicated tube increase the position x by 100 from what the position x is on your 1st duplicated tube
Example: my 1st duplicate tube is at position x 19
I duplicated it & mirrored then changed the position x to 119

Now back to your 1st duplicate tube
Duplicate & increase position x by 200

Back to your 2nd duplicated tube
Duplicate & increase the position x by 200

Keep doing this all the way across
Always go back to the tube on your left & duplicate & increase position x by 200
You should end up with 6 of these

Arrange them in order, the left one on the bottom & the right one on top

Activate your rectangle shape tool
Use both your foreground & background colors, width 8
Draw out a rectangle near the top center of your tag
Add an inner bevel & drop shadow

Resize all layers to 70%

Add your text, name & © info


Animation:

Hide all of your dancing tubes, text & name
Merge visible
Copy & paste into animation shop

Undo your merge
Unhide the left tube & the first word of your text
Merge & paste after current in animation shop

Undo your merge
Hide the left tube & unhide the one above it
Merge visible & paste after current in animation shop

Keep doing this until you have all frame pasted
On your 4th frame hide the 1st word of your text & unhide the 2nd one
On your 6th frame hide the 2nd word of your text & unhide your name

I set my frame properties to 100 on frame 1 & 50 on the rest

View your animation

Save as gif & you're all done!

I hope you enjoyed my tutorial

Your comments are very much appreciated either here on this post or on the chat box.  I've made it easy for you to post on this tut by turning off the requirement of having to type in a confirmation code

I would love to post your © compliant result, just email it to me with ATT Sharon & the tut name in the subject line

You'll find my email blinkie on your left

:)


Result by Kaye W


Monday, May 21, 2012

Kiss My Ass - SAC

Click for larger view

This tutorial was written by Sharon A on May 21, 2012 & is copyright protected
For more info read my TOU

Supplies Needed
Flowers here

Plugins
Xero Fritillary

The tube I used 18-3 is by  Amy Matthews, you can purchase this tube from CDO here

The name of the font I used is Honey Script Light


Open new transparent canvas 930x375, we will resize later
Floodfill with a color from your tube
Apply fritillary changing the top & bottom #'s to 20

Paste your flowers as a new layer
Change layer properties to overlay
Add drop shadow

Paste your main tube as a new layer
Resize as needed
Add drop shadow
Position on one side

Paste a close up tube as a new layer
Resize as needed & add drop shadow
I mirrored mine
Position on one side
Change layer properties to soft light

Duplicate your bg layer
Send to the top
Select all
Contract 8
Delete & deselect
Add an inner bevel & drop shadow

Duplicate 4 times for a total of 5
Change the layer properties on each
Starting from the top I used
Multiply, overlay, dodge, burn & hard light

Move your main tube layer to above your border

Resize all layers to 70%

Add your text, name & © info


Animation:

Hide all your border layers except the top one
Merge visible
Copy & paste into animation shop

Undo your merge
Hide your top border layer & unhide the next one down
Merge & paste after current in animation shop

Undo your merge
Hide your 2nd border & unhide the 3rd
Merge visible & paste after current in animation shop

Repeat until you have all 5 frames pasted

I set my frame properties at 25

View your animation

Save as gif & you're all done!

I hope you enjoyed my tutorial

Your comments are very much appreciated either here on this post or on the chat box.  I've made it easy for you to post on this tut by turning off the requirement of having to type in a confirmation code

I would love to post your © compliant result, just email it to me with ATT Sharon & the tut name in the subject line

You'll find my email blinkie on your left :)


Result by Kaye W


Friday, May 18, 2012

Blog Blinkie 4


This tutorial was written by Sharon A on May 18, 2012 & is copyright protected
For more info read my TOU

Supplies Needed
Element of your choice

Plugins
Eyecandy Texture Weave

The name of my font is Honey Script Light

This is a pretty simple one to make
Go ahead & give it a try!  :)


Open a new transparent canvas 300x150, we will resize later
Floodfill with a color, gradient or pattern which will look nice with your blog
Apply eyecandy weave with these settings


Paste your element as a new layer
Duplicate & hide the duplicated layer

Resize it small, I resized mine to 15%
Apply mura meister copies
Preset menu on line, number will depend on the size of your element
I used 11, odd #'s will work better
Position at the bottom of your tag
Duplicate & position at the top

Back to your duplicated element
Resize so it will fit between your lines
Add drop shadow

Copy & paste into animation shop
Effects>insert image effect>Rotate
You'll have 11 frames

Back to psp

Add your blog name, 1 word per layer
Make your font big
I used size 100 with my font
Align center & apply your effects

Activate your rectangle shape tool
Foreground null, background on your text color
Draw out a vertical line as wide as you want, fit between your element lines
Position into place
Add an inner bevel & drop shadow
Duplicate & mirror
 

Animation:

Hide all your text layers and your main element layer
Merge visible
Copy & paste into animation shop
Multiply until you have 11 layers
Activate frame 1 and select all

Make sure all the frames of your element are selected & both animations are zoomed to the same size
Grab your element by frame 1 and drop into position on frame 1 of your blinkie
View your animation to make sure all frames have your element
Activate frame 11

Back to psp

Undo your merge
Uhide the 1st word of your blog name & your element
Merge & paste after current in animation shop

Undo your merge
Hide your 2nd word & unhide your 3rd
Merge visible & paste after current in animation shop
Continue until you have all your blog word frames pasted

I set the text frame properties to 75

Resize to 50%

View your animation

Save as gif & you're all done!

I hope you enjoyed my tutorial

Your comments are very much appreciated either here on this post or on the chat box.  I've made it easy for you to post on this tut by turning off the requirement of having to type in a confirmation code

I would love to post your © compliant result, just email it to me with ATT Sharon & the tut name in the subject line

You'll find my email blinkie on your left

:)


My Birthday Party

Click for larger view

This tutorial was written by Sharon A on May 18, 2012 & is copyright protected
For more info read my TOU

Supplies Needed
Scrapkit Birthday Wishes here

Plugins
Eyecandy Texture Weave
Xenofex Constellation
DSB Flux Bright Noise

The tubes I used are by Judy Mastrangelo, you can purchase these tubes from PTE here

The name of my font is Wild Script


Open a new transparent canvas 700x700, we will resize later
Select all
Paste paper 12 into selection
Deselect
Apply eyecandy texture weave
Settings on solid plain angled
Use these settings on basic


Paste element 6 as a new layer
Add drop shadow

Paste element 56 as a new layer
Resize to 85%
Resize the width to 75% by unchecking the lock aspect ratio button
Reposition
Click inside with your magic wand
Expand 5

Add a new raster layer
Paste paper 13 into selection
Deselect & move to below your frame
Apply bright noise, intensity 40, mix checked

Duplicate 2 times
Apply constellation
Settings on medium, keep original image checked
Repeat on other 2 layers clicking on the random seed button each time
Paste your main tube as a new layer
Resize as needed
Add drop shadow

Add an inner bevel & drop shadow to your frame

Paste your other tubes as new layers
Resize as needed & add drop shadow
Position near the bottom of your tag

Paste element 24 as a new layer
Resize to 40%
Position on left side of your frame
Add drop shadow

Paste element 50 as a new layer
Resize to 30%
Position on right side of your frame
Add drop shadow

Paste element 51 as a new layer
Resize to 50%
Position at the top center of your tag
Add drop shadow

Paste element 53 as a new layer
Resize to 15%
Position inside the frame
Rotate left 30
Add drop shadow

Resize all layers to 70%

Add your text, name & © info


Animation:

Hide animation 2 & 3
Merge visible
Copy & paste into animation shop

Undo your merge
Hide animation 1 & unhide #2
Merge & paste after current in animation shop

Undo your merge
Hide animation 2 & unhide #3
Merge visible & paste after current in animation shop

View your animation

Save as gif & you're all done!

I hope you enjoyed my tutorial

Your comments are very much appreciated either here on this post or on the chat box.  I've made it easy for you to post on this tut by turning off the requirement of having to type in a confirmation code

I would love to post your © compliant result, just email it to me with ATT Sharon & the tut name in the subject line

You'll find my email blinkie on your left

:)


Result by Kaye W


Day at the Zoo

Click for larger view

This tutorial was written by Sharon A on May 18, 2012 & is copyright protected
For more info read my TOU

Tube of your choice.  For the purpose of writing this tut I will assume you're using the same one I am

The tube I used P07 Jungle Party is by Toosh Toosh, you can purchase this tube from Toosh Toosh here

The name of my font is Wild Script


Open a new transparent canvas 700x700, we will resize later
Floodfill with a color from one of your tubes
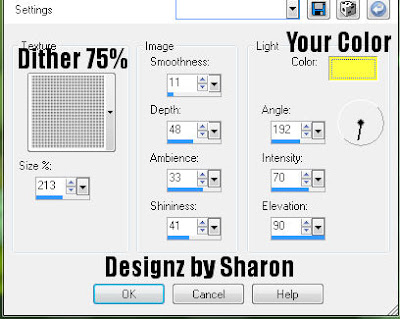
Add texture with these settings


Paste your elephant as a new layer
Resize as needed
Add drop shadow

Paste your giraffes as new layers
Position on either side of your elephant
I sized the left one a bit smaller than the right
Add drop shadow

Paste your other tubes as new layers
Position around on your tag
Add drop shadow

Duplicate your tube at the bottom of your tag
Mirror & reposition

Duplicate your bg layer
Send to the top
Select all
Contract 12
Delete & deselect
Add an inner bevel & drop shadow

Resize all layers to 70%

Add your text, name & © info


Animation:

Hide one of your duplicated tubes
Merge visible
Copy & paste into animation shop

Undo your merge
Hide your tube & unhide the other one
Merge & paste after current in animation shop

I set my frame properties at 25

View your animation

Save as gif & you're all done!

I hope you enjoyed my tutorial

Your comments are very much appreciated either here on this post or on the chat box.  I've made it easy for you to post on this tut by turning off the requirement of having to type in a confirmation code

I would love to post your © compliant result, just email it to me with ATT Sharon & the tut name in the subject line

You'll find my email blinkie on your left

:)


Result by Kaye W


Tuesday, May 15, 2012

Beautiful Delights

Click for larger view

This tutorial was written by Sharon A on May 15, 2012 & is copyright protected
For more info read my TOU

Plugins
DSB Flux Bright Noise

The tubes I used are by Karina Dale, you can purchase these tubes from PTE here

The name of my font is Honey Script Light


Open a new transparent canvas 930x420, we will resize later
Floodfill with a gradient of your choice, radial, angle 0, repeats 0
I used a hue tint gradient
Apply bright noise intensity 20, mix checked

Paste your main tube as a new layer
Resize as needed
Add drop shadow
Position at the bottom center

Paste your close up tubes
Resize as needed
Position into place
Add drop shadow
Move to below your main tube layer

Paste your full size side tubes
Resize as needed
Position on the sides
Add drop shadow

Activate your picture tube tool
Select confetti
I set my scale to 35
Click around on random areas of your tag

Add a new raster layer & repeat

Add a 3rd raster layer & repeat

Duplicate your bg layer & send to the top
Select all
Contract 15
Delete & deselect
Add an inner bevel & drop shadow

Resize all layers to 70%

Add your text, name & © info


Animation:

Hide animation 2 & 3
Merge visible
Copy & paste into animation shop

Undo your merge
Hide animation 1 & unhide #2
Merge & paste after current in animation shop

Undo your merge
Hide animation 2 & unhide #3
Merge visible & paste after current in animation shop

View your animation

Save as gif & you're all done!

I hope you enjoyed my tutorial

Your comments are very much appreciated either here on this post or on the chat box.  I've made it easy for you to post on this tut by turning off the requirement of having to type in a confirmation code

I would love to post your © compliant result, just email it to me with ATT Sharon & the tut name in the subject line

You'll find my email blinkie on your left

:)


 Result by Kaye W


Monday, May 14, 2012

Purple Apples

Click for larger view

This tutorial was written by Sharon A on May 14, 2012 & is copyright protected
For more info read my TOU

Supplies Needed
Purple Apple I made for this tut here

Plugins
Xero Fritillary
Mura Meister Copies
DSB Flux Bright Noise

The tube I used Eve is by Alfadesire, you can purchase this tube from PFD here

The name of my font is Honey Script Light


Open a new transparent canvas 930x420, we will resize later
Floodfill with a color from your tube
Apply fritillary changing the top & bottom #'s to 16

Paste your apple as a new layer
Duplicate & hide the duplicated one
Resize original to 25%
Add drop shadow
Apply mura meister copies
Preset menu on line, number 19
Position at the bottom of your tag
Duplicate & position at the top
Merge down

Duplicate 2 times
Apply bright noise intensity 35, mix checked
Repeat on other 2 layers changing the intensity to 40 & 45

Paste your tube as a new layer
Resize as needed
Add drop shadow

Unhide your duplicated apple
Send to the top
Add drop shadow
Move to the left side of your tube
Duplicate & mirror

Duplicate your bg layer & position below your apple lines
Select all
Contract 12
Delete & deselect
Add an inner bevel & drop shadow

Resize all layers to 70%

Add your text, name & © info


Animation:

Hide animation 2 & 3
Merge visible
Copy & paste into animation shop

Undo your merge
Hide animation 1 & unhide #2
Merge & paste after current in animation shop

Undo your merge
Hide animation 2 & unhide #3
Merge visible & paste after current in animation shop

View your animation

Save as gif & you're all done!

I hope you enjoyed my tutorial

Your comments are very much appreciated either here on this post or on the chat box.  I've made it easy for you to post on this tut by turning off the requirement of having to type in a confirmation code

I would love to post your © compliant result, just email it to me with ATT Sharon & the tut name in the subject line

You'll find my email blinkie on your left

:)


Result by Kaye W


Rain Rain

Click for larger view

This tutorial was written by Sharon A on May 14, 2012 & is copyright protected
For more info read my TOU

Supplies Needed
Frame I made for this tut here
Butterfly of your choice

Plugins
Xenofex Little Fluffy Clouds
Mura Meister Cloud
Eyecandy Texture Noise
Mura Meister Copies

The tube I used Flower Girl 1-3 is by Marlon Teunissen, you can purchase this tube from CDO here

The name of the font I used is Tamborine


Open new transparent canvas 700x700, we will resize later
Floodfill with a color from your tube
Add a new raster layer

Apply xenofex little fluffy clouds
Settings on blue sky
Change coverage to 90
Set the base color to white & the edge color to black
I set the random seed at 6607

Change layer properties to multiply
Merge down & add an inner bevel

Paste your frame as a new layer
Click inside with your magic wand
Expand 5
Floodfill with another color from your tube
Deselect & move to below your frame

Add an inner bevel & drop shadow to your frame

Paste your tube as a new layer
Resize as needed
Add drop shadow

Activate your frame layer
Click inside with your magic wand
Add a new raster layer
Apply mura meister cloud
Preset menu on thin clouds, uncheck bg box
Change layer opacity to 50

Duplicate 2 times
Apply eyecandy texture noise
Settings on heavy rain
Use these settings


Repeat on other 2 layers clicking the random seed button each time
Deselect

Paste your butterfly as a new layer
Resize as needed
Add drop shadow
Rotate if needed
Position on the upper left corner of your frame
Duplicate, mirror & merge down
Duplicate & move to the bottom of your frame
Merge down

Activate your text tool
I used impact size 36
Type the word rain
Align center
Add your effects

Activate your frame floodfill layer
Select all>float>defloat
Back to your text
Apply mura meister copies
Preset menu on tiling
Gap will depend on your font & size, I used 4
Deselect & move to below your frame

Resize all layers to 70%

Add your text, name & © info


Animation:

Hide animation 2 & 3
Merge visible
Copy & paste into animation shop

Undo your merge
Hide animation 1 & unhide #2
Merge & paste after current in animation shop

Undo your merge
Hide animation 2 & unhide #3
Merge visible & paste after current in animation shop

View your animation

Save as gif & you're all done!

I hope you enjoyed my tutorial

Your comments are very much appreciated either here on this post or on the chat box.  I've made it easy for you to post on this tut by turning off the requirement of having to type in a confirmation code

I would love to post your © compliant result, just email it to me with ATT Sharon & the tut name in the subject line

You'll find my email blinkie on your left

:)


Result by Kaye W