Tuesday, October 18, 2011

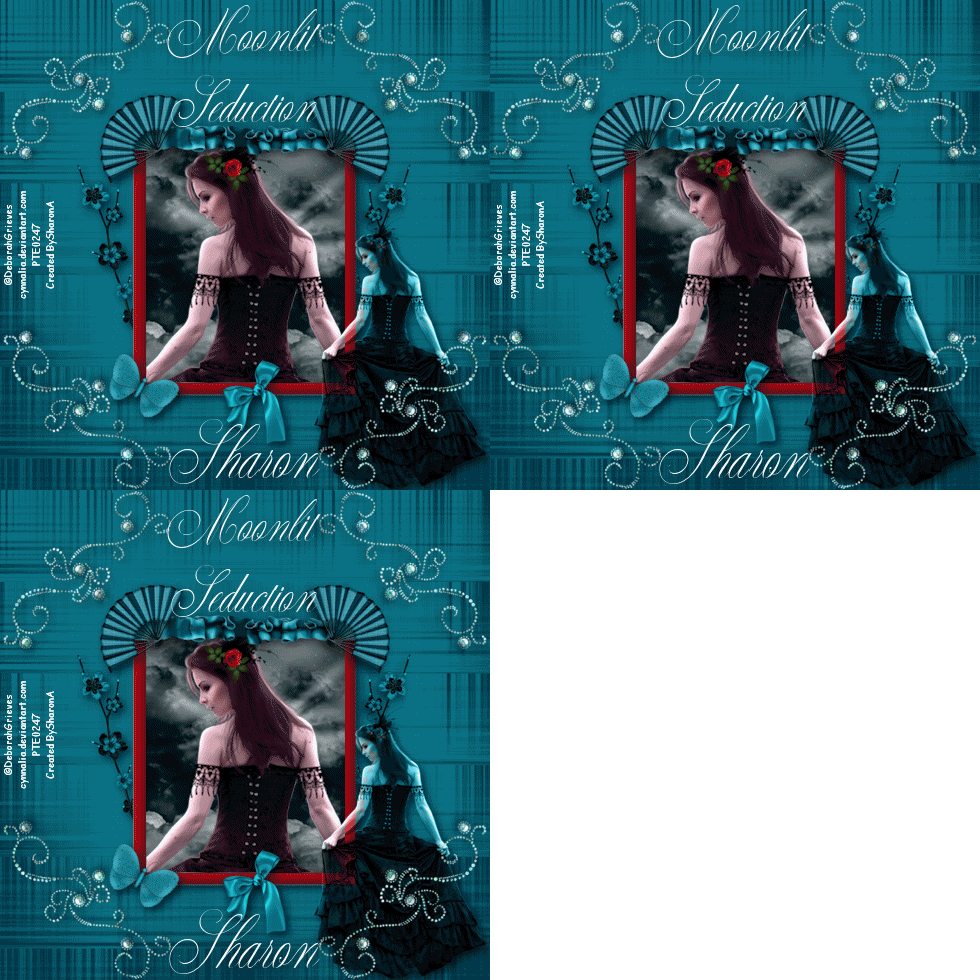
Moonlit Seduction

Click for larger view

This tutorial was written by Sharon on Oct 18, 2011
For more info read my TOU

Supplies Needed
Scrapkit Nightlife by Bea here
(Click on the 4 shared link near the top & scroll down about 1/2 way)

Plugins
Eyecandy 4 HSB Noise

The tube I used Moonlit Seduction is by Deborah Grieves, you can purchase this tube from PTE here


Open a new transparent canvas 700x700, we will resize later
Select all
Paste paper 2 into selection
Deselect

Activate your shapes tool set on rectangle, width 20
Foreground a color from your tube, background null
Draw out a rectangle begging at x200 y200 ending at x500 y555
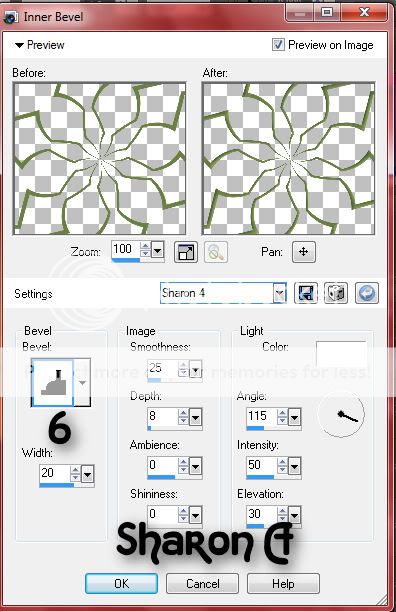
Add an inner bevel
Using your magic wand click inside your frame
Expand 3

Paste paper 13 as a new layer
Resize to 50%
Move down a bit with your move tool
Invert your selection
Delete
Do Not Deselect

Paste the close up of your tube as a new layer
Resize as needed
Invert your selection
Delete
Deselect

Add a drop shadow to the frame

Paste the full size layer of your tube as a new layer
Resize as needed (I resized mine to 75%)
Add drop shadow
Change layer properties to luminance legacy

Paste bling swirl 2 as a new layer
Resize to 50%
Rotate left 45
Position upper left corner
Apply an inner bevel & drop shadow
Duplicate & mirror
Merge down
Duplicate & flip
Merge down

Duplicate 2 times
Rename these layers to animation 1, 2 & 3
Apply eyecandy hsb noise using default settings, random seed on 1

Repeat on animations 2 & 3 clicking on the random seed button each time

Paste bow 4 as a new layer
Resize to 35%
Position on bottom of frame
Add drop shadow

Paste flower 1 as a new layer
Resize to 50%
Position on left side of frame
Add drop shadow
Duplicate and mirror
Merge down
Move to below your frame layer

Back to the top

Paste butterfly 7 as a new layer
Resize to 40%
Rotate right 30
Position lower left corner of frame
Add drop shadow

Paste ruffle 3 as a new layer
Resize to 50%
Position at top of frame
Add drop shadow

Paste fan 1 as a new layer
Resize to 35%
Position upper left corner of frame
Add drop shadow
Duplicate & mirror
Merge down

Resize all layers to 70%

Add your text, name & your © info

Make sure animations 2 & 3 are hidden

Merge visible
Copy & paste into animation shop

Undo your merge
Hide animation 1 & unhide animation 2
Merge visible
Copy & paste after current in animation shop

Undo your merge
Hide animation 2 & unhide animation 3
Merge visible
Copy & paste after current in animation shop

I left the frame properties on the default of 10

Save as gif & you're all done!

I hope you enjoyed my tutorial

I would love to post your © compliant result, just email it to me with the tut name in the subject line

:)


Monday, October 17, 2011

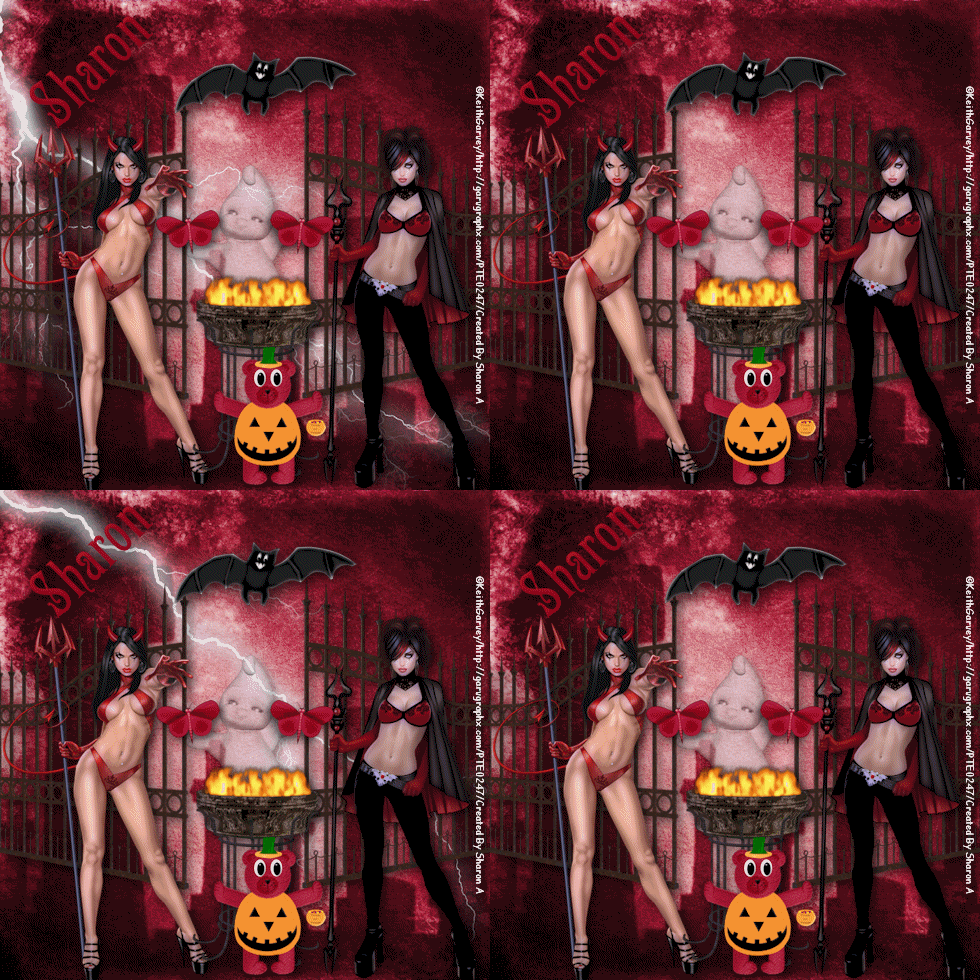
Spooky Night

Click for larger view

This tutorial was written by Sharon on Oct 17, 2011
For more info read my TOU

Supplies Needed
Scrapkit Hallow Eve by me here

Plugins
Xenofex 2 Lightening

The tubes I used Devil Woman & Evil Queen are by Keith Garvey, you can purchase this tube from PTE here


Open a new transparent canvas 700x700, we will resize later
Select all
Paste paper 29 into selection
Deselect

Duplicate 2 times
Rename these layers to animation 1, 2 & 3

On animation 1 apply xenofex lightening, click on Glow and change flash size to 0
Repeat on animation 3 clicking on the random seed button

Paste ghost 4 as a new layer
Resize to 40%
Change opacity to 50
Add drop shadow

Paste gate as a new layer
Resize to 90%
Add drop shadow

Paste your tube as a new layer
Apply xero porcelain using default settings
Add drop shadow

Paste your 2nd tube as a new layer
Repeat effects

Paste cauldron fire as a new layer
Resize to 75%
Position in between your tubes
Add drop shadow

Paste pumpkin bear 5 as a new layer
Resize to 40%
Position in front of cauldron fire
Add drop shadow

Paste butterfly 5 as a new layer
Resize to 35%
Position on gate
Add drop shadow
Duplicate & mirror

Paste bat as a new layer
Resize to 65%
Position near top
Add drop shadow

Resize all layers to 70%

Add your name & your © info

Hide animations 2 & 3 
Merge visible
Copy & paste into animation shop

Undo your merge
Hide animation 1 & unhide animation 2
Merge visible
Copy & paste after current in animation shop

Undo your merge
Hide animation 2 & unhide animation 3
Merge visible
Copy & paste after current in animation shop

Copy frame 2 & paste after frame 3
Set frame properties on frames 1 & 3 at 15
Set frame properties on frames 2 & 4 at 100

Save as gif & you're all done!

I hope you enjoyed my tutorial

I would love to post your © compliant result, just email it to me with the tut name in the subject line

:)


Buddies

Click for larger view

This tutorial was written by Sharon on Oct 17, 2011
For more info read my TOU

Supplies Needed
Template # 135 by me here

Plugins
Xero Fritillary
Graphics Plus Cross Shadow

The tube I used Tiger is by Marco Guaglione, you can purchase this tube from PTE here

Open your template, shift D to duplicate & close original
Delete credit layer

Activate diamond shape layer
Select all>float>defloat
Floodfill with a pattern

Paste your tube as a new layer
Resize as needed
Invert your selection
Delete
Deselect
Add drop shadow

Activate diamond frame layer
Select all>float>defloat
Floodfill with a color from your tube
Deselect
Apply an inner bevel of your choice
Add drop shadow

Activate the circle layer
Select all>float>defloat
Floodfill with a gradient Style Linear, angle 0, repeats 0
Apply xero fritillary changing top & bottom #'s to 10
Apply graphics plus cross shadow using default settings
Deselect

Activate the bars layer
Select all>float>defloat
Floodfill with the same pattern you used before
Apply inner bevel & drop shadow

Floodfill raster 1 with the same color you used before

Resize all layers to 70%

Add your name, text & your © info

Merge all

Save as jpg & you're all done!

I hope you enjoyed my tutorial

I would love to post your © compliant result, just email it to me with the tut name in the subject line

:)
Result by Kaye W


Sunday, October 16, 2011

Sexy Cowgirl


Click for larger view

This tutorial was written by Sharon on Oct 16, 2011
For more info read my TOU

Plugins
Xero Fritillary
Graphics Plus Cross Shadow
Eyecandy 4 HSB Noise

The tube I used Cowgirl 6 is by Jose Cano, you can purchase this tube from PTE here


Open a new transparent canvas 600x225
Floodfill with a color from your tube
Apply xero fritillary, change top & bottom #'s to 12
Apply graphics plus cross shadow using default settings

Activate your shapes tool, select rectangle
Foreground null, background same as your floodfill color
Starting at x0 y100, ending at x600 y115, draw a rectangle
Effects>Reflection effects>Kaliedoscope with these settings


Add inner bevel using these settings


Add drop shadow

Duplicate 2 times
Rename these layers to animation 1, 2 & 3

On animation 1 apply eyecandy hsb noise, default settings, random seed on 1

Repeat on animation 2 & 3 clicking on random seed each time

Paste your tube as a new layer
Resize as needed
Add drop shadow
Duplicate & mirror
Change layer properties to luminance legacy

Hide all layers except your main tube, animation 1 and background
Activate your selection tool, set on rectangle.  click on customize
Top 10, left 450, right 600, bottom 160
Copy & paste as a new image
Add your © info and intinial
Save as jpeg

Back to your main tag

Undo your merge

Add your text

Add your name & your © info

Make sure animations 2 & 3 are hidden

Merge visible
Copy & paste into animation shop

Undo your merge
Hide animation 1 & unhide animation 2
Merge visible
Copy & paste after current in animation shop

Undo your merge
Hide animation 2 & unhide animation 3
Merge visible
Copy & paste after current in animation shop

I left the frame properties on the default of 10

Save as gif & you're all done!

I hope you enjoyed my tutorial

I would love to post your © compliant result, just email it to me with the tut name in the subject line

:)


Bear County Sheriff


Click for larger view

This tutorial was written by Sharon on Oct 16, 2011
For more info read my TOU

Supplies Needed

Plugins
Eyecandy 5 Textures Animal Fur
Eyecandy 5 Impact Chrome
Cybia Screenworks - You can get it free here
Xenofex 2 Contesllation

The tube I used is by Ken Morton, you can purchase this tube from CDO here


Open new transparent canvas 600x225
Floodfill with a color from your tube
Apply eyecandy textures animal fur using default settings
Click on Pattern, change both colors to the same color you used in your floodfill
Apply cybia screenworks>rib webring default settings

Activate your shapes tool set on rectangle
Foreground null, background same as your floodfill color
Starting at x0 y100, ending at x600 y15

Effects>distortion effects>wave use these settings:
Horizontal displacement - Amplitude 91, wavelenght 60
Vertical displacement - Amplitude 67, wavelenght 21
Edge mode Wrap
Duplicate 2 times

Rename these layers to animation 1, 2 & 3
On animation 1 apply xenofex contstellation with these settings
Star size 2, size variation 2, edge star density 1, overall star density 3, overdrive 50, twinkle amount 75, twinkle rotation 45, click on keep original image, random seed on 1

Repeat on animations 2 & 3 clicking on the random seed button each time

Paste your tube as a new layer
Resize as needed
Add drop shadow

Hide animations 2 & 3
Merge visible
Activate your selection tool set on rectangle, click on customize
Top 40, left 225, right 375, bottom 190
Copy & paste as a new image

Add your © info and your initial
Save as jpeg

Back to your original tag
Undo your merge

Activate your shapes tool, select preset shapes
Foreground null, background light grey
Select a star
Draw out a star
Position lower left area
Convert to raster
Apply eyecandy 5 impact chrome
On Settings click on Gold
Type in the word Sheriff and center over the star
Add an inner bevel & drop shadow

Add your text

Add your name & your © info

Make sure animations 2 & 3 are hidden & animation 1 is UNhidden

Merge visible
Copy & paste into animation shop

Undo your merge
Hide animation 1 & unhide animation 2
Merge visible
Copy & paste after current in animation shop

Undo your merge
Hide animation 2 & unhide animation 3
Merge visible
Copy & paste after current in animation shop

I left the frame properties on the default of 10

Save as gif & you're all done!

I hope you enjoyed my tutorial

I would love to post your © compliant result, just email it to me with the tut name in the subject line

:)


Saturday, October 15, 2011

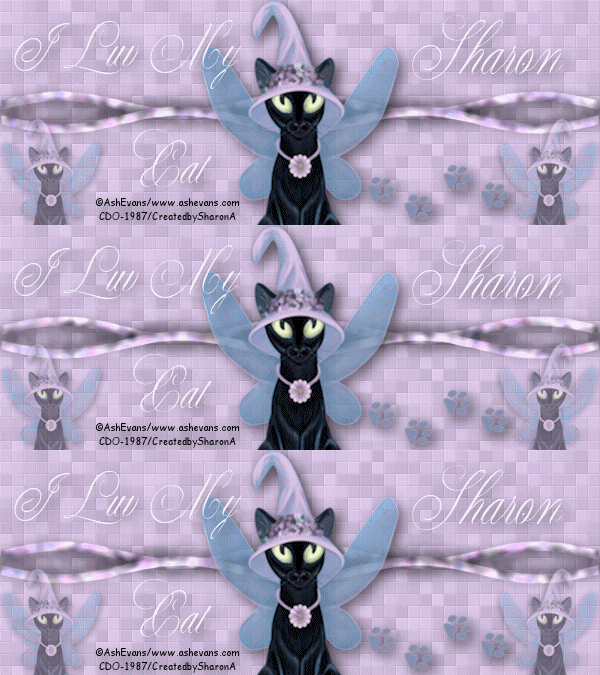
I Luv My Cat


Click for larger view

This tutorial was written by Sharon on Oct 15, 2011
For more info read my TOU

Supplies Needed
Paw Prints
Right click to save


Plugins
Xero Fritillary
Eyecandy 4 HSB Noise


The tube I used May Flowers is by Ash Evans, you can purchase this tube from CDO here


Open new transparent canvas 600x225
Floodfill with a color from your tube
Apply xero fritillary using default settings, change top & bottom #'s to 12

Activate your shapes tool set on rectangle.  Null foreground, background same as your floodfill
Draw a rectangle starting at x300 y100 ending at x600 y110
Effects>Distortion Effects>Wave>Default Settings
Apply inner bevel with these settings, bevel #2, width 31, smoothness 35, depth 3, ambience 0, shininess 30, angle 315, intensity 50, elevation 30
Add drop shadow
Duplicate & flip
Merge down
Duplicate & mirror
Merge down

Duplicate 2 times
Rename these layers to animation 1, 2 & 3
Activate animation 1
Apply eyecandy hsb noise using default settings

Repeat on animations 2 & 3 clicking on the random seed button each time

Paste your tube as a new layer
Resize as needed
Add drop shadow
Duplicate
Resize to 50%
Position left side
Change opacity to 50
Duplicate & mirror

Hide all layers except:
Your main tube layer
Animation 1
Background
Merge visible

Activate your selection tool
Click on customize
Top 50, left 225, right 375, bottom 200
Copy
Paste as new image
Add your intinial & © info
Save

Back to your main tag

Undo your merge
Deselect
Unhide the 2 side cats

Paste paws as a new layer
Select all>float>defloat
Floodfill with a color from your tube
Deselect
Resize to 85%
Position lower right side
Add drop shadow

Add your text

Add your name & your © info

Make sure animations 2 & 3 are hidden

Merge visible
Copy & paste into animation shop

Undo your merge
Hide animation 1 & unhide animation 2
Merge visible
Copy & paste after current in animation shop

Undo your merge
Hide animation 2 & unhide animation 3
Merge visible
Copy & paste after current in animation shop

I left the frame properties on the default of 10

Save as gif & you're all done!

I hope you enjoyed my tutorial

I would love to post your © compliant result, just email it to me with the tut name in the subject line

:)


Result by Lori


Tuesday, October 11, 2011

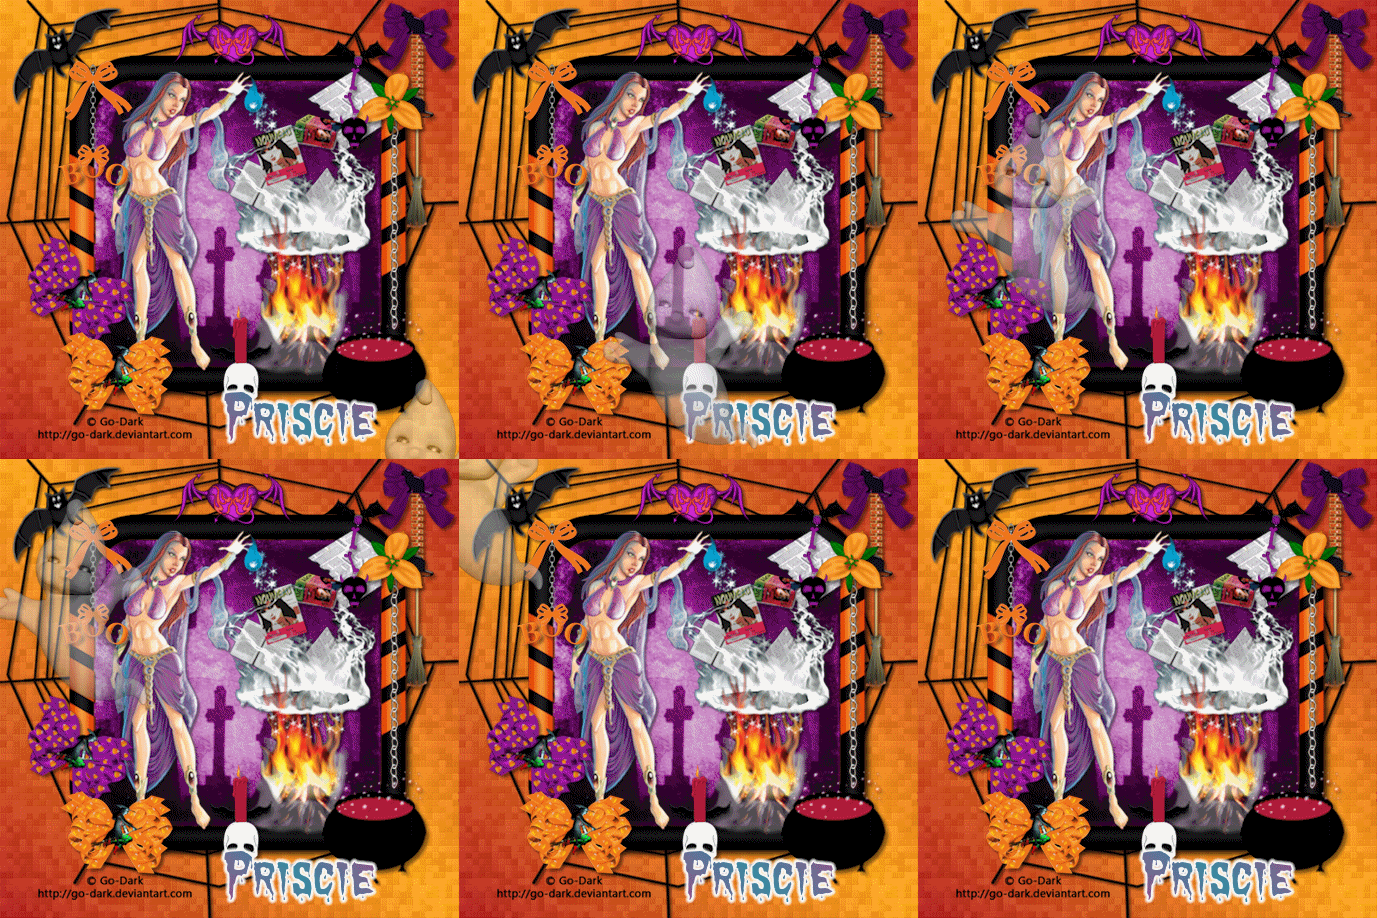
Hallow Eve

Click for larger view

This tutorial was written by Sharon on Oct 11, 2011
For more info read my TOU

Supplies Needed
FTU Scrapkit Hallow Eve by me here

Animation Shop

The font I used is called Dracula, you can get it from Dafont here

Plugins
Xero Fritillary

The tube I used Halloween is by Nils, you can purchase this tube from PTE here


Open a new transparent canvas 700x700, we will resize later
Floodfill with a color from your tube
Apply xero fritillary using default settings, change top & bottom #'s to 10

Paste spider web as a new layer
Add drop shadow

Paste frame 9 as a new layer
Resize to 75%
Using your magic wand click inside the frame
Paste paper 27 into selection
Add drop shadow

Paste your tube as a new layer
Resize as needed
Add drop shadow

Paste bat as a new layer
Resize to 75%
Position upper left corner
Rotate left 30
Add drop shadow

Paste boo bow 4 as a new layer
Resize to 75%
Position near upper right of frame
Add drop shadow

Paste bow 4 as a new layer
Resize to 50%
Rotate right 30
Position lower left of frame
Add drop shadow

Paste broom 4 as a new layer
Resize to 60%
Position upper right
Add drop shadow

Paste cauldron 4 as a new layer
Resize to 50%
Position lower right
Add drop shadow

Paste dangle 4 as a new layer
Resize to 50%
Position near upper left of frame with the bat above the frame
Add drop shadow

Paste ribbon 3 as a new layer
Resize to 90%
Position at bottom
Add drop shadow

Resize all layers to 70%

Add your name & your © info

Paste ghost 2 as a new layer
Resize to 40%
Change opacity to 50
Move layer to below ribbon layer
Move ghost down on right side until you can just see the head above the ribbon
Merge all
Select around your tag
Crop
Copy & paste into animation shop

Undo your merge
Move ghost up and to the left a bit
Merge all
Crop
Copy & paste after current in animation shop

Repeat until you have several frames, I had 10

Set frame properties on frames 1-9 at 35
Set frame properties on frame 10 at 100

Save as gif & you're all done!

I hope you enjoyed my tutorial

I would love to post your © compliant result, just email it to me with the tut name in the subject line

:)

Result by Priscie


Teachers Pet

Click for larger view

This tutorial was written by Sharon on Oct 11 2011
For more info read my TOU

Supplies Needed
FTU Scrapkit School of Rac by Teresa here

The tube I used Schoolgirl is by Nils, you can purchase this tube from PTE here


Open a new transparent canvas 700x700, we will resize later
Floodfill with a color of your choice, I used the blue from the school

Paste school as a new layer
Resize to 85%
Add drop shadow

Paste your tube as a new layer
Resize as needed
Add drop shadow

Paste a handprint as a new layer
Resize to 10%
Position over door
Rotate right 30
Add drop shadow

Paste apples as a new layer
Resize to 10%
Position near bottom right
Add drop shadow
Duplicate
Position on lower door

Paste award as a new layer
Resize to 15%
Position between left window & door
Add drop shadow

Paste books as a new layer
Resize to 20%
Position lower left
Add drop shadow

Paste book as a new layer
Resize to 15%
Rotate left 30
Position on right side of books
Add drop shadow

Paste clock as a new layer
Resize to 15%
Position upper center of school
Add drop shadow

Paste abc's as a new layer
Resize to 20%
Rotate left 45
Position as shown on my tag
Add drop shadow

Resize all layers to 70%

Add your text

Add your name & your © info

Merge all

Save as jpg & you're all done!

I hope you enjoyed my tutorial

I would love to post your © compliant result, just email it to me with the tut name in the subject line

:)


Sunday, October 2, 2011

New Award!


I just received this award from Moody Designz!
Thank you so much Moody for this award

I am passing this award on to

Judith at Scrapz N Stuff

Jenny at Jennys Desingz

Terri at Randys Sin 


Breast Cancer Awareness

Click for larger view

This tutorial was written by Sharon on Oct 2, 2011
For more info read my TOU

Supplies Needed
PTU Scrapkit Breast Cancer by Judith here
(100% of all proceeds will be donated to the International Breast Cancer Research Foundation!)

The tube I used Pink & Red is by Anna Liwanag, you can purchase this tube from PTE here


Open a new transparent canvas 700x550, we will resize later
Select all
Resize paper 13 to 20%
Paste into selection
Deselect

Paste frame 5 as a new layer
Resize to 20%
Using your magic wand click inside the frame
Expand 5
Paste paper 10 as a new layer
Resize to 15%
Invert your selection
Delete
Deselect
Move to below your frame layer

Paste your tube as a new layer
Resize as needed
Add drop shadow
Move to below your frame layer

Add drop shadow to frame

Paste element 12 as a new layer
Resize to 10% and again to 60%
Position upper right area as shown on my tag
Add drop shadow
Move to below the frame layer

Paste element 8 as a new layer
Resize to 10%
Rotate right 30
Position lower left corner of frame
Add drop shadow

Paste element 23 as a new layer
Resize to 10%
Position lower right corner of frame
Add drop shadow

Paste element 28 as a new layer
Resize to 10% and again to 60%
Mirror
Position on pillows
Add drop shadow

Paste element 2 as a new layer
Resize to 10%
Position lower right inside frame area
Add drop shadow

Paste element 6 as a new layer
Resize to 10%
Position upper right corner of frame
Add drop shadow
Duplicate & mirror

Paste element 43 as a new layer
Resize to 10%
Position bottom center of frame
Add drop shadow

Paste element 38 as a new layer
Resize to 10%
Position lower left area of frame as shown on my tag
Add drop shadow
Duplicate
Resize to 75%
Position to the lower right of the first flower

Paste element 66 as a new layer
Resize to 10%
Position near the bottom of your tube
Add drop shadow

Paste element 95 as a new layer
Resize to 50%
Position in the top part of the frame
Add drop shadow

Paste element 93 as a new layer
Resize to 35%
Position above element 95
Add drop shadow

Resize all layers to 70%

Add your name & your © info

Merge all

Save as jpg & you're all done!

I hope you enjoyed my tutorial

I would love to post your © compliant result, just email it to me with the tut name in the subject line

:)