Wednesday, September 28, 2011

Diabetes Awareness

Click for larger view

This tutorial was written by Sharon on Sept 28, 2011
For more info read my TOU

Supplies Needed
Scrapkit Naturally Sweet here

Plugins
Eyecandy 4 HSB Noise

The tube I used is by Jamie Kidd, you can purchase this tube from CDO here


Open new transparent canvas 700x700, we will resize later
Select all
Paste paper 5 into selection
Deselect

Paste ball dangle as a new layer
Resize to 95%
Move up
Add drop shadow
Duplicate 2 times
Rename these layers to animation 1, 2 & 3
On animation 1 apply hsb noise using default settings

Repeat on animations 2 & 3 clicking the random seed button each time

Paste your tube as a new layer
Position lower left
Add drop shadow

Paste sofa as a new layer
Resize to 60%
Position lower right
Add drop shadow

Paste chandelier as a new layer
Resize to 40%
Position upper right
Add drop shadow

Paste streamer as a new layer
Resize to 50%
Position upper left
Add drop shadow

Paste glitter butterfly as a new layer
Resize to 25%
Position near the chandelier
Add drop shadow

Paste clock as a new layer
Resize to 40%
Position near the top
Add drop shadow

Resize all layers to 70%

Add your text

Add your name & your © info

Hide animations 2 & 3
Merge visible
copy & paste into animation shop

Undo your merge
Hide animation 1
Unhide animation 2
Merge visible
copy & paste after current in animation shop

Undo your merge
Hide animation 2
Unhide animation 3
Merge visible
copy & paste after current in animation shop

Set frame properties at 15

View your animation

Save as gif & you're all done!

I hope you enjoyed my tutorial

I would love to post your © compliant result, just email it to me with the tut name in the subject line

:)

Result by Priscie


Tuesday, September 27, 2011

Witchy Night

Click for larger view

This tutorial was written by Sharon on Sept 27, 2011
For more info read my TOU

Supplies Needed
Scrapkit A Spooky World here

Plugins
Xenofex 2 Lightening

The tube I used Halloween Witch is by Michael Calandra, you can purchase this tube from PTE here


Open a new transparent canvas 700x700, we will resize later
Floodfill with black
Duplicate 2 times
Rename to animation 1, 2 & 3

On animation 1 apply xenofex lightening default settings, random seed 250
Click on Glow
Change flash size to 0

Repeat on animation 3 clicking on the random seed button
Mirror

Paste element 14 as a new layer
Add drop shadow

Paste element 18 as a new layer
Resize to 80%
Using your magic wand click inside the frame
Expand 5
Paste paper 7 into selection
Deselect
Add drop shadow

Paste your tube as a new layer
Resize as needed
Add drop shadow
Duplicate
Resize to 50%
Position upper left side of frame
Move to below frame layer
Duplicate & mirror

Paste element 4 as a new layer
Resize to 10%
Position upper left part of inside the frame
Add drop shadow
Duplicate
Resize to 75%
Position opposite corner

Paste element 30 as a new layer
Resize to 50%
Position bottom center
Add drop shadow

Resize all layers to 70%

Add your text, name & your © info

Hide animations 2 & 3
Merge visible
copy & paste into animation shop

Undo your merge
Hide animation 1
Unhide animation 2
Merge visible
copy & paste after current in animation shop

Undo your merge
Hide animation 2
Unhide animation 3
Merge visible
copy & paste after current in animation shop

Copy frame 2
Activate frame 3
Paste after current

Set frame properties on frames 2 & 4 at 100
On frames 1 & 3 set frame properties at 20

View your animation

Save as gif & you're all done!

I hope you enjoyed my tutorial

I would love to post your © compliant result, just email it to me with the tut name in the subject line

:)


If The Broom Fits

Click for larger view

This tutorial was written by Sharon on Sept 27, 2011
For more info read my TOU

Supplies Needed
Template # 28 by Judith here

The tube I used Witch Valley is by Lorenzo DiMauro, you can purchase this tube from PTE here


Open your template, shift D to duplicate & close original
Delete credit & the witch layer
Resize to 700x700 pixels

Activate foto layer
Floodfill with orange
Select all>float>defloat

Paste your tube as a new layer
Resize as needed
Invert your selection
Delete
Deselect
Add drop shadow

Floodfill circle 1 and bg layers with the same orange you just used

Pick a color from your tube
Floodfill paper small & circle 3

Floodfill paper & circle 2 with purple

Floodfill frame 3 with a darker shade of orange
Apply inner bevel with these settings
Bevel # 2, width 30, smoothness 35, depth 3, ambience 0, shininess 30, angle 315, intensity 50, elevation 30

Repeat on frame 4, 2 & 1

Activate the text layer
Add a new raster layer
Floodfill with orange
Back to the text layer
Select all>float>defloat
Back to your new raster layer
Invert your selection
Delete
Deselect
Merge down
Add drop shadow

Resize all layers to 70%

Add your name & your © info

Merge all

Save as jpg & you're all done!

I hope you enjoyed my tutorial

I would love to post your © compliant result, just email it to me with the tut name in the subject line

:)


Sunday, September 25, 2011

Halloween Magic

Click for larger view

This tutorial was written by Sharon on Sept 25, 2011
For more info read my TOU

Supplies Needed
Scrapkit Halloween Majic here
(I have just learned this is a PTU kit, I don't know what happened I got it free just a day or 2 before I wrote this tutorial.  Sorry about the mix up)

Plugins
Xero Fritillary

The tube I used Pumpkin Witch is by Unholy Vault Designs, you can purchase this tube from PTE here


Open a new transparent canvas 700x700, we will resize later
Floodfill with a halloween color, I used #f08c19
Apply xero fritillary using default settings, change top & bottom #'s to 10

Paste element 55 as a new layer
Resize to 45%
Move up to top
Add drop shadow
Duplicate & flip

Paste element 6 as a new layer
Resize to 25%
Position upper right
Add drop shadow

Paste element 4 as a new layer
Resize to 30%
Add drop shadow

Paste your tube as a new layer
Resize as needed
Position lower right
Add drop shadow

Paste a close up of your tube
Resize smaller than your first tube
Add drop shadow
Position upper left part of castle
Move layer to below the castle layer

Paste element 7 as a new layer
Resize to 10% and again to 75%
Position near your tube
Add drop shadow

Paste element 16 as a new layer
Resize to 15%
Position lower left
Add drop shadow

Paste element 21 as a new layer
Resize to 15%
Position as shown on my tag
Add drop shadow

Paste element 25 as a new layer
Resize to 10% and again to 75%
Position at the bottom to the right of the ivy
Add drop shadow
Duplicate
Resize to 75%
Position somewhere on the castle

Paste element 23 as a new layer
Resize to 10% and again to 60%
Rotate right 25
Position above the pumpkin
Add drop shadow
Duplicate
Resize to 75%
Position somewhere on the castle
Repeat a few times

Resize all layers to 70%

Add your name & your © info

Merge all

Save as jpg & you're all done!

I hope you enjoyed my tutorial

I would love to post your © compliant result, just email it to me with the tut name in the subject line

:)


Saturday, September 24, 2011

Never Too Green

Click for larger view

This tutorial was written by Sharon on Sept 24, 2011
For more info read my TOU

Supplies Needed
Scrapkit Never Too Green here

The tube I used Fishy Femme is by Ed Mironiuk, you can purchase this tube from CDO here

Open new transparent canvas 700x700, we will resize later

Paste frame 4 as a new layer
Resize to 85%
Click inside the frame with your magic wand
Expand 5
Paste paper 8 into selection
Deselect
Add a drop shadow 

Paste your tube as a new layer
Resize as needed and position into place
Add drop shadow

Paste leaves as a new layer
Resize to 60%
Position as shown on my tag
Add inner bevel using bevel # 6, width 20
Add drop shadow

Paste tree as a new layer
Resize to 75%
Position lower right of inner frame
Add drop shadow
Move to below your tube layer

Paste daisies as a new layer
Resize to 40%
Position in front of tree
Add drop shadow

Paste butterfly 1 as a new layer
Resize to 20%
Position in front of daisies
Add drop shadow

Paste flower 2 as a new layer
Resize to 15%
Position lower left of inner frame area
Add drop shadow

Do the same with flower 1
Position a little down & to the right of flower 2
Add drop shadow

Paste dragonfly 2 as a new layer
Resize to 15%
Position near the right side of your tube
Add drop shadow

Paste bow 4 as a new layer
Resize to 15%
Position as shown on my tag
Add drop shadow

Paste butterfly 4 as a new layer
Resize to 10% and again to 75%
Position on the tree
Add drop shadow
Duplicate
Resize to 75%
Position somewhere on the tree

Resize all layers to 70%

Add your text

Add your name & your © info

Merge visible

Save as png & you're all done!

I hope you enjoyed my tutorial

I would love to post your © compliant result, just email it to me with the tut name in the subject line

:)


Wednesday, September 21, 2011

Purple Diva

Click for larger view

This tutorial was written by Sharon on Sept 20, 2011
For more info read my TOU

Supplies Needed
Scrapkit Purple Diva by me here

Plugins
Xero Porcelain

The tube I used Elle is by Keith Garvey, you can purchase this tube from PTE here


Open a new transparent canvas 700x700, we will resize later
Select all
Paste paper 11 into selection
Deselect

Paste frame 8 as a new layer
Resize to 85%
Using your magic wand click inside the frame
Expand 3
Paste paper 20 into selection
Do Not Deselect

Paste your tube as a new layer
Resize as needed
Invert your selection
Delete
Deselect

Apply porcelain effect to the tube & frame, using default settings
Add drop shadow

Paste candle as a new layer
Resize to 50%
Position lower right corner
Add drop shadow

Paste swan as a new layer
Resize to 50%
Position lower right
Apply porcelain effect
Add drop shadow

Paste corset as a new layer
Resize to 50%
Rotate right 15
Position on right
Add drop shadow

Paste a word art as a new layer
Resize to 75%
Position upper right
Add drop shadow

Paste heart as a new layer
Resize to 50%
Position above the corset
Rotate right 20
Add drop shadow

Paste heels as a new layer
Resize to 50%
Position lower left
Add drop shadow

Paste strap shoe as a new layer
Resize to 50%
Position to the right and above the heels
Add drop shadow

Paste lipstick as a new layer
Resize to 50%
Position by the shoes
Add drop shadow

Paste clutch as a new layer
Resize to 50%
Rotate left 25
Position above the shoes
Add drop shadow

Paste sunglasses as a new layer
Resize to 50%
Rotate left 15
Position over lower part of clutch
Add drop shadow

Paste butterfly as a new layer
Resize to 50%
Rotate right 15
Position on right lower side of frame
Add drop shadow

Paste a flower as a new layer
Resize to 50%
Position upper left area
Add drop shadow

Resize all layers to 70%

Add your name & your © info

Merge all

Save as jpg & you're all done!

I hope you enjoyed my tutorial

I would love to post your © compliant result, just email it to me with the tut name in the subject line

:)


Result by Dixie


Monday, September 19, 2011

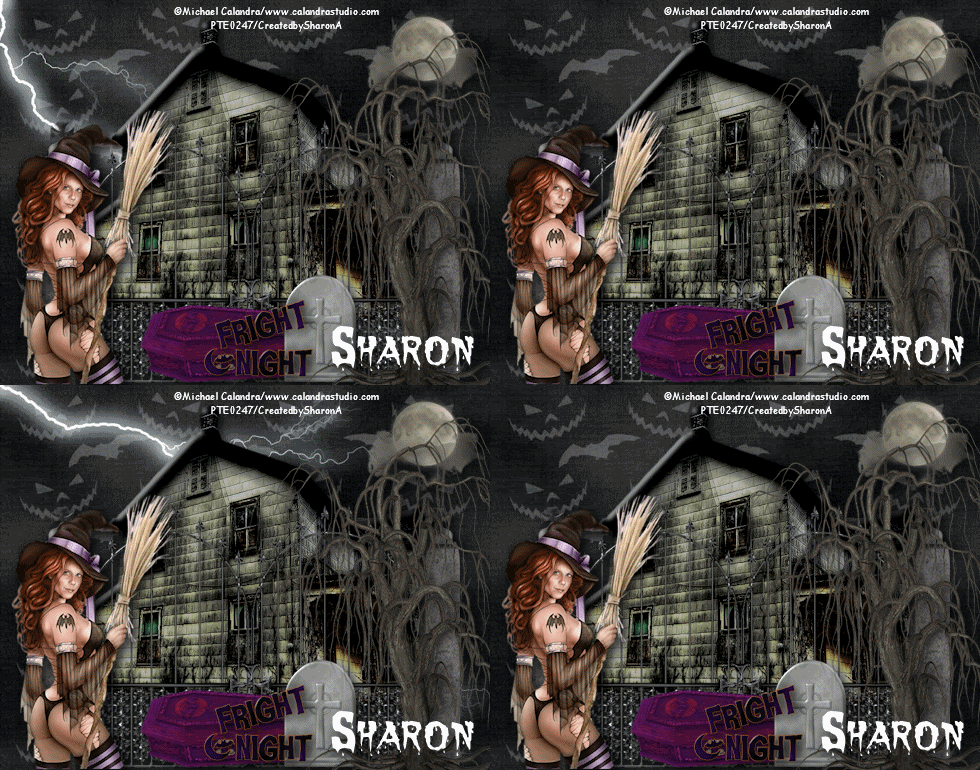
Fright Night ~ SAC

Click for larger view

This tutorial was written by Sharon on Sept 19, 2011
For more info read my TOU

Supplies Needed
Scrapkit Fright Night here

Plugins
Xenofex 2 Lightening

The tube I used Pinup Witch is by Michael Calandra, you can purchase this tube from PTE here


Open a new transparent canvas 700x550, we will resize later
Select all
Paste paper 2 into selection
Deselect
Duplicate
Rename these layers to animation 1, 2 & 3

On animation 1 layer apply xenofex lighting effect
On the basic part use default settings, make sure random seed is on 1
Click on Glow
Set flash size on 0

On animation 3 repeat lightening effect clicking on the random seed button

Paste haunted house as a new layer
Add drop shadow
Move up a bit

Paste gate as a new layer
Resize to 75%
Position at the bottom
Add drop shadow

Paste your tube as a new layer
Resize as needed, if you're using the same tube I resized to 75%
Add drop shadow

Paste coffin as a new layer
Resize to 35%
Postion bottom center
Add drop shadow

Paste tombstone as a new layer
Resize to 25%
Position in front of the coffin
Add drop shadow

Paste moon as a new layer
Resize to 35%
Position upper right corner

Paste word art as a new layer
Resize to 20%
Position at the bottom
Add drop shadow

Paste tree as a new layer
Resize to 75%
Position on right
Add drop shadow

Resize all layers to 70%

Add your name & your © info

Animation:
Hide animations 1 & 2
Merge visible
Copy & paste into animation shop

Undo your merge
Unhide animation 2 and hide animation 3
Merge visible
Copy & paste after current in animation shop

Undo your merge
Unhide animation 1 and hide animation 2
Merge visible
Copy & paste after current in animation shop

Copy frame 2 and paster after frame 3

I set the frame properties on frames 2 & 4 at 125
Frames 1 & 3 at 30

View your animation

Save as gif & you're all done!

I hope you enjoyed my tutorial

I would love to post your © compliant result, just email it to me with the tut name in the subject line

:)


Result by Creanbri


Sunday, September 18, 2011

Bat Girl

Click for larger view

This tutorial was written by Sharon on Sept 18, 2011
For more info read my TOU

Supplies Needed
A pumpkin
Autumn Pattern
Here's the one I used
Right click to save

The tube I used Halloween Twilight is by Jasmine Becket-Griffith, you can purchase this tube from CDO here

Open new transparent canvas 700x700, we will resize later
Floodfill with an autumn color, I used #f2890e
Effects>Texture Effects>Texuture>Mosiac
Effects>Artistic Effects>Enamel
Blur 65, detail 89, density 65, angle 138, color #c3eebb
Effects>Texture Effects>Blinds
Width 5, opacity 40, light from left checked, color black

Add a new raster layer
Activate your selection tool, set on rectangle
click the customize button
Top 100, bottom 600, right 600, left 100
Floodfill with an autumn pattern
Deselect
Add drop shadow
Effects>Texture Effects>Blinds
Same as before except check the horizontal box

Paste your tube as a new layer
Resize as needed
Add drop shadow

Paste your pumpkin as a new layer
Resize as needed, if you're using the same tube I am it came with a pumpkin, I resized it to 75%
Position in lower right corner
Add drop shadow
Duplicate
Resize to 75%
Position at upper right corner of your autumn pattern layer
I rotated right 45
Duplicate & mirror

Resize all layers to 70%

Add your text

Add your name & your © info

Merge all

Save as jpg & you're all done!

I hope you enjoyed my tutorial

I would love to post your © compliant result, just email it to me with the tut name in the subject line

:)


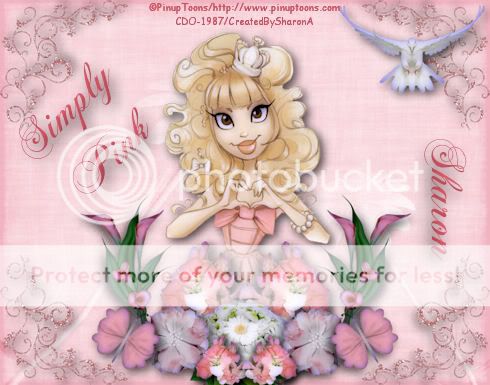
Simply Pink

Click for larger view

This tutorial was written by Sharon on Sept 18, 2011
For more info read my TOU

Supplies Needed
Scrapkit Simply Pink by Doris here

Plugins
Xero Porcelain

The tube I used Cameo Heart is by PinUp Toons, you can purchase this tube from CDO here


Open new transparent canvas 700x550, we will resize later
Select all
Paste paper 1 into selection
Deselect

Paste glitter doodle 1 as a new layer
Resize to 25%
Position lower left corner
Add drop shadow
Duplicate & mirror
Merge down
Duplicate & flip

Paste your tube as a new layer
Apply xero porcelain using default settings
Add drop shadow

I applied the porcelain effect to all the element layers starting here

Paste flowers 3 as a new layer
Resize to 30%
Position bottom center
Add drop shadow

Paste flowers as a new layer
Resize to 25%
Position on one side of flowers 3
Add drop shadow
Duplicate & mirror
Merge down
Move to below flowers 3

Paste flower 3 as a new layer
Resize to 30%
Position left of flowers 3
add drop shadow
Duplicate & mirror

Paste calla lillies as a new layer
Resize to 30%
Position on right side of the flower arrangment
Add drop shadow
Duplicate & mirror
Merge down
Move to below flower 3 layer

Go back to the flowers layer (the first pink ones you did)
Send to top
Resize to 60%
Position bottom center

Paste dove as a new layer
Resize to 35%
Position near upper right
Add drop shadow

Paste butterfly 1 as a new layer
Resize to 15%
Position as shown on my tag
Add drop shadow
Duplicate & mirror

Resize all layers to 70%

Add your text

Add your name & your © info

Merge all

Save as jpg & you're all done!

I hope you enjoyed my tutorial

I would love to post your © compliant result, just email it to me with the tut name in the subject line

:)


A Wolfish Friend

Click for larger view

This tutorial was written by Sharon on Sept 18, 2011
For more info read my TOU

Supplies Needed
Scrapkit Toasted Almond here

The tube I used A Wolfish Friend is by Jasmine Becket-Griffith, you can purchase this tube from CDO here


Open new transparent canvas 700x550, we will resize later
Select all
Paste paper 15 into selection
Deselect

Paste element 57 as a new layer
Add drop shadow

Paste your tube as a new layer
Resize as need
Move to below the frame layer
Add drop shadow

Paste element 17 as a new layer
Resize to 30%
Position lower right corner
Add drop shadow
Duplicate, flip & mirror

Paste element 37 as a new layer
Resize to 20%
Position on lower right corner
Add drop shadow
Duplicate
Position on upper left corner

Paste element 9 as a new layer
Resize to 35%
Position near lower left corner of frame as shown on my tag
Add drop shadow
Move to below the flower layers
Duplicate
Position on right side of frame

Resize all layers to 70%

Add your text

Add your name & your © info

Merge all

Save as jpg & you're all done!

I hope you enjoyed my tutorial

I would love to post your © compliant result, just email it to me with the tut name in the subject line

:)


Haunted Times

Click for larger view

This tutorial was written by Sharon on Sept 18, 2011
For more info read my TOU

Supplies Needed
Scrapkit Haunted Times by Jenny here

The tube I used Halloween Witch is by Michael Calandra, you can purchase this tube from PTE here


Open a new transparent canvas 700x700, we will resize later

Paste paper 4 as a new layer
Resize to 20%

Paste frame 1 as a new layer
Resize to 75%
Using your magic wand click inside the frame
Floodfill with a pattern
Add drop shadow

Paste your tube as a new layer
Resize as needed
Add drop shadow
Move to below the frame

Paste vine as a new layer
Resize to 85%
Position on left
Add drop shadow

Paste fence as a new layer
Position bottom center
Add drop shadow

Paste leaves as a new layer
Resize to 85%
Position bottom center
Adjust>hue & saturation>colorize
Hue 5, saturation 200

Paste butterfly as a new layer
Resize to 40%
Mirror
Position on left side of tube
Add drop shadow

Paste rose 1 as a new layer
Resize to 25%
Position to the right of your tube
Add drop shadow

Paste stars as a new layer
Resize to 75%
Position upper left
Duplicate & mirror
Merge down

Paste ghost as a new layer
Resize to 20%
Position lower right

Resize all layers to 70%

Add your text

Add your name & your © info

Merge all

Save as jpg & you're all done!

I hope you enjoyed my tutorial

I would love to post your © compliant result, just email it to me with the tut name in the subject line

:)