Showing posts with label Keith Garvey. Show all posts

Friday, April 20, 2012

Pink Sweetness

Click for larger view

This tutorial was written by Sharon A on April 20, 2012 & is copyright protected
For more info read my TOU

Supplies Needed
Template 147 by me here

Plugins
Graphics Plus Cross Shadow
Cybia Screenworks
DSB Flux Bright Noise

The tube I used Felicity is by Keith Garvey, you can purchase this tube from PTE here

The font I used is called Tagettes
I used size 48


Open your template, shift D to duplicate, close original
Delete info layer

Floodfill the bg layer with pink
Add texture with these settings


Apply graphics plus cross shadow changing the 2 bottom #'s to 70

Activate the lower right frame
Click inside with your magic wand
Expand 3

Paste your close up tube as a new layer, twice
Hide one of them for now
Position into place over the right square
Invert your selection
Delete & deselect
Move to below the frame layer

Unhide the other close up tube
Move to above the left frame
Mirror
Repeat the above steps

Activate the middle frame
Click inside with your magic wand
Expand 3

Paste your main tube as a new layer
Resize as needed
Position to one side of the middle square
Invert your selection
Delete & deselect
Add drop shadow
Duplicate & mirror
Merge down
Move to below the middle frame layer

Floodfill your frames with a darker shade of pink
Add inner bevel & drop shadow

Floodfill your middle square with another shade of pink
Apply cybia screenworks>cresent wave>default settings

Activate your lace layer
Change layer properties to luminance
Add an inner bevel

Activate your corners layer
Select all>float>defloat
Add a new raster layer
Floodfill with one of your colors
Deselect
Change layer properties to overlay
Merge down
Add drop shadow
Mirror

Repeat with your flower & bow layers

Duplicate your flower
Resize to 75%
Position under the bow so it looks like its hanging from it

Merge your flowers, bow, corners & middle frame layers
Duplicate 2 times
Apply dsb flux bright noise, intensity 50
Repeat on other 2 layers changing intensity to 55 & 60

Resize all layers to 70%

Add your text, name & © info


Animation:

Hide animation 2 & 3
Merge visible
Copy & paste into animation shop

Undo your merge
Hide animation 1 & unhide #2
Merge & paste after current in animation shop

Undo your merge
Hide animation 2 & unhide #3
Merge visible & paste after current in animation shop

View your animation

Save as gif & you're all done!

I hope you enjoyed my tutorial

Your comments are very much appreciated either here on this post or on the chat box.  I've made it easy for you to post on this tut by turning off the requirement of having to type in a confirmation code

I would love to post your © compliant result, just email it to me with ATT Sharon & the tut name in the subject line

You'll find my email blinkie on your left

:)


Result by Kaye W


Monday, March 26, 2012

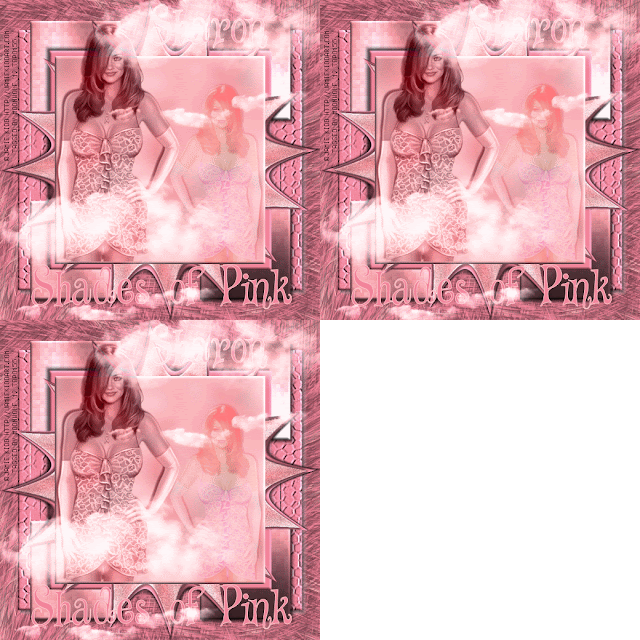
Shades of Pink

Click for larger view

This tutorial was written by Sharon A on March 26, 2012
For more info read my TOU

Supplies Needed
Template #140 by me here

You will need a cloud, you probably have one in your tubes or in one of your kits
If you don't have one email me & I'll send you mine
(Look on the left for my email blinkie)

Plugins
Eyecandy 5 Textures Texture Noise & Animal Fur
DSB Flux Center Mirror & Bright Noise
Graphics Plus Cross Shadow
Xero Fritillary
Screenworks Aged Mosaic

The tube I used Felicity is by Keith Garvey, you can purchase this tube from PTE here

The font I used is called Chancery Cursive


Open your template, shift D to duplicate & close original
Delete info layer

Floodfill square 1 with a color from your tube
Duplicate
Apply eyecandy texture noise with these settings
Transparent haze
click on basic
Texture smooth lumps, random seed 1
Merge down
Add an inner bevel

Duplicate
Apply dsb flux center mirror using default settings
Move to below square 1
Add drop shadow

Duplicate 2 times
Apply dsb flux bright noise, intensity 30, mix checked
Repeat on other 2 layers changing intensity to 35 & 40
Rename thesse layers to animation 1, 2 & 3

Paste your tube as a new layer
Resize as needed
Move to the left
Add drop shadow
Duplicate
Resize to 75%
Mirror
Change layer properties to  luminance legacy on the big tube
Change layer properties to soft light on the small tube

Floodfill square 2 with a darker shade of your color
Add an inner bevel
Add drop shadow, twice

Duplicate
Apply dsb flux center mirror, same settings as before

Floodfill the small squares layer with your light color
Apply xero fritillary changing the top & botton #'s to 10
Apply graphics plus cross shadow using default settings
Add an inner bevel
Add drop shadow, twice

Floodfill the rectangles layer with your dark color
Add an inner bevel
Add drop shadow, twice
Apply screenworks aged mosaic

Floodfill bg with your light color
Apply eyecandy textures animal fur
Settings on calico, swirly
Base color your dark color, spot color your light color

Resize all layers to 65%

Add your text, name & © info

Making sure you're on the top layer, paste cloud as a new layer
Resize to 75%
Position in a corner
Duplicate 2 times and move around
Merge these layers
Change layer properties to luminance legacy


Animation:

Hide animation 2 & 3
Merge visible
Copy & paste into animation shop

Undo your merge
Hide animation 1 & unhide #2
Merge & paste after current in animation shop

Undo your merge
Hide animation 2 & unhide #3
Merge visible & paste after current in animation shop

View your animation

Save as gif & you're all done!

I hope you enjoyed my tutorial

I would love to post your © compliant result, just email it to me with the tut name in the subject line

:)


Result by Tammy


Monday, October 17, 2011

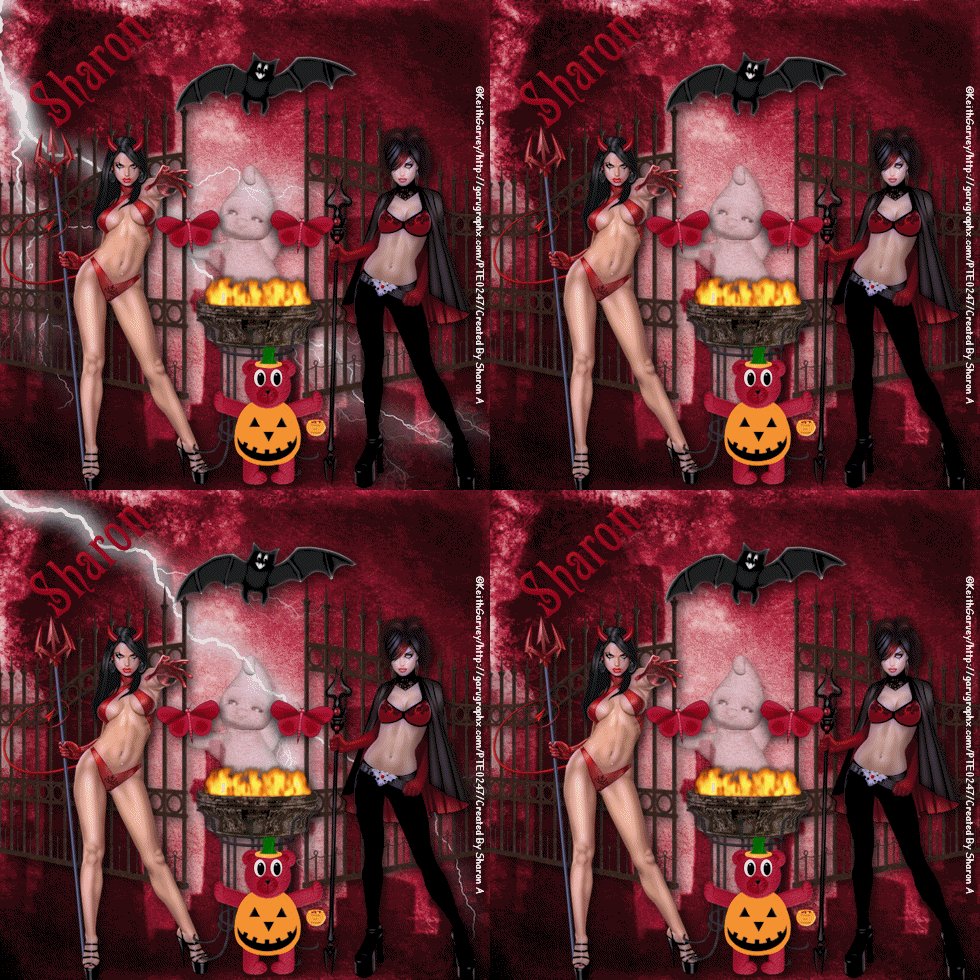
Spooky Night

Click for larger view

This tutorial was written by Sharon on Oct 17, 2011
For more info read my TOU

Supplies Needed
Scrapkit Hallow Eve by me here

Plugins
Xenofex 2 Lightening

The tubes I used Devil Woman & Evil Queen are by Keith Garvey, you can purchase this tube from PTE here


Open a new transparent canvas 700x700, we will resize later
Select all
Paste paper 29 into selection
Deselect

Duplicate 2 times
Rename these layers to animation 1, 2 & 3

On animation 1 apply xenofex lightening, click on Glow and change flash size to 0
Repeat on animation 3 clicking on the random seed button

Paste ghost 4 as a new layer
Resize to 40%
Change opacity to 50
Add drop shadow

Paste gate as a new layer
Resize to 90%
Add drop shadow

Paste your tube as a new layer
Apply xero porcelain using default settings
Add drop shadow

Paste your 2nd tube as a new layer
Repeat effects

Paste cauldron fire as a new layer
Resize to 75%
Position in between your tubes
Add drop shadow

Paste pumpkin bear 5 as a new layer
Resize to 40%
Position in front of cauldron fire
Add drop shadow

Paste butterfly 5 as a new layer
Resize to 35%
Position on gate
Add drop shadow
Duplicate & mirror

Paste bat as a new layer
Resize to 65%
Position near top
Add drop shadow

Resize all layers to 70%

Add your name & your © info

Hide animations 2 & 3 
Merge visible
Copy & paste into animation shop

Undo your merge
Hide animation 1 & unhide animation 2
Merge visible
Copy & paste after current in animation shop

Undo your merge
Hide animation 2 & unhide animation 3
Merge visible
Copy & paste after current in animation shop

Copy frame 2 & paste after frame 3
Set frame properties on frames 1 & 3 at 15
Set frame properties on frames 2 & 4 at 100

Save as gif & you're all done!

I hope you enjoyed my tutorial

I would love to post your © compliant result, just email it to me with the tut name in the subject line

:)


Wednesday, September 21, 2011

Purple Diva

Click for larger view

This tutorial was written by Sharon on Sept 20, 2011
For more info read my TOU

Supplies Needed
Scrapkit Purple Diva by me here

Plugins
Xero Porcelain

The tube I used Elle is by Keith Garvey, you can purchase this tube from PTE here


Open a new transparent canvas 700x700, we will resize later
Select all
Paste paper 11 into selection
Deselect

Paste frame 8 as a new layer
Resize to 85%
Using your magic wand click inside the frame
Expand 3
Paste paper 20 into selection
Do Not Deselect

Paste your tube as a new layer
Resize as needed
Invert your selection
Delete
Deselect

Apply porcelain effect to the tube & frame, using default settings
Add drop shadow

Paste candle as a new layer
Resize to 50%
Position lower right corner
Add drop shadow

Paste swan as a new layer
Resize to 50%
Position lower right
Apply porcelain effect
Add drop shadow

Paste corset as a new layer
Resize to 50%
Rotate right 15
Position on right
Add drop shadow

Paste a word art as a new layer
Resize to 75%
Position upper right
Add drop shadow

Paste heart as a new layer
Resize to 50%
Position above the corset
Rotate right 20
Add drop shadow

Paste heels as a new layer
Resize to 50%
Position lower left
Add drop shadow

Paste strap shoe as a new layer
Resize to 50%
Position to the right and above the heels
Add drop shadow

Paste lipstick as a new layer
Resize to 50%
Position by the shoes
Add drop shadow

Paste clutch as a new layer
Resize to 50%
Rotate left 25
Position above the shoes
Add drop shadow

Paste sunglasses as a new layer
Resize to 50%
Rotate left 15
Position over lower part of clutch
Add drop shadow

Paste butterfly as a new layer
Resize to 50%
Rotate right 15
Position on right lower side of frame
Add drop shadow

Paste a flower as a new layer
Resize to 50%
Position upper left area
Add drop shadow

Resize all layers to 70%

Add your name & your © info

Merge all

Save as jpg & you're all done!

I hope you enjoyed my tutorial

I would love to post your © compliant result, just email it to me with the tut name in the subject line

:)


Result by Dixie


Friday, September 16, 2011

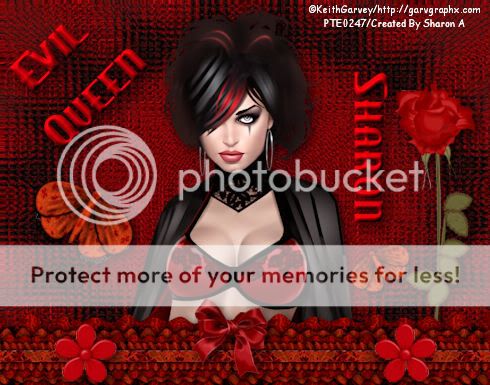
Evil Queen

Click for larger view

This tutorial was written by Sharon on Sept 16, 2011
For more info read my TOU

Supplies Needed
Scrapkit I see red here
You'll need to scroll down about 3/4 of the wayP

The tube I used Evil Queen is by Keith Garvey, you can purchase this tube from PTE here

Today my dad would have turned 84 but he died at a young age on Sept 1, 1979 just before turning 52.  So today all my tuts are dedicated to him.
Love you dad!


Open a new transparent canvas 700x550, we will resize later
Select all
Paste paper 5 into selection
Deselect

Paste your tube as a new layer
Add drop shadow

Paste element 7 as a new layer
Resize to 95%
Position at the bottom
Add drop shadow

Paste butterfly as a new layer
Resize to 50%
Rotate right 30
Add drop shadow

Paste bow as a new layer
Resize to 25%
Position lower center over the ribbon
Add drop shadow

Paste red rose as a new layer
Resize to 60%
Position on the right
Add drop shadow
Move to below the ribbon layer

Paste element 5 as a new layer
Resize to 25%
Position near the bottom left
Add drop shadow
Duplicate & mirror

Go back to your butterfly layer
Duplicate
Resize to 60%
Rotate left 60
Position in between your tube & the rose as shown on my tag

Resize all layers to 70%

Add your text

Add your name & your © info

Merge all

Save as jpg & you're all done!

I hope you enjoyed my tutorial

I would love to post your © compliant result, just email it to me with the tut name in the subject line

:)


Wednesday, August 31, 2011

Snap Shots

Click for larger view

This tutorial was written by Sharon on August 31, 2011
For more info read my TOU

Supplies Needed
Template 18 by Judith here

The tubes I used are by Keith Garvey, you can purchase his tubes from PTE here


Open your template, shift D to duplicate & close original
Resize to 700x700 pixels
Delete credit layer
Also delete the small flower, large flower, medium flower and the 2 branch layers, these will be covered by the main front tube anyway


Floodfill each of the paper strip layers with black

Activate paper stip 1
Select all>float>Defloat
Contract 5
Paste your tube as a new layer
Move to just below the scalloped circle frame
Resize and position into place
Invert your selection
Delete
Deselect

Repeat for the other 8 strip layers using a different tube by the same artist in each

Floodfill all of the stiching layers with white, zoom out to make it easier to see

Paste your main front tube as a new layer
Rotate left 5 to line up with the paper & frame layers
Duplicate

Using your selection tool set on elipse select around the camera lens
Effect>Illumation effects>light burst, default settings color white

Deselect
Rename these layers to animation 1 & 2

Activate paper 1
Floodfill with a pink pattern

Floodfill the following layers as listed below

paper frame 1 & 2 with black

paper frame 3 with pink

frame 1 with black

ribbon with black

ricrac with pink

circle frame with pink

scalloped circle frame with black

circle with black

the outer part of huge flower with pink

snapshots & you & of with pink

of & snapshots frames with black

frame with white

bg 2 with your pink pattern

bg 1 with black

Resize all layers to 70%

Add your name & your © info

Animation

Hide animation 1 (the one with light effect)

Merge visible

Copy & paste into animation shop
Paste after current so you have 2 frames

Back to psp

Undo your merge

Unhide animation 1
Hide animation 2

Merge visible
Copy & paste after current in animation shop

Set frame properties on frames 1 & 2 at 25

Frame 3 properties 20

Save as gif & you're all done!

I hope you enjoyed my tutorial

I would love to post your © compliant result, just email it to me with the tut name in the subject line

:)


Result By Kaye

Result by Dixie


Sunday, August 28, 2011

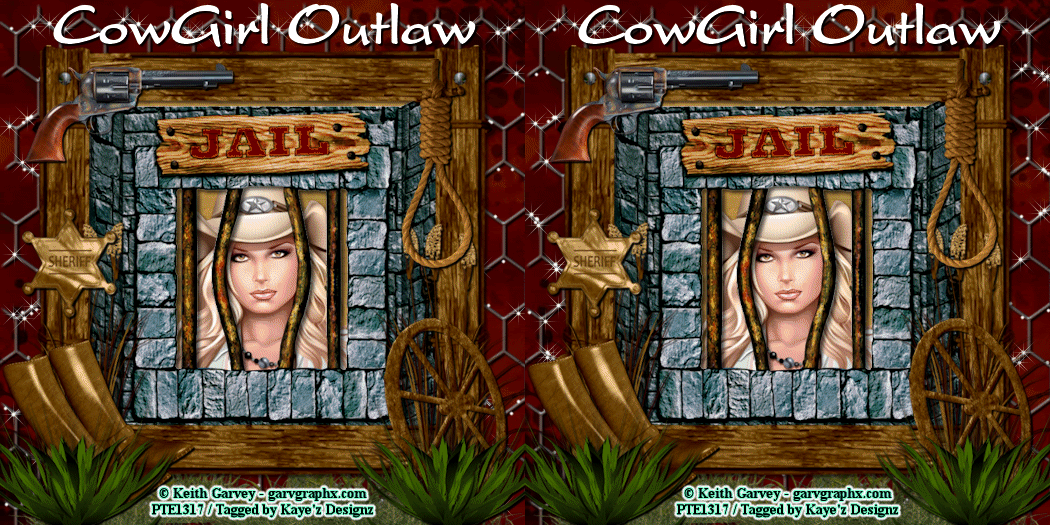
Cow Girl Outlaw

Click for larger view

This tutorial was written by Sharon on August 28, 2011
For more info read my TOU

Supplies Needed
Scrapkit Cowgirl Outlaw here

Plugins
Graphics plus cross shadow

The tube I used called Sparkle #PTE1166 is by Keith Garvey, you can purchase it from PTE here


Open new transparent canvas 700x700, we will resize later
Select all
Paste paper 4 into selection
Deselect
Apply graphics plus cross shadow

Paste wire fence as a new layer
Add drop shadow

Select all
Crop

Paste frame 1 as a new layer
Click inside the frame with your magic wand
Expand 5
Paste paper 5 as a new layer
Resize to 75%
Invert your selection
Delete
Deselect
Move to below your tube layer

Add a drop shadow to your frame

Paste your tube as a new layer
Move to below your frame
Resize as needed
Add drop shadow

Paste grass as a new layer
Resize to 50%
Add drop shadow
Move to below the frame layer
Duplicate & mirror

Make sure you have your top layer activated

Paste wheel as a new layer
Resize to 35%
Position lower right
Add drop shadow

Paste gun as a new layer
Resize to 30%
Position on the upper right corner of the frame
Add drop shadow
Duplicate & mirror

Paste badge as a new layer
Resize to 20%
Position on the left side of the frame
Add drop shadow

Paste boots as a new layer
Mirror
Resize to 25%
Position on lower left corner of frame
Rotate left 25
Add drop shadow

Paste bow 4 as a new layer
Resize to 20%
Position in between the guns
Add drop shadow

Paste flower 2 as a new layer
Resize to 15%
Position right side of frame
Add drop shadow

Paste grass 3 as a new layer
Position at the bottom
Add drop shadow

Paste grass 4 as a new layer
Resize to 50%
Position lower left corner
Add drop shadow
Duplicate & mirror

Resize all layers to 75%

Add your name & your © info

Merge all

Save as jpg & you're all done!

I hope you enjoyed my tutorial

I would love to post your © compliant result, just email it to me with the tut name in the subject line

:)


Result by Kaye


Denim & Ruffles ~ Mini Tut

Click for larger view

This tutorial was written by Sharon on August 28, 2011
For more info read my TOU

Supplies Needed
Scrapkit Night Life by Bea here
(Click on the 4 shared link, the kit is on the first page)

Blue tag back # 7 here

The tube I used is by Keith Garvey, you will need a license to use which you can purchase from PTE here


Open your tag back

Paste swirl 2 as a new layer
Add drop shadow

Paste your tube as a new layer
Resize as needed
Add drop shadow

Paste butterfly 3 as a new layer
Resize to 30%
Rotate left 30
Position on the right as shown on my tag
Add drop shadow
Duplicate & mirror
Position in upper left corner

Paste ruffle 3 as a new layer
Resize to 90%
Position across the bottom
Add drop shadow

Add your name & your © info

Merge all

Save as jpg & you're all done!

I hope you enjoyed my tutorial

I would love to post your © compliant result, just email it to me with the tut name in the subject line

:)


Wednesday, August 17, 2011

From My Window

Click for larger view

This tutorial was written by Sharon on August 17, 2011
For more info read my TOU

Supplies Needed
Scrapkit From My Window here
(Look for download password in her TOU)

The tube I used is by Keith Garvey, you will need a license to use which you can purchase from PTE here


Open a new transparent canvas 700x700, we will resize later
Select all
Paste paper 2 into selection
Deselect

Paste window 2 (7) as a new layer
Resize to 45%
Using your magic wand select inside the window frame
Expand 3

Add a new raster layer
Floodfill inside selection with a pattern, gradient or color from your tube
Do Not Deselect
Move this layer to below the window layer

Paste your tube as a new layer
Resize as needed
Invert your selection
Delete
Deselect
Add drop shadow
Move to below the window layer

Paste element 1 (5) as a new layer
Resize to 20%
Position right side
Add drop shadow

Add drop shadow

Paste element 2 (1) as a new layer
Resize to 15%
Add drop shadow

Paste element 2 (10) as a new layer
Resize to 10%
Add drop shadow

Paste element 2 (14) as a new layer
Resize to 80%
Move to one side a bit
Duplicate
Move to the other side a bit
Merge down 
Add drop shadow

Paste element 1 (11) as a new layer
Resize to 25%
Duplicate & merge down
Add drop shadow

Activate your tube tool
Add a new raster layer
Select birds
When you get the one you want resize as needed 
Position on the bird bath
Add drop shadow
I rotated left 15

Paste element 1 (3) as a new layer 
Resize to 25%
Mirror
Activate your freehand selection, mode on Replace, feather 0
Select around the left ear
When done selecting left click once inside your selection to pull the marching ants tight around the ear
Copy
Cut
Paste as new layer, twice
Rename these layers to ear 1 & ear 2

Position 1 ear back into place

Rotate the other left 30
Position back into place
You'll notice it doesn't quite look right so now you need to go over this small area with your clone brush

Add your name

Resize all layers to 75%

Add your © info

Animation

Hide ear 1
Merge visible
Copy & paste into animation shop

Undo your merge
Unhide ear 1
Hide ear 2
Copy & paste after current in animation shop

Set frame properties at 75 or to your preferences

Save as gif & you're all done!

I hope you enjoyed my tutorial

I would love to post your © compliant result, just email it to me with the tut name in the subject line

:)

=========================

Result by Vickie


Thursday, August 4, 2011

Swinging Heart

Click for larger view

This tutorial was written by Sharon on August 4, 2011
For more info read my TOU

Materials Needed
Scrapkit Rose by Vyabs here

Plugins
Graphics Plus Cross Shadow

The tube is used is by Keith Garvey, you will need a license to use which you can purchase from PTE here

Open a new transparent canvas, 800x400, we will resize later
Floodfill with a color or pattern
Apply Graphic Plus Cross Shadaw, default settings

Paste frame 6 as a new layer
Resize to 75%
Move to the right side
Using your magic wand click inside the frame
Expand 5
Floodfill with a black pattern or color
I had to use my paint brush to fill it entirely
Add a bevel, I used bevel #3 width 3
Effects>Edge Effects>Enhance
Apply graphic plus cross shadow, default settings
Do Not Deselect!

Paste your tube as a new layer
Resize as needed
Invert your selection
Delete
Deselect

Paste Rosestraw 1 as a new layer
Resize to 55%
Position on left side of frame
Rotate left 10
Move to below the frame layer
Add drop shadow

Paste rose as a new layer
Resize to 35%
Move to lower left of frame
Add drop shadow

Paste bow 2 as a new layer
Resize to 40%
Position in upper right corner of frame
Rotate right 10
Add drop shadow
Duplicate & mirror
Position on upper left corner of frame

Paste dangling heart 2 as a new layer
Resize to 80%
Position as shown on my tag
Duplicate 2 times
Rotate one right 30
Rotate the other one left 30
Rename these layers to left, right, middle

New raster layer
Floodfill with a gold pattern
Select all
Contract 5
Delete
Deselect
Effects>Edge Effects>Enhance

Resize all layers to 65%

Add your name & © info

Activate the left heart
Nudge up until the chain ends are hidden by the border
Repeat with the right heart

Hide the left & right hearts
Merge visible
Copy & paste into animation shop

Undo your merge
Hide the middle heart and unhide the left one
Merge visible
Copy & paste after current in animation shop

Copy frame 1 and paste after frame #2

Undo your merge
Hide the left heart & unhide the right one
Merge visible
Copy & paste after current in animation shop

You should have 4 frames

Set frame properties at 90

Save as a gif and you're all done!

I hope you enjoyed my tutorial

I would love to post your result, just email it to me with the tut name in the subject line

:)

==================================
Result by Dixie