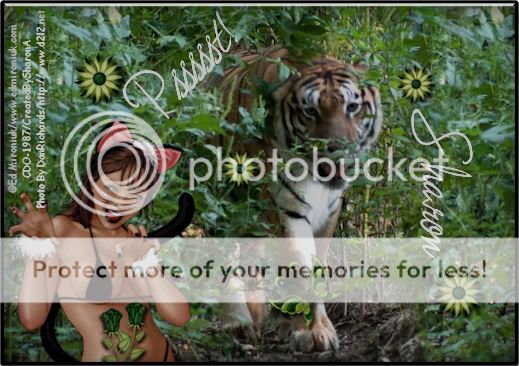
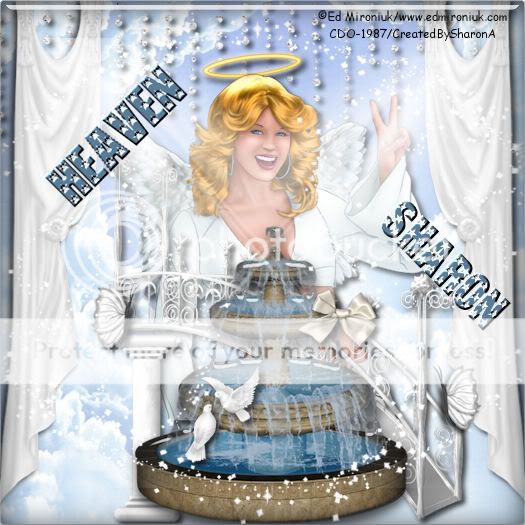
Click for larger view
This tutorial was written by Sharon A on Apr 30, 2012 & is copyright protected
For more info read my TOU
Supplies Needed
A photo of your choice
You'll need it to be wide with a lower height
This tutorial was written by Sharon A on Apr 30, 2012 & is copyright protected
For more info read my TOU
Supplies Needed
A photo of your choice
You'll need it to be wide with a lower height
The one I used is # 4-8 by Hawaiin Cowgirl
You can purchase her photos at CDO here
Flower I made for this tut here
Plugins
DSB Flux Bright Noise
The tube I used Fishy Femme (66-1) is by Ed Mironiuk, you can purchase this tube from CDO here
The name of the font I used is A Yummy Apology
I used size 60

Open new transparent canvas 930x375, we will resize later
Select all
Paste your photo into selection
Deselect
Adjust>gaussian blur>radius 6
Paste your photo as a new layer
Resize if needed, I resized the height to 75% and repositioned back into place
Add an inner bevel & drop shadow
Paste your tube as a new layer
Resize as needed and add drop shadow
Position at the bottom of your photo
Zoom in on the tail (or whatever its called lol)
Using your freehand selection tool select around the tail
Copy, cut & deselect
Paste as a new layer & postion back into place
Rename this layer to tail
Duplicate & rotate left 25
Position back into place
Use your clone tool to cover the gap
Rename to left tail
Back on your original tail
Duplicate & rotate right 25
Position back into place
Use your clone tool to cover the gap
Rename to right tail
I moved my tube to above the tail layers & nudged her to the right to help cover my imperfect cloning
Paste your flower as a new layer
Resize to 50%
Add drop shadow
Duplicate & hide the original
Position on the lower left corner of your photo
Duplicate, mirror & merge down
Duplicate, move to top of your photo & merge down
Unhide your flower
Resize to 75%
Position on one side
Duplicate, mirror & merge down
Duplicate your bg layer
Move to the top
Select all
Contract 12
Delete & deselect
Add an inner bevel & drop shadow
Apply dsb flux bright noise intensity 75, mix checked
Resize all layers to 70%
Add your text, name & © info
Animation:
Hide left & right tails
Merge visible
Copy & paste into animation shop
Undo your merge
Hide tail & uhide left tail
Merge & paste after current in animation shop
Copy frame 1 & paste after frame 2
Undo your merge
Hide left tail & unhide right tail
Merge visible & paste after current in animation shop
I set my frame properties at 45
View your animation
Save as gif & you're all done!
I hope you enjoyed my tutorial
Your comments are very much appreciated either here on this post or on the chat box. I've made it easy for you to post on this tut by turning off the requirement of having to type in a confirmation code
I would love to post your © compliant result, just email it to me with ATT Sharon & the tut name in the subject line
You'll find my email blinkie on your left
:)
Result by Kaye W

You can purchase her photos at CDO here
Flower I made for this tut here
Plugins
DSB Flux Bright Noise
The tube I used Fishy Femme (66-1) is by Ed Mironiuk, you can purchase this tube from CDO here
The name of the font I used is A Yummy Apology
I used size 60
Open new transparent canvas 930x375, we will resize later
Select all
Paste your photo into selection
Deselect
Adjust>gaussian blur>radius 6
Paste your photo as a new layer
Resize if needed, I resized the height to 75% and repositioned back into place
Add an inner bevel & drop shadow
Paste your tube as a new layer
Resize as needed and add drop shadow
Position at the bottom of your photo
Zoom in on the tail (or whatever its called lol)
Using your freehand selection tool select around the tail
Copy, cut & deselect
Paste as a new layer & postion back into place
Rename this layer to tail
Duplicate & rotate left 25
Position back into place
Use your clone tool to cover the gap
Rename to left tail
Back on your original tail
Duplicate & rotate right 25
Position back into place
Use your clone tool to cover the gap
Rename to right tail
I moved my tube to above the tail layers & nudged her to the right to help cover my imperfect cloning
Paste your flower as a new layer
Resize to 50%
Add drop shadow
Duplicate & hide the original
Position on the lower left corner of your photo
Duplicate, mirror & merge down
Duplicate, move to top of your photo & merge down
Unhide your flower
Resize to 75%
Position on one side
Duplicate, mirror & merge down
Duplicate your bg layer
Move to the top
Select all
Contract 12
Delete & deselect
Add an inner bevel & drop shadow
Apply dsb flux bright noise intensity 75, mix checked
Resize all layers to 70%
Add your text, name & © info
Animation:
Hide left & right tails
Merge visible
Copy & paste into animation shop
Undo your merge
Hide tail & uhide left tail
Merge & paste after current in animation shop
Copy frame 1 & paste after frame 2
Undo your merge
Hide left tail & unhide right tail
Merge visible & paste after current in animation shop
I set my frame properties at 45
View your animation
Save as gif & you're all done!
I hope you enjoyed my tutorial
Your comments are very much appreciated either here on this post or on the chat box. I've made it easy for you to post on this tut by turning off the requirement of having to type in a confirmation code
I would love to post your © compliant result, just email it to me with ATT Sharon & the tut name in the subject line
You'll find my email blinkie on your left
:)
Result by Kaye W