Showing posts with label The Vintage Angel™. Show all posts

Monday, June 25, 2012

An Angels Light

Click for larger view

This tutorial was written by Sharon A on June 25, 2012 & is copyright protected
For more info read my TOU

Supplies Needed
Texture, pattern & cloud here

Plugins
Xenofex Constellation

The tube I used Angels Prayer (8-1) is by The Vintange Angel™, you can purchase this tube from CDO here

The name of the font I used is Tagettes


Open new transparent canvas 930x420, we will resize later
Floodfill with a color from your tube
Apply texture, size 125, depth 1

Add a new raster layer
Flood with your lace pattern, scale 75
Duplicate 2 times

Apply constellation, settings on small star constellation, keep original image checked
Repeat on other 2 layers clicking the random seed button each time
Hide the middle & bottom lace layers

Paste your tube as a new layer
Resize as needed
Add drop shadow
Position on one side
Duplicate & mirror

Paste your cloud as a new layer

Add my text or use your own
I used the font Tagettes size 48 using the same color as my bg floodfill
Align center
Add an inner bevel & drop shadow

The warmth of an angel's light
can comfort and illuminate
the whole world

Resize all layers to 70%

Add your text, name & © info


Animation:

Hide animation 2 & 3
Copy merged & paste into animation shop

Undo your merge
Hide animation 1 & unhide #2
Copy merged & paste after current in animation shop

Undo your merge
Hide animation 2 & unhide #3
Copy merged & paste after current in animation shop

View your animation

Save as gif & you're all done!

I hope you enjoyed my tutorial

Your comments are very much appreciated either here on this post or on the chat box.  I've made it easy for you to post on this tut by turning off the requirement of having to type in a confirmation code

I would love to post your © compliant result, just email it to me with ATT Sharon & the tut name in the subject line

You'll find my email blinkie on your left

:)


Sunday, April 15, 2012

Tranquility Forever

Click for larger view

This tutorial was written by Sharon A on Apr 15, 2012 & is copyright protected
For more info read my TOU

Supplies Needed
Beautiful scrapkit Twilight Forever PT 2 Honeymoon by Jenny here

Plugins
DC Special Nylon
Graphics Plus Cross Shadow
DSB Flux Bright Noise
Eyecandy Texture Noise


The tube I used Tranquility (7-3) is by The Vintage Angel™, you can purchase this tube from CDO here

The name of my font is Aquarelle
I used size 48


Open new transparent canvas 700x700, we will resize later
Select all
Paste paper 3 into selection
Deselect
Apply dc special nylon using default settings
Apply graphics plus cross shadow, change the 2 bottom #'s to 70

Paste your tube as a new layer
Resize as needed & position on the lower right corner
Add drop shadow
Duplicate
Hide your top tube layer

Using your freehand selection tool, select around the wings
Copy & cut
Duplicate 2 times
Apply eyecandy texture noise
Settings>crinkle noise
Repeat on other 2 layers clicking on the random seed button each time
Deselect
Rename these layers to animation 4, 5 & 6
Hide all 3

Unhide the top tube layer
Using your freehand selection tool select around the ball
Copy & cut
Paste as a new layer & position back into place
Hide & unhide this layer, if you see any movement then move the ball
Do this until you see no movement

Duplicate 2 times
Apply dsb flux bright noise intensity 40, mix checked
Repeat on other 2 layers changing intensity to 45 & 50
Deselect
Rename these layers to animation 1, 2 & 3

Delete the tube layer you just cut the ball from

You'll have 3 tube layers & 3 ball layers

Paste flower 5 as a new layer
Resize to 10%
Position in lower left corner
Add drop shadow
Duplicate & mirror
Resize to 75%
Position next to the other one

Paste flower 4 as a new layer
Resize to 35%
Position over flower 5
Add drop shadow
Duplicate & mirror
Resize to 75%
Position next to the other one

Paste flower deco as a new layer
Resize to 60%
Move to lower left corner
Add drop shadow
Move to between the flower 5 layers
Change layer properties to luminance

Open dust 3
Resize all layers to 700x700
Copy & paste as a new layer
Close original dust, dont save changes
Duplicate & mirror
Merge down
Duplicate & flip
Merge down

If using the same tube I am:
Copy & paste the flower layer from your tube
Resize 50%
Add drop shadow
Positon upper right corner
Duplicate & mirror
Merge down

If using a different tube:
Use a flower from the kit

Resize all layers to 70%

Add your text, name & © info


Animation:

Hide your middle & bottom animation layers
Merge visible
Copy & paste into animation shop

Undo your merge
Hide your top animation layers & unhide the middle ones
Merge & paste after current in animation shop

Undo your merge
Hide your middle animation layers & unhide the bottom ones
Merge visible & paste after current in animation shop

View your animation

Save as gif & you're all done!

I hope you enjoyed my tutorial

Your comments are very much appreciated either here on this post or on the chat box.  I've made it easy for you to post on this tut by turning off the requirement of having to type in a confirmation code

I would love to post your © compliant result, just email it to me with ATT Sharon & the tut name in the subject line

You'll find my email blinkie on your left

:)


Friday, April 6, 2012

Hope

Click for larger view

This tutorial was written by Sharon A on Apr 6, 2012 & is copyright protected
For more info read my TOU

Supplies Needed
Shooting Stars here

Star Lines here

Plugins
Screenworks Fabric Weave
Graphics Plus Cross Shadow
Eyecandy 4 HSB Noise


The tube I used Hope is by The Vintage Angel™, you can purchase this tube from CDO here

The name of my font is Tagettes
I used size 48


Open new transparent canvas 700x700, we will resize later
Floodfill with a color from your tube
Apply screenworks fabric weave
Apply graphics plus cross shadow changing the 2 bottom #'s to 100

Paste star line as a new layer
Position upper left corner
Duplicate 2 times
Arrange evenly across the top
Merge these 3 layer
Change layer properties to luminance legacy
Add drop shadow
Duplicate & flip
Merge down

Paste your tube as a new layer
Add drop shadow
Use your freehand selection tool to select around the wings
Duplicate 2 times

Apply hsb noise using default settings, pattern smooth lumps, random seed 1
Repeat on other 2 wings layers clicking on the random seed button each time
Deselect

Resize all layers to 70%

Add your text, name & © info

I duplicated my name twice & applied hsb noise


Animation:

Open your shooting stars in animation shop
Activate frame 1 & select all

Hide animation 2 & 3
Merge visible
Copy & paste into animation shop

Undo your merge
Hide animation 1 & unhide #2
Merge & paste after current in animation shop

Undo your merge
Hide animation 2 & unhide #3
Merge visible & paste after current in animation shop

View your animation

Select all & copy
Activate frame 3
Paste after current
Activate your last frame & paste after currnet until you have 21 frames

View your animation

Activate frame 1 & select all

Grab the stars by frame 1 and drag & drop onto the desired postion on your tag

Go back to the shooting stars animation
Undo (CTRL Z)
Grab by frame 1, drag & drop on another position on your tag

Repeat this as many times as you wish
I placed one in each left corner & the center left near my tube
I then reversed the shooting stars frames & repeated for the right side of my tag

View your animation

Save as gif & you're all done!

I hope you enjoyed my tutorial

Your comments are very much appreciated either here on this post or on the chat box.  I've made it easy for you to post on this tut by turning off the requirement of having to type in a confirmation code

I would love to post your © compliant result, just email it to me with ATT Sharon & the tut name in the subject line

You'll find my email blinkie on your left 

:)


Monday, April 2, 2012

Wolf Angel

Click for larger view

This tutorial was written by Sharon A on Apr 2, 2012 & is copyright protected
For more info read my TOU

Supplies Needed
Dove here

Flower here

Plugins
Eyecandy 5 Textures Weave
Eyecandy 4 HSB Noise

The tube I used Winter Wings is by The Vintage Angel, you can purchase this tube from CDO here

The name of the font I used is Tagettes
I used size 36 for my font & 48 for my name after resizing


Open new transparent canvas 940x425, we will resize later
Pick a color for your foreground from your tube
Pick a darker color for your background
Activate your foreground gradient, linear, angle 45, repeats 20
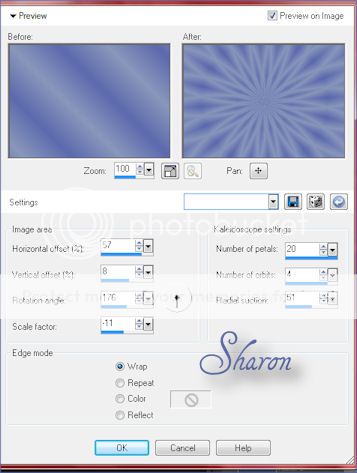
Effects>reflection effects>kalioscope with these settings


Apply eyecandy weave
Settings>Twill tiny smeared
Basic>change pattern to satin

Paste your flower as a new layer
Resize to 90%
Add drop shadow
Change layer properties to burn
Change opacity to 40

Paste your tubes as new layers
Resize as needed & position into place

Using your freehand selection tool select around the wings of one
Hold down your shift key to select the flowers
Duplicate 2 times

Repeat with the flowers on the other tube if it has any or you could do the wings
Duplicate 2 times

Apply eyecandy hbs noise using default settings, change pattern to smooth fractal
Repeat on all your animation layers clicking on the random seed button each time
Deselect

Paste your dove as a new layer
Resize to 50%
Position upper left corner
Add drop shadow
Duplicate & mirror
Reposition to the lower left corner

Resize all layers to 70%

Add your text, name & © info


Animation:

Hide both middle & bottom animation layers
Merge visible
Copy & paste into animation shop

Undo your merge
Hide animation both top animation layers & unhide the middle ones
Merge & paste after current in animation shop

Undo your merge
Hide the middle animation layers & unhide the bottom ones
Merge visible & paste after current in animation shop

View your animation

Save as gif & you're all done!

I hope you enjoyed my tutorial

Your comments are very much appreciated either here on this post or on the chat box.  I've made it easy for you to post on this tut by turning off the requirement of having to type in a confirmation code

I would love to post your © compliant result, just emaail it to me with ATT Sharon & the tut name in the subject line

You'll find my email blinkie on your left 

:)

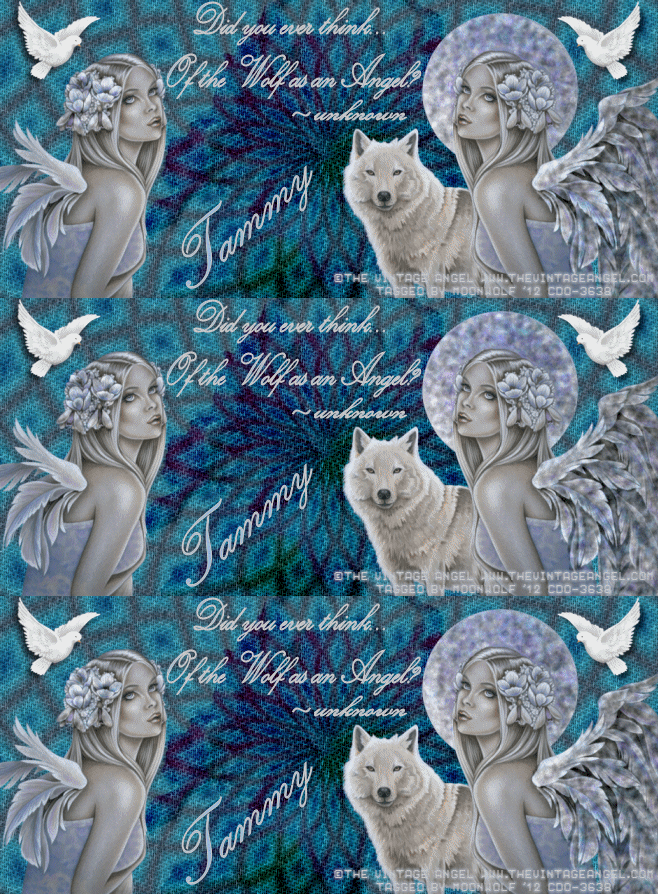
Result by Tammy


And one for me!
Thank you Tammy!


Faith

Click for larger view

This tutorial was written by Sharon A on Apr 2, 2012 & is copyright protected
For more info read my TOU

Supplies Needed
Moon here

Plugins
Graphics Plus Cross Shadow
Eyecandy 4 HSB Noise

The tube I used # 4-3 is by The Vintage Angel, you can purchase this tube from CDO here

The name of the font I used is Night Sky
I used size 48 for the text & 60 for my name


Open new transparent canvas 940x450, we will resize later
Floodfill with a color from your tube
Effects>texture effects>texture>tin foil>scale 40%>depth 2
Duplicate 2 times

Apply graphics plus cross shadow
Change the top # to 90 and the bottom 2 numbers to 100
Repeat on other 2 layers changing the top # to 100 & 110
Rename these layers to A1, A2 & A3

Paste your tube as a new layer
Resize as needed
Zoom in close on the wings
Using your freehand selection tool select around one of the wings
Hold down your shift key to select around the other one
Duplicate 2 times 

Using your freehand selection tool select around one of the wings
Hold down your shift key to select the other one

Apply eywcandy hsb noise using the default settings
Repeat on other 2 layers clicking the random seed button each time
Rename these layers to A4, A5 & A6

Paste your moon as a new layer
Resize to 80%
Position upper right side
Duplicate & mirror
Duplicate 2 times

Apply graphics plus cross shadow using the same settings as on your background

Resize all layers to 70%

Add your text, name & © info


Animation:

Hide all your middle & bottom animation layers
Merge visible
Copy & paste into animation shop

Undo your merge
Hide your top layers & unhide the middle layers
Merge & paste after current in animation shop

Undo your merge
Hide your middle layers & unhide the bottom ones
Merge visible & paste after current in animation shop

View your animation

Save as gif & you're all done!

I hope you enjoyed my tutorial

Your comments are very much appreciated either here on this post or on the chat box.  I've made it easy for you to post on this tut by turning off the requirement of having to type in a confirmation code

I would love to post your © compliant result, just emaail it to me with ATT Sharon & the tut name in the subject line

You'll find my email blinkie on your left 

:)


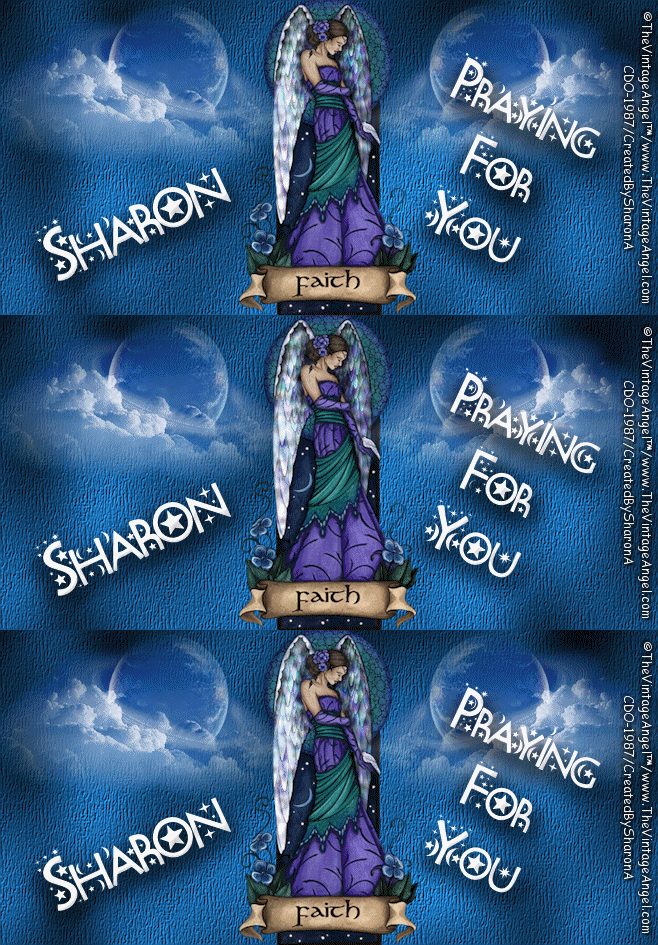
Result by Kaye W