Showing posts with label Dogs. Show all posts

Wednesday, August 22, 2012

Stop Animal Abuse

Click for larger view

This tutorial was written by Sharon A on August 22, 2012 & is copyright protected
For more info read my TOU

Supplies Needed
Template #140 by me here
Supplies made by me for this tut here

Plugins
Xenofex 2 Puzzle
DSB Flux Bright Noise
Xero Fritillary

The tube I used Baby Chi (58-1) is by Cuddly Rigor Mortis, you can purchase this tube from CDO here

The name of the font I used is Isla Bella



Open your template, shift D to duplicate & close original
Delete the info layer

Paste your stop sign as a new layer
Add drop shadow

Activate your bg layer & floodfill with a color from the sign
Apply xenofex puzzle using default setting, change columns to 16

Activate the rectangles layer & floodfill with another color from your sign
Apply bright noise intesity 50, mix checked

Activate the small squares layer & floodfill with a 3rd color from the sign
Apply fritillary using default settings, change the top & bottom #'s to 12

Activate the square 2 layer
Floodfill with one of your colors
Add an inner bevel & drop shadow

Activate the square 1 layer
Select all>float>defloat
Paste the fur into selection
Use your manual color correction to change the color
(You'll need your source color to be #999595)
(To find your manual color correction go to View>Customize>Unused Commands)

Duplicate 2 times
Apply bright noise, intensity 30, mix checked
Repeat on other 2 layers changing intensity to 35 & 40

Paste your paw as a new layer
Recolor if desired
Rotate left 45
Add an inner bevel & drop shadow
Duplicate & mirror
Merge down
Duplicate & flip
Merge down

Paste your tube as a new layer
Resize as needed
Add drop shadow

Resize all layers to 70%

Add your text, name & © info
Duplicate your name 2 times & repeat bright noise same as above on the fur


Animation:

Hide animation 2 & 3
Copy merged & paste into animation shop

Undo your merge
Copy merged & paste after current in animation shop

Undo your merge
Copy merged & paste after current in animation shop

View your animation

Save as gif & you're all done!

I hope you enjoyed my tutorial

Your comments are very much appreciated either here on this post or on the chat box.  I've made it easy for you to post on this tut by turning off the requirement of having to type in a confirmation code

I would love to post your © compliant result, just email it to me with ATT Sharon & the tut name in the subject line

You'll find my email blinkie on your left

:)


Saturday, July 7, 2012

Take Me

Click for larger view

This tutorial was written by Sharon A on July 7, 2012 & is copyright protected
For more info read my TOU

Supplies Needed
Bone by me, right click to save
 Plugins
Mura Meister Copies
DC Special Nylon

The tube I used Suitcase Yorkie (25-2) is by  Maryline Cazenave, you can purchase this tube from CDO here

The name of the font I used is Edmunds


Open new transparent canvas 930x420, we will resize later
Floodfill with a color from your tube
Apply dc special nylon using default settings

Paste your bone as a new layer
Duplicate & hide the duplicated layer

Apply mura meister copies
Preset menu on tiling angle, gap 2
Change layer properties to burn
Add an inner bevel

Paste your tube as a new layer
Resize if needed
Add drop shadow

Unhide your bone & send to the top
Use your manual color correction to change the color
Change the sourse to white and the target to your color choice
Duplicate & hide the duplicated layer

Apply mura meister copies
Preset menu on line, number 13
Position near the bottom, leaving a space
Duplicate & flip
Merge down
Add an inner bevel & drop shadow

Unhide your duplicated bone
Resize the width to 75%
Reposition back to the center of your tag
Repeat copies changing # to 17

Move to above the angled bones layer
Duplicate 2 times
Effects>distortion effects>wave with these settings


Repeat on other 2 layers increasing the wave length by 1 on each layer
Hide the 2 bottom wave layers

Resize all layers to 70%

Add your text, name & © info


Animation:

Hide animation 2 & 3
Copy merged & paste into animation shop

Undo your merge
Hide animation 1 & unhide #2
Copy merged & paste after current in animation shop

Undo your merge
Hide animation 2 & unhide #3
Copy merged & paste after current in animation shop

View your animation

Save as gif & you're all done!

I hope you enjoyed my tutorial

Your comments are very much appreciated either here on this post or on the chat box.  I've made it easy for you to post on this tut by turning off the requirement of having to type in a confirmation code

I would love to post your © compliant result, just email it to me with ATT Sharon & the tut name in the subject line

You'll find my email blinkie on your left

:)


Result by Kaye W


Friday, June 1, 2012

Cuddly Cats & Dogs


Click for larger view

This tutorial was written by Sharon A on May 31, 2012 & is copyright protected
For more info read my TOU

Supplies Needed
Paw Print Overlay by me here

Plugins
DSB Flux Bright Noise
The tubes I used are by Cuddly Rigor Mortis, you can purchase these tubes from CDO here

The name of the font I used is Tamborine


Pick one of your tubes as your main tube which you will pick your colors from

Open your overlay, shift D to duplicate & close original
Add a new layer & floodfill with a color from your tube
Change layer properties to overlay, merge down

Activate your rectangle shape tool
Foreground a color from your tube, background null
Width 45
Draw out a frame almost as big as your tag
Align center
Convert to raster

Change your color from foreground to background
Draw out a narrow vertical line, align center & convert to raster
Repeat drawing a horizontal line
Move both to below your frame
Merge the 2 lines

Still on your lines layer
Select all>float>defloat
Add a new raster layer
Apply cutout with these settings


Deselect & merge down

Repeat on your frame layer
Change the offset vertical to 36
Change the horizontal to -36
Deselect & merge down
Merge with the lines layer
Add an inner bevel

Open your paw print overlay again, shift D to duplicate, close original
Resize to 50%
Do the same as before using another color from your main tube
Merge down & copy

Back to your tag
Using your magic wand click inside the the 4 areas of your frame
Expand 5
Add a new raster layer
Paste into selection
Deselect & move to below your frame

Using your magic wand click inside one of the squares
Paste one of your tubes as a new layer
Resize as needed
Invert your selection
Delete & deselect
Add drop shadow & move to below your frame

Repeat with your next 3 tubes

Paste your main tube as a new layer
Resize so she's no higher than the horizontal line in your frame then move to the bottom of your tag
Add drop shadow

Add drop shadow to your frame
Duplicate 2 times
Apply bright noise intensity 35, mix checked
Repeat on other 2 layers changing intensity to 40 & 45
Resize all layers to 70%

Add your text, name & © info


Animation:

Hide animation 2 & 3
Copy merged & paste into animation shop

Hide animation 1 & unhide #2
Copy merged & paste after current in animation shop

Hide animation 2 & unhide #3
Copy merged & paste after current in animation shop

View your animation

Save as gif & you're all done!

I hope you enjoyed my tutorial

Your comments are very much appreciated either here on this post or on the chat box.  I've made it easy for you to post on this tut by turning off the requirement of having to type in a confirmation code

I would love to post your © compliant result, just email it to me with ATT Sharon & the tut name in the subject line

You'll find my email blinkie on your left

:)


Friday, May 18, 2012

My Birthday Party

Click for larger view

This tutorial was written by Sharon A on May 18, 2012 & is copyright protected
For more info read my TOU

Supplies Needed
Scrapkit Birthday Wishes here

Plugins
Eyecandy Texture Weave
Xenofex Constellation
DSB Flux Bright Noise

The tubes I used are by Judy Mastrangelo, you can purchase these tubes from PTE here

The name of my font is Wild Script


Open a new transparent canvas 700x700, we will resize later
Select all
Paste paper 12 into selection
Deselect
Apply eyecandy texture weave
Settings on solid plain angled
Use these settings on basic


Paste element 6 as a new layer
Add drop shadow

Paste element 56 as a new layer
Resize to 85%
Resize the width to 75% by unchecking the lock aspect ratio button
Reposition
Click inside with your magic wand
Expand 5

Add a new raster layer
Paste paper 13 into selection
Deselect & move to below your frame
Apply bright noise, intensity 40, mix checked

Duplicate 2 times
Apply constellation
Settings on medium, keep original image checked
Repeat on other 2 layers clicking on the random seed button each time
Paste your main tube as a new layer
Resize as needed
Add drop shadow

Add an inner bevel & drop shadow to your frame

Paste your other tubes as new layers
Resize as needed & add drop shadow
Position near the bottom of your tag

Paste element 24 as a new layer
Resize to 40%
Position on left side of your frame
Add drop shadow

Paste element 50 as a new layer
Resize to 30%
Position on right side of your frame
Add drop shadow

Paste element 51 as a new layer
Resize to 50%
Position at the top center of your tag
Add drop shadow

Paste element 53 as a new layer
Resize to 15%
Position inside the frame
Rotate left 30
Add drop shadow

Resize all layers to 70%

Add your text, name & © info


Animation:

Hide animation 2 & 3
Merge visible
Copy & paste into animation shop

Undo your merge
Hide animation 1 & unhide #2
Merge & paste after current in animation shop

Undo your merge
Hide animation 2 & unhide #3
Merge visible & paste after current in animation shop

View your animation

Save as gif & you're all done!

I hope you enjoyed my tutorial

Your comments are very much appreciated either here on this post or on the chat box.  I've made it easy for you to post on this tut by turning off the requirement of having to type in a confirmation code

I would love to post your © compliant result, just email it to me with ATT Sharon & the tut name in the subject line

You'll find my email blinkie on your left

:)


Result by Kaye W


Sunday, May 13, 2012

Calling The Rainbow Bridge

Click for larger view

This tutorial was written by Sharon A on May 13, 2012 & is copyright protected
For more info read my TOU

Supplies Needed
Scrapkit Rainbow Bridge by me here

The tube I used 10-3 is by Maryline Cazenave, you can purchase this tube from CDO here

The name of the font I used is Tamborine

I dedicate this tut to all of my four legged children who have passed on to the rainbow bridge throughout my life starting when I was only 6.  Her name was Mick & even though I was young when she passed I will never forget her.  She saved the lives of my mother, my brother, my great grandma & me when I was a baby before my sister was born.  My great grandmother had been staying with us and my dad was working the night shift.  She had left the gas stove on & went to bed.  Mick couldn't wake anybody so she came & shook my crib to wake me up which you know what happens when a baby wakes up!  That finally woke my mother who got up & opened all the windows & shut off the gas.  I've heard many similar stories about animals saving lives.  I of course remember none of it, this was told to me many times over the years by my mother.  I think of Mick & all the rest often


Open new transparent canvas 700x700, we will resize later
Select all
Paste paper 17 into selection
Deselect
Add an inner bevel

Paste frame 14 as a new layer
Resize to 75%
Click inside with your magic wand
Expand 5

Add a new raster layer
Paste paper 9 into selection
Move to below your frame layer
Deselect
Since this is a torn paper resize by 102%

Add an inner bevel & drop shadow to your frame

Paste your tube as a new layer
Resize if needed
Add drop shadow

Paste honeysuckle as a new layer
Resize to 60%
Add drop shadow
Position on the upper right corner of your frame
Duplicate, mirror & merge down

Paste a butterfly as a new layer
Resize to 40%
Rotate right 30
Add drop shadow
Position on the left side of your frame

Paste one of the sunshine flowers as a new layer
Resize to 40%
Position on the right side of your frame
Add drop shadow

Paste a butterfly bow as a new layer
Resize to 50%
Position on the lower left corner of your frame
Add drop shadow
Duplicate, mirror & merge down

Paste a tag as a new layer
Resize to 50%
Position at the bottom of your frame
Add drop shadow

Duplicate & position within your frame
Rotate left 30

Paste lace border as a new layer
Position at the top of your tag
Add drop shadow

Resize all layers to 70%

Add your name & © info

Add your text one word at a time, each on a new layer
I used size 42 for my font
Rotate left 30
Center over the tag in your frame
Add your inner bevel & drop shadow

Hide and add your next word
Keep doing this until you have all your words in
I had to resize the width of the word rainbow by 90%

The # of your frames in your animation will depend on how many words you use
I ended up with 9


Animation:

Hide all your text layers (not your name though)
Merge visible
Copy & paste into animation shop

Undo your merge
Unhide the word calling
Merge visible & paste after current in animation shop

Undo your merge
Hide the word calling & unhide the word my
Merge visible & paste after current in animation shop

Continue this until all your text words are pasted

I set my frame properties at 60

View your animation

Save as gif & you're all done!

I hope you enjoyed my tutorial

Your comments are very much appreciated either here on this post or on the chat box.  I've made it easy for you to post on this tut by turning off the requirement of having to type in a confirmation code

I would love to post your © compliant result, just email it to me with ATT Sharon & the tut name in the subject line

You'll find my email blinkie on your left

:)


Result by Kaye W
Using her own cats!


Thursday, May 10, 2012

Poodle Bath

Click for larger view

This tutorial was written by Sharon A on May 10, 2012 & is copyright protected
For more info read my TOU

Plugins
DSB Flux Center Mirror

The tube I used Poodle Bath (8-3) is by Sherri Baldy, you can purchase this tube from CDO here

The name of the font I used is Honey Script


Open new transparent canvas 700x700, we will resize later
Floodfill with a color from your tube
Effects>artistic effects>balls & bubbles
Click the reset to default button
Change coverage to 25>average size 5>size variation 15
Click on surface
Click on material & change to a bright shade of your bg color & opacity 5

Paste your tube as a new layer
Resize if needed
Add drop shadow

Activate your rectangle shape tool
Set your foreground to a gradient of your choice, background null
Width 60, draw a frame slightly larger than your tube
Align center
Convert to raster

Click inside your frame with your magic wand
Expand 5
Add a new raster layer
Floodfill with your gradient
Move to below your frame
Do Not Deselect

Duplicate
Apply dsb flux center mirror changing mirrors to 50
Deselect
Resize to 70%

Activate your frame layer
Select all>float>defloat
Add a new raster layer
Duplicate 2 times

Add bubbles changing coverage to 20 & average size to 4
Repeat on other 2 layers changing the seed to 1 & 2

Add an inner bevel & drop shadow to your frame

Activate your top layer
Add a new raster layer
Floodfill with your gradient
Select all
Contract 10
Delete & deselect
Add an inner bevel & drop shadow

Resize all layers to 70%

Add your text, name & © info


Animation:

Hide animation 2 & 3
Merge visible
Copy & paste into animation shop

Undo your merge
Hide animation 1 & unhide #2
Merge & paste after current in animation shop

Undo your merge
Hide animation 2 & unhide #3
Merge visible & paste after current in animation shop

I set my frame properties at 25

View your animation

Save as gif & you're all done!

I hope you enjoyed my tutorial

Your comments are very much appreciated either here on this post or on the chat box.  I've made it easy for you to post on this tut by turning off the requirement of having to type in a confirmation code

I would love to post your © compliant result, just email it to me with ATT Sharon & the tut name in the subject line

You'll find my email blinkie on your left

:)


Result by Kaye W


Wednesday, May 9, 2012

Tiny Body Big Mouth

Click for larger view

This tutorial was written by Sharon A on May 9, 2012 & is copyright protected
For more info read my TOU

Supplies Needed
Paw Print Overlay by me here
Paw Print Frame by me here
A butterfly & flower of your choice

The tube I used Baby Chi (58-1) is by Cuddly Rigor Mortis, you can purchase this tube from CDO here

The name of the font I used is Honey Script

Once again my chihuahua Gooper was my inspiration on this tut.  I'm always saying he has a tiny body with a big mouth lol


Open your overlay
Add a new raster layer
Floodfill with a gradient of your choice
Change layer properties to overlay
Add drop shadow

Paste your frame as a new layer
Click inside with your magic wand
Expand 12

Add a new raster layer
Floodfill with a gradient to match a color on your tube
Move to below your frame layer

Add texture effects>blinds
Width 8>opacity 60>color a darker shade of your gradient color

Back on your frame
Add a new raster layer
Floodfill with a gradient darker than your bg gradient
Merge down
Add an inner bevel & drop shadow

Paste your tube as a new layer
Resize as neeed
Add drop shadow
Duplicate

Activate your warp brush
Push down on the lower lip & up on the upper lip

Paste your butterfly as a new layer
Resize as needed & add drop shadow
Position onto a corner of your frame
Duplicate & mirror

Repeat with your flower

Resize all layers to 70%

Add your text, name & © info


Animation:

Hide the closed mouth layer
Merge visible
Copy & paste into animation shop

Undo your merge
Hide the open mouth layer & unhide the closed mouth layer
Merge & paste after current in animation shop

I set my frame properties to 120 on the closed mouth & 20 on open mouth

View your animation

Save as gif & you're all done!

I hope you enjoyed my tutorial

Your comments are very much appreciated either here on this post or on the chat box.  I've made it easy for you to post on this tut by turning off the requirement of having to type in a confirmation code

I would love to post your © compliant result, just email it to me with ATT Sharon & the tut name in the subject line

You'll find my email blinkie on your left

:)


Result by Kaye W


Wednesday, May 2, 2012

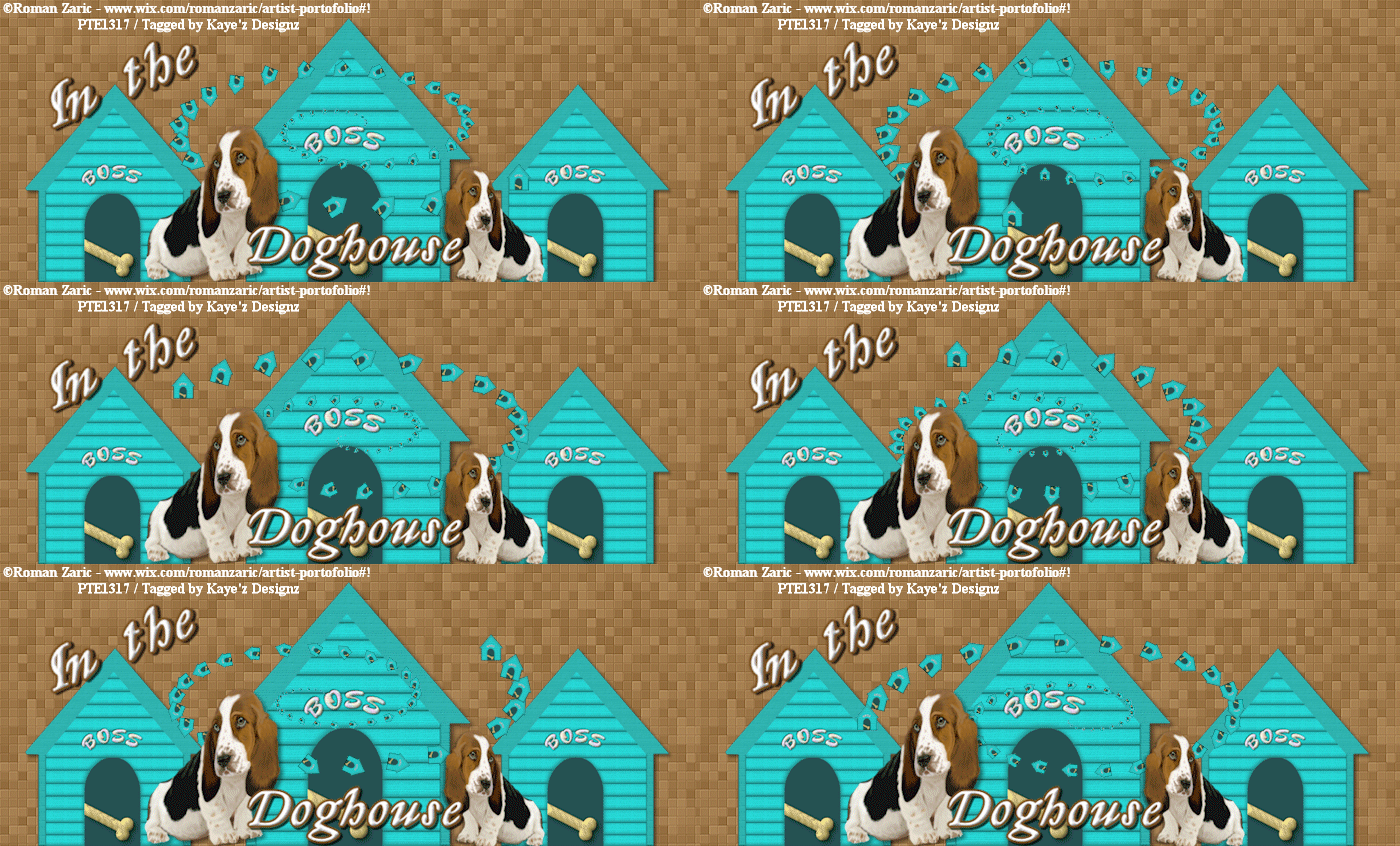
In The Dog House

Click for larger view

This tutorial was written by Sharon A on May 2, 2012 & is copyright protected
For more info read my TOU

Supplies Needed
Dog House I made for this tut here
Plugins
Xero Fritillary
Mura Meister Copies

The tube I used Chinese Crested is by Ann Fesenko, you can get this tube from PFD here

The name of my font is Lyonesse
I used size 60


Open a new transparent canvas 930x375, we will resize later
Floodfill with a color from your tube
Apply xero fritillary changing the top & bottom #'s to 12

Paste your dog house as a new layer
Add drop shadow
Duplicate & hide original

Move to the bottom edge of your tag
Duplicate
Resize to 75%
Position next to your original dog house
Duplicate & mirror
Merge the dog house layers

Unhide your dog house & send to top
Resize to 10%
Rename layer to spiral
Duplicate 9 times

Apply mura meister copies with these settings


Repeat on your other 9 spiral layers decreasing the phase by 10 each time
The phase should be 10 on your last layer
Hide all these except the top one

Paste your tube as a new layer
Resize as needed
Add drop shadow
Psoition between 2 dog houses
Duplicate
Resize to 75%
Position opposite your original tube

Resize all layers to 70%

Add your text, name & © info


Animation:

Make sure all your spiral layers are hidden except the top one
Merge visible
Copy & paste into animation shop

Undo your merge
Hide your top spiral layer & unhide the 2nd one
Merge & paste after current in animation shop

Keep doing this until you have all 10 frames pasted

View your animation

Save as gif & you're all done!

I hope you enjoyed my tutorial

Your comments are very much appreciated either here on this post or on the chat box.  I've made it easy for you to post on this tut by turning off the requirement of having to type in a confirmation code

I would love to post your © compliant result, just email it to me with ATT Sharon & the tut name in the subject line

You'll find my email blinkie on your left

:)


Result by Kaye W


Tuesday, April 24, 2012

Mommys Wittle Applehead

Click for larger view

This tutorial was written by Sharon A on Apr 24, 2012 & is copyright protected
For more info read my TOU

Supplies Needed
Template 149 by me here

Plugins
DSB Flux Bright Noise
Xenofex Constellation

The tube I used Is That You is by Majestik Art, you can purchase this tube from MTA here

The name of my font is Wild Script
I used size 48

For more paw print dividers visit my other blog

I dedicate this tut to my chihuahua Gooper who inspired it.  He has that class chihuahua applehead so I call him Mommys Wittle Applehead LOL.


Open your template, shift D to duplicate & close original
Delete credit layer & the flower layer you're not gonna use

Floodfill your bg layer with a color from your tube
My tube doesn't have much color so I just chose one at random
Add an inner bevel
Apply dsb flux bright noise intensity 50, mix checked

Floodfill your square layer with the same color
Add an inner bevel

Activate your flowers layer
Change layer properties to multiply
Add drop shadow

Darken your shade & floodfill your frame
Add an inner bevel & drop shadow
Repeat bright noise

Floodfill your small square with your 1st color
Add an inner bevel
Repeat bright noise

Activate your flower layer
Change layer properties to overlay
Add drop shadow

Floodfill your small frame with your dark color
Add an inner bevel & drop shadow
Repeat bright noise

Paste your tube as a new layer
Resize as needed
Add drop shadow
Change layer properties to luminance legacy
Add another drop shadow

Activate your square frame flowers
Select all>float>defloat
Add a new raster layer
Floodfill with your bg color
Deselect
Change layer properties to hard light
Merge down
Add drop shadow

Repeat with your small corner flowers
Use your dark color & layer properties to burn

Repeat with small side flowers using your light color & layer properties on burn

Repeat with the top flowers
Use your dark color, layer propeties color

Resize all layers to 70%

Add your text, name & © info

Merge your text & name
Duplicate 2 times
Apply xenofex constellation
Settings>star field>overall star density 0>keep original image checked
Repeat on other 2 layers clicking the random seed button each time


Animation:

Hide animation 2 & 3
Merge visible
Copy & paste into animation shop

Undo your merge
Hide animation 1 & unhide #2
Merge & paste after current in animation shop

Undo your merge
Hide animation 2 & unhide #3
Merge visible & paste after current in animation shop

View your animation

Save as gif & you're all done!

I hope you enjoyed my tutorial

Your comments are very much appreciated either here on this post or on the chat box.  I've made it easy for you to post on this tut by turning off the requirement of having to type in a confirmation code

I would love to post your © compliant result, just email it to me with ATT Sharon & the tut name in the subject line

You'll find my email blinkie on your left

:)

Result by Kaye W