Showing posts with label Jasmine Becket-Griffith. Show all posts

Tuesday, May 1, 2012

Cats Have It All

Click for larger view

This tutorial was written by Sharon A on May 1, 2012 & is copyright protected
For more info read my TOU

Supplies Needed
Word Art by me here
Lace here

Plugins
Eyecandy Texture

The tube I used Two Fluffy Kitties (80-3) is by Jasmine Becket-Griffith, you can purchase this tube from CDO here

The name of the font I used is Shutup
I used size 60


Open new transparent canvas 930x375, we will resize later
Floodfill with a color from your tube
Duplicate 2 times
Apply eyecandy texture marble
Settings>sharp calcite
Click on basic
Change the bedrock color to your bg color
Change vein color to a lighter shade of your color
Repeat on other 2 layers clicking on the random seed button each time

Paste your tube as a new layer
Resize as needed and add drop shadow
Position on one side

Paste word art as a new layer
Resize to 75%
Position into place
Add a new raster layer
Floodfill with a lighter shade of your bg color
On your WA layer select all>float>defloat
On your floodfill layer invert your selection
Delete, deselect & merge down
Add an inner bevel & drop shadow

Paste your lace as a new layer
Resize to 57%
Position on the upper right side
Duplicate, mirror & merge down
Move up so only the lacey bottom part shows

Select around your tag with your selection tool
Crop to selection

Duplicate your lace
Flip & merge down

Resize all layers to 70%

Add your text, name & © info


Animation:

Hide animation 2 & 3
Merge visible
Copy & paste into animation shop

Undo your merge
Hide animation 1 & unhide #2
Merge & paste after current in animation shop

Undo your merge
Hide animation 2 & unhide #3
Merge visible & paste after current in animation shop

View your animation

Save as gif & you're all done!

I hope you enjoyed my tutorial

Your comments are very much appreciated either here on this post or on the chat box.  I've made it easy for you to post on this tut by turning off the requirement of having to type in a confirmation code

I would love to post your © compliant result, just email it to me with ATT Sharon & the tut name in the subject line

You'll find my email blinkie on your left

:)


Result by Kaye W


Thursday, April 19, 2012

Lilac Angel

Click for larger view

This tutorial was written by Sharon A on Apr 19, 2012 & is copyright protected
For more info read my TOU

Supplies Needed
White Lilac here

Plugins
Mura Meister Copies
Tramages Tow The Line
Graphics Plus Cross Shadow
DSB Flux Bright Noise


The tube I used Angel in Lilac is by Jasmine Becket-Griffith, you can purchase this tube from CDO here

The name of the font I used is Tagettes
I used size 48 & 60


Open new transparent canvas 930x375, we will resize later
Floodfill with a color from your tube
Apply tramages tow the line
Change the top # to 45
Apply graphics plus cross shadow changing the 2 bottom #'s to 90

Paste your lilac as a new layer
Resize to 42%
Duplicate & hide the original for now

On the duplicated lilac:
Use your eraser tool to erase the leave
Resize to 30%
Apply mura meister copies
Line>number 39
Change layer properties to luminance legacy
Duplicate 2 times

Effects>distortion effects>wave
Use these settings


Repeat on other 2 layers increasing the horizontal displacement by 1 each time
Rename these layers to animation 1, 2 & 3

Paste your tube as a new layer
Resize as needed and add drop shadow

Unhide your lilac layer & move to the top
Position on the left
Add drop shadow
Change layer properties to luminance legacy
Duplicate, mirror & merge down
Change layer opacity to 40
Add another drop shadow

Resize all layers to 70%

Add your text, name & © info

I merged my text & name
I then applied dsb flux bright noise, intensity 55, mix checked


Animation:

Hide animation 2 & 3
Merge visible
Copy & paste into animation shop

Undo your merge
Hide animation 1 & unhide #2
Merge & paste after current in animation shop

Undo your merge
Hide animation 2 & unhide #3
Merge visible & paste after current in animation shop

View your animation

Save as gif & you're all done!

I hope you enjoyed my tutorial

Your comments are very much appreciated either here on this post or on the chat box.  I've made it easy for you to post on this tut by turning off the requirement of having to type in a confirmation code

I would love to post your © compliant result, just email it to me with ATT Sharon & the tut name in the subject line

You'll find my email blinkie on your left

:)


Wednesday, April 4, 2012

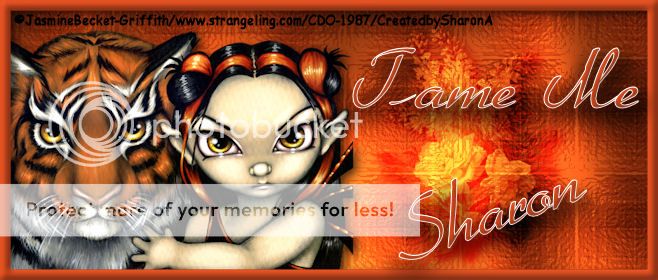
Tame Me

Click for larger view

This tutorial was written by Sharon A on Apr 4, 2012 & is copyright protected
For more info read my TOU

Supplies Needed
Flower here

Plugins
Graphics Plus Cross Shadow

The tube I used Taming A Tiger (6-3) is by Jasmine Becket-Griffith, you can purchase this tube from CDO here

The name of the font I used is Heather
I used size 60


Open new transparent canvas 940x400, we will resize later
Floodfill with a color from your tube
Add texture using these settings, change the color to your floodfll color


Apply graphics plus cross shadow changing the 2 bottom #'s to 80

Paste flower as a new layer
Erase the stems at the bottom
Resize to 75%
Position opposite side of your tube
Add drop shadow
Change layer properties to overlay

Paste your tube as a new layer
Resize as needed
Add drop shadow
Position to one side

Add a new raster layer
Floodfill with your color
Select all
Contract 15
Delete
Deselect
Add an inner bevel & drop shadow

Resize all layers to 70%

Add your text, name & © info

Merge all

Save as jpg & you're all done!

I hope you enjoyed my tutorial

Your comments are very much appreciated either here on this post or on the chat box.  I've made it easy for you to post on this tut by turning off the requirement of having to type in a confirmation code

I would love to post your © compliant result, just emaail it to me with ATT Sharon & the tut name in the subject line

You'll find my email blinkie on your left 

:)


Result by Kaye W
Love the animation!


Saturday, March 31, 2012

Howling At The Moon

Click for larger view

This tutorial was written by Sharon A on Mar 31, 2012 & is copyright protected
For more info read my TOU

Supplies Needed
Moon, right click to save


Plugins
Maura Meister Copies
Graphics Plus Cross Shadow

The tube I used A Wolfish Friend is by Jasmine Becket-Griffith, you can purchase this tube from CDO here

The name of the font I used is JLR Pawrty Hearty
I used size 36 for my text & size 42 for my name after resizing it


Open new transparent canvas 940x400, we will resize later
Floodfill with dark blue
Effects>texture effects>texture>grid>scale 50>depth 3
Duplicate 2 times
Apply graphics plus cross shadow using default settings

Repeat on the middle bg layer, changing the bottom two #'s to 148
Repeat on bottom bg layer, changing the bottom two #'s to 168

Paste your moon as a new layer
Apply mura meister copies with these settings
Set preset to tiling
Mode line

Change layer properties to soft light
Add an inner bevel
Add drop shadow twice

Paste your tube as a new layer
Resize as needed
Add drop shadow
Duplicate & mirror
Change layer properties to dodge

Resize all layers to 70%

Add your text, name & © info


Animation:

Hide animation 2 & 3
Merge visible
Copy & paste into animation shop

Undo your merge
Hide animation 1 & unhide #2
Merge & paste after current in animation shop

Undo your merge
Hide animation 2 & unhide #3
Merge visible & paste after current in animation shop

View your animation

Save as gif & you're all done!

I hope you enjoyed my tutorial

Your comments are very much appreciated either here on this post or on the chat box.  I've made it easy for you to post on this tut by turning off the requirement of having to type in a confirmation code

I would love to post your © compliant result, just emaail it to me with ATT Sharon & the tut name in the subject line

You'll find my email blinkie on your left 

:)

Result by Kaye W


Saturday, March 10, 2012

Family Portrait


Click for larger view

This tutorial was written by Sharon A on March 10, 2012
For more info read my TOU

Supplies Needed
Scrapkit Toasted Almond by Moody Designz here

The tube I used Pixie Dogs is by Jasmine Becket-Griffith, you can purchase this tube from CDO here


Open new transparent canvas 700x700, we will resize later
Select all
Paste paper 15 into selection
Deselect

Paste element 56 as a new layer
Using your magic wand click inside the frame
Add new raster layer
Floodfill with a pattern or gradient
Move to below the frame layer
Do Not Deselect

Paste your tube as a new layer
Resize as needed
If you're using the same tube I had to move it a bit
Move to below the frame layer
Invert your selection
Delete
Deselect

Activate the background layer
Paste element 17 as a new layer
Duplicate & mirror
Merge down
Add drop shadow, twice

Paste element 13 as a new layer
Resize to 35%
Position on upper left corner of frame
Add drop shadow, twice
Duplicate & flip

Resize all layers to 70%

Add your text

Add your name & your © info

Merge all

Save as jpg & you're all done!

I hope you enjoyed my tutorial

I would love to post your © compliant result, just email it to me with the tut name in the subject line

:)


Result by Kaye W


Friday, March 9, 2012

Best Friends

Click for larger view

This tutorial was written by Sharon A on March 9, 2012
For more info read my TOU

Supplies Needed
Template #131 by me here

Plugins
Xero Fritillary
Graphics Plus Cross Shadow

The tube I used Pug Pixie is by Jasmine Becket-Griffith, you can purchase this tube from CDO here


Open your template, shift D to duplicate & close original
Delete credit layer & the Forever Word art layer & shadow layer

Activate the diamond shape layer
Select all>float>defloat
Floodfill with a gradient, linear, angle 0, repeats 0
Apply Xero Fritillary~8, 30, 10, 6
Apply Graphics Plus Cross Shadow using default settings
Do Not Deselect

Paste your tube as a new layer
Resize as needed
Invert your selection
Delete
Deselect

Activate diamond frame layer
Floodfill with a gold pattern
Duplicate
Apply Graphics Plus Cross Shadow, default settings to one of these layers
Rename these layers to animaion 1 & 2

Repeat the pattern or gradient & cross shadow effect on the bars layer but not the duplication

Activate the circle layer
Floodfill with the same gradient as the diamond shape layer
Apply Xero Fritillary changing the top # to 10
Apply Graphics Plus Cross Shadow, same settings, twice

Floodfill raster 1 with black or another dark color

Resize all layers to 70%

Add your name & your © info

Animation


Hide animation 1
Merge visible
Copy & paste into animation shop

Undo your merge
Unhide animation 1 & hide animation 2
Merge visible
Copy & paste after current in animation shop

Set frame properties to 15

Save as gif & you're all done!

I hope you enjoyed my tutorial

I would love to post your © compliant result, just email it to me with the tut name in the subject line

:)


Result by Kaye W


Sunday, September 18, 2011

Bat Girl

Click for larger view

This tutorial was written by Sharon on Sept 18, 2011
For more info read my TOU

Supplies Needed
A pumpkin
Autumn Pattern
Here's the one I used
Right click to save

The tube I used Halloween Twilight is by Jasmine Becket-Griffith, you can purchase this tube from CDO here

Open new transparent canvas 700x700, we will resize later
Floodfill with an autumn color, I used #f2890e
Effects>Texture Effects>Texuture>Mosiac
Effects>Artistic Effects>Enamel
Blur 65, detail 89, density 65, angle 138, color #c3eebb
Effects>Texture Effects>Blinds
Width 5, opacity 40, light from left checked, color black

Add a new raster layer
Activate your selection tool, set on rectangle
click the customize button
Top 100, bottom 600, right 600, left 100
Floodfill with an autumn pattern
Deselect
Add drop shadow
Effects>Texture Effects>Blinds
Same as before except check the horizontal box

Paste your tube as a new layer
Resize as needed
Add drop shadow

Paste your pumpkin as a new layer
Resize as needed, if you're using the same tube I am it came with a pumpkin, I resized it to 75%
Position in lower right corner
Add drop shadow
Duplicate
Resize to 75%
Position at upper right corner of your autumn pattern layer
I rotated right 45
Duplicate & mirror

Resize all layers to 70%

Add your text

Add your name & your © info

Merge all

Save as jpg & you're all done!

I hope you enjoyed my tutorial

I would love to post your © compliant result, just email it to me with the tut name in the subject line

:)


A Wolfish Friend

Click for larger view

This tutorial was written by Sharon on Sept 18, 2011
For more info read my TOU

Supplies Needed
Scrapkit Toasted Almond here

The tube I used A Wolfish Friend is by Jasmine Becket-Griffith, you can purchase this tube from CDO here


Open new transparent canvas 700x550, we will resize later
Select all
Paste paper 15 into selection
Deselect

Paste element 57 as a new layer
Add drop shadow

Paste your tube as a new layer
Resize as need
Move to below the frame layer
Add drop shadow

Paste element 17 as a new layer
Resize to 30%
Position lower right corner
Add drop shadow
Duplicate, flip & mirror

Paste element 37 as a new layer
Resize to 20%
Position on lower right corner
Add drop shadow
Duplicate
Position on upper left corner

Paste element 9 as a new layer
Resize to 35%
Position near lower left corner of frame as shown on my tag
Add drop shadow
Move to below the flower layers
Duplicate
Position on right side of frame

Resize all layers to 70%

Add your text

Add your name & your © info

Merge all

Save as jpg & you're all done!

I hope you enjoyed my tutorial

I would love to post your © compliant result, just email it to me with the tut name in the subject line

:)


Friday, September 16, 2011

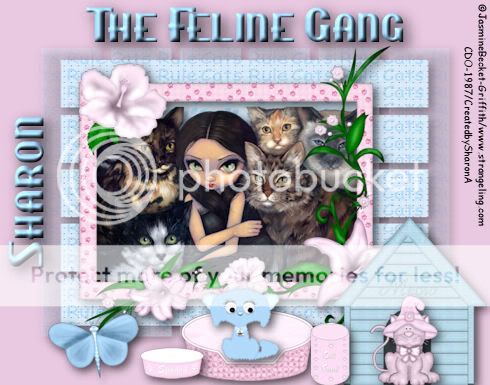
The Feline Gang

Click for larger view

This tutorial was written by Sharon on Sept 16, 2011
For more info read my TOU

Supplies Needed
Scrapkit Kitty Cats & Puppy Dogs by me here

Mask # 250 by Vix here

The tube I used Its All About The Cats is by Jasmine Becket-Griffith, you can purchase this tube from CDO here

Today my dad would have turned 84 but he died at a young age on Sept 1, 1979 just before turning 52.  So today all my tuts are dedicated to him.
Love you dad!


Open new transparent canvas 700x550, we will resize later
Floodfill  with a color from your frame

Add a new raster layer
Select all
Paste paper 14 into selection
Deselect

Apply mask
Merge group
Add drop shadow

Paste frame 3 as a new layer
Resize to 75%
Click inside frame with your magic wand
Hold down your shift key and click inside the small areas 
Expand 3
Paste paper 10 into selection
Do Not Deselect

Paste your tube as a new layer
If you're using the same tube resize to 75%
Reposition a bit
Invert your selection
Delete
Deselect
Add drop shadow

Move the paper & tube layers to below your frame layer

Paste bed 3 as a new layer
Resize to 65%
Position bottom center
Add drop shadow

Paste bowl 2 as a new layer
Resize to 50%
Position next to the bed
Add drop shadow

Paste cat house 2 as a new layer
Resize to 75%
Position lower right
Add drop shadow

Paste cat food 1 as a new layer
Resize to 30%
Position between the bed & cat house
Add drop shadow

Paste cat 1 as a new layer
Resize to 35%
Position in front of cat house
Add drop shadow

Paste cat 4 as a new layer
Resize to 25%
Position on bed
Add drop shadow

Paste butterfly 5 as a new layer
Resize to 50%
Position near bottom left
Add drop shadow

Resize all layers to 70%

Add your text

Add your name & your © info

Merge all

Save as jpg & you're all done!

I hope you enjoyed my tutorial

I would love to post your © compliant result, just email it to me with the tut name in the subject line

:)


Monday, September 12, 2011

Autumn Fairy Queen

Click for larger view

This tutorial was written by Sharon on Sept 12, 2011
For more info read my TOU

Supplies Needed
FTU Scrapkit Autumn Delight by me here

Mask #3 by WSL here

The tube I used Red Haired Fairy Queen is by Jasmine Becket-Griffith, you can purchase this tube from CDO here


Open new transparent canvas 700x700, we will resize later
Floodfill with a color from your tube or frame (Skip this step if you want a transparent background)

Add a new raster layer
Floodfill with a color from your tube or frame

Apply mask
Merge group
Add drop shadow

Paste frame 2 as a new layer
Using your magic wand click inside the frame
Expand 5

Paste paper 12 as a new layer
Invert your selection
Delete
Deselect
Move to below your frame layer

Add drop shadow to your frame

Paste your tube as a new layer
Resize as needed
Move to below your frame layer
Add drop shadow

Paste flower 8 as a new layer
Resize to 35%
Position as shown on my tag above the fairy's head
Add drop shadow

Paste leaf cluster 1 as a new layer
Mirror
Position on right side of frame
Add drop shadow

Paste an autumn butterfly as a new layer
Resize to 50%
Rotate right 45
Position on lower left of frame
Add drop shadow

Paste a bow as a new layer
Resize to 50%
Position on top center of frame
Add drop shadow

Paste bird 2 as a new layer
Mirror
Resize to 65%
Position near upper right corner of frame, over the leaf cluster
Add drop shadow

Paste butterfly 5 as a new layer
Resize to 65%
Rotate right 45
Position upper left corner of frame
Add drop shadow

Paste leaf 2 as a new layer
Position center left of frame
Add drop shadow

Paste flower 2 as a new layer
Resize to 35%
Position on top of leaf
Add drop shadow

Resize all layers to 70%

Add your name & your © info

Merge all

Save as jpg & you're all done!

I hope you enjoyed my tutorial

I would love to post your © compliant result, just email it to me with the tut name in the subject line

:)


Sunday, September 4, 2011

Autumn Delight

Click for larger view

This tutorial was written by Sharon on Sept 4, 2011
For more info read my TOU

Supplies Needed
Scrapkit Autumn Delight by me here


The tube I used called Red Haired Fairy Queen is by Jasmine Becket-Griffith, you can purchase this tube from CDO here


Open a new transparent canvas 700x700, we will resize later
Select all
Paste paper 17 into selection
Deselect

Paste a cluster frame as a new layer, I used #8
Click inside the frame with your magic wand
Hold down the shift key and click inside a couple of small areas on the right
Paste paper 14 as a new layer
Invert your selection
Delete
Deselect
Move to below the frame

Add drop shadow to frame

Paste your tube as a new layer
Resize as needed
Move to below the frame
Add drop shadow

Paste butterfly 3 as a new layer
Resize to 50%
I positioned inside my frame or you could put it on the left side of the frame
Rotate right 45
Add drop shadow

Paste a bow as a new layer
Resize to 45%
Position on top of frame
Add drop shadow

Activate your top layer
Add new raster layer
Select all
Paste paper 14 into selection
Contract 12
Delete
Deselect

Resize all layers to 70%

Add your name & your © info

Merge all

Save as jpg & you're all done!

I hope you enjoyed my tutorial

I would love to post your © compliant result, just email it to me with the tut name in the subject line

:)


Thursday, September 1, 2011

Autumn Leaves

Click for larger view

This tutorial was written by Sharon on Sept 1, 2011
For more info read my TOU

Supplies Needed
Scrapkit Autumn Romance by Bea here

Plugins
Graphics Plus Cross Shadow

The tube I used called Little Autumn Leaves is by Jasmine Becket-Griffith, you can purchase this tube from CDO here


Open new transparent canvas 700x700, we will resize later
Select all
Paste paper 12 into selection
Apply graphics plus cross shadow, default settings

Paste frame 4 as a new layer
Using your magic wand click inside the frame
Paste paper 14 as a new layer
Do Not Deselect

Paste your tube into selection
Deselect

Paste deco 4 as a new layer
Position as shown on my tag
Add drop shadow
Apply cross shadow

Paste butterfly 1 as a new layer
Position on left center of frame
Add drop shadow
Duplicate & mirror
Merge down
Apply cross shadow

Paste leaf 5 as a new layer
Resize to 50%
Position upper left corner
Add drop shadow

Paste leaf 4 as a new layer
Resize to 40%
Rotate left 15
Position on top of leaf 5
Add drop shadow
Merge down
Rotate left 15
Duplicate & mirror
Merge down
Add cross shadow

Paste flower 6 as a new layer
Resize to 60%
Position as shown on my tag
Add drop shadow
Add cross shadow

Resize all layers to 70%

Add your name & your © info

Merge all

Save as jpg & you're all done!

I hope you enjoyed my tutorial

I would love to post your © compliant result, just email it to me with the tut name in the subject line

:)