Showing posts with label Unholy Vault Designs. Show all posts

Sunday, April 29, 2012

Waiting for the Rain

Click for larger view

This tutorial was written by Sharon A on April 29, 2012 & is copyright protected
For more info read my TOU

Supplies Needed
Forum Template 65 by me here

Plugins
Plugins AB 08 Wire Meshings
Xenofex Constellation

The tube I used Waiting for the Rain (PTE4758) is by Unholy Vault Designs, you can purchase this tube from PTE here

The name of my font is A Yummy Apology
I used size 48 & 60


Open your template, shift D to duplicate & close original
Delete credit, left & right flower layers

Activate your bg layer
Add a new raster layer
Floodfill with a very dark pink
Layer properties>color

Change layer properties on your lace layer to dodge
Add an inner bevel & drop shadow

Activate your rectangle
Floodfill with your bg color
Apply wire meshings using default settings

Change layer properties on your center flower to luminance legacy
Add drop shadow

Activate your large frame
Floodfill with your bg color
Add an inner bevel & drop shadow
Click  inside with your magic wand
Expand 3

Paste your main tube as a new layer
Resize as needed, line up with the bottom of the frame
Add drop shadow
Move to above your right frame layer

Activate your left square
Floodfill with your bg color

Activate your left frame
Floodfill with your bg color
Add an inner bevel & drop shadow
Click inside with your magic wand
Expand 3

Paste your close up tube as a new layer
Resize as needed
Invert your selection
Delete & deselect
Add drop shadow
Duplicate & mirror

Floodfill your right square with your bg color
Add an inner bevel & drop shadow

Activate your left butterfly
Select all>float>defloat
Add a new raster layer
Floodfill with your bg color
Deselect
Layer properties>color
Merge down & add drop shadow

Repeat with your right butterfly

Repeat with your frame flowers
Layer properties>color

Repeat with your L & R frame flowers
Merge the 2 layers first
Layer properties>dodge

Move your large & left frames up to the right frame layer
Merge the 3 frames
Duplicate 2 times
Apply constellation
Settings>star field>keep original image checked
Repeat on other 2 layers clicking the random seed button each time

Resize all layers to 70%

Add your text, name & © info


Animation:

Hide animation 2 & 3
Merge visible
Copy & paste into animation shop

Undo your merge
Hide animation 1 & unhide #2
Merge & paste after current in animation shop

Undo your merge
Hide animation 2 & unhide #3
Merge visible & paste after current in animation shop

View your animation

Save as gif & you're all done!

I hope you enjoyed my tutorial

Your comments are very much appreciated either here on this post or on the chat box.  I've made it easy for you to post on this tut by turning off the requirement of having to type in a confirmation code

I would love to post your © compliant result, just email it to me with ATT Sharon & the tut name in the subject line

You'll find my email blinkie on your left

:)


 Result by Kaye W


Sunday, April 1, 2012

April Showers

Click for larger view

This tutorial was written by Sharon A on April 1, 2012 & is copyright protected
For more info read my TOU

Supplies Needed
Scrapkit Dotty by Vyabs here

Sqirlz Water Reflections
A free program you can get here

The tube I used Waiting for the Rain is by Unholy Vault Designs, you can purchase this tube from PTE here

The font I used is called Floral Dawn
I used size 48 for the text and 60 for my name after resizing


Open a new transparent canvas 700x700, we will resize later
Select all
Paste paper 2 into selection
Deselect

Paste element 6 as a new layer
Resize to 200%
Add drop shadow

Paste frame 15 as a new layer
Click inside the frame with your magic wand
Expand 3
Add a new raster layer
Paste paper 5 into selection
Move to below your frame layer
Do Not Deselect

Paste your tube as a new layer
Resize as needed
Invert your selection
Delete
Deselect
Move to below your frame layer
Add drop shadow

Add drop shadow to your frame

Paste element 33 as a new layer
Resize to 40%
Add drop shadow
Position on one side of your frame
Duplicate & Mirror

Resize all layers to 70%

Add your text, name & © info


Animation:

Merge all layers
Save as jpg

Open up in your sqirtz program
Click on the rain icon at the top
Change width to 1

Click on the yellow arrow
Click on rain/snow only, then ok

Click on gif
Same as above

The file was huge so I opened it up in animation shop
Select all>Click Animation>Cull Animation
Change the # to 2
You'll have 10 frames

I hope you enjoyed my tutorial

Your comments are very much appreciated either here on this post or on the chat box.  I've made it easy for you to post on this tut by turning off the requirement of having to type in a confirmation code

I would love to post your © compliant result, just emaail it to me with ATT Sharon & the tut name in the subject line

You'll find my email blinkie on your left 

:)


Result by Kaye W


Friday, March 9, 2012

Happy Day~Forum

Click for larger view

This tutorial was written by Sharon on Oct 2, 2011
For more info read my TOU

Supplies Needed
Floral Vine Here

Plugins
Xero Fritillary
Xero Porcelain
Graphics Plus Cross Shadow
Xenofex 1 or 2 Constellation

The tube I used Pink Ribbons is by Unholy Vault Designs, you can purchase this tube from PTE here


Open a new transparent canvas 700x275, we will resize later
Floodfill with a medium or dark color from your tube
Apply Xero Fritillary ~ 10, 30, 10, 2
Apply Graphics Plus Cross Shadow using default settings
Duplicate 2 times
Rename these layers to animation 1, 2 & 3

Apply Xenofex Constellation with these settings


Repeat on animation 2 & 3 clicking the random seed button on each

Paste your tube as a new layer
Resize as needed
Move to the left side
Apply Xero Porcelain using default settings
Duplicate & mirror
Resize the duplicated tube and change layer properties to Lumiance Legacy
Change layer opacity to 50

Paste the floral vine as a new layer
Resize to 35%
Position near one of your tubes
Apply Xero Porcelain same settings as before
Add drop shadow
Move to below your tube layer
Duplicate & mirror, reposition a bit
Merge down

Resize all layers to 85%

Add your text, name & your © info

Animation


Hide animation 2 & 3
Merge visible, copy & paste into animation shop

Undo your merge, hide animation 1, unhide animation 2
Copy & paste after current in animation shop

Undo your merge, hide animation 2, unhide animation 3
Copy & paste after current in animation shop

Save a gif & you're all done!

I hope you enjoyed my tutorial

I would love to post your © compliant result, just email it to me with the tut name in the subject line

:)


Sunday, September 25, 2011

Halloween Magic

Click for larger view

This tutorial was written by Sharon on Sept 25, 2011
For more info read my TOU

Supplies Needed
Scrapkit Halloween Majic here
(I have just learned this is a PTU kit, I don't know what happened I got it free just a day or 2 before I wrote this tutorial.  Sorry about the mix up)

Plugins
Xero Fritillary

The tube I used Pumpkin Witch is by Unholy Vault Designs, you can purchase this tube from PTE here


Open a new transparent canvas 700x700, we will resize later
Floodfill with a halloween color, I used #f08c19
Apply xero fritillary using default settings, change top & bottom #'s to 10

Paste element 55 as a new layer
Resize to 45%
Move up to top
Add drop shadow
Duplicate & flip

Paste element 6 as a new layer
Resize to 25%
Position upper right
Add drop shadow

Paste element 4 as a new layer
Resize to 30%
Add drop shadow

Paste your tube as a new layer
Resize as needed
Position lower right
Add drop shadow

Paste a close up of your tube
Resize smaller than your first tube
Add drop shadow
Position upper left part of castle
Move layer to below the castle layer

Paste element 7 as a new layer
Resize to 10% and again to 75%
Position near your tube
Add drop shadow

Paste element 16 as a new layer
Resize to 15%
Position lower left
Add drop shadow

Paste element 21 as a new layer
Resize to 15%
Position as shown on my tag
Add drop shadow

Paste element 25 as a new layer
Resize to 10% and again to 75%
Position at the bottom to the right of the ivy
Add drop shadow
Duplicate
Resize to 75%
Position somewhere on the castle

Paste element 23 as a new layer
Resize to 10% and again to 60%
Rotate right 25
Position above the pumpkin
Add drop shadow
Duplicate
Resize to 75%
Position somewhere on the castle
Repeat a few times

Resize all layers to 70%

Add your name & your © info

Merge all

Save as jpg & you're all done!

I hope you enjoyed my tutorial

I would love to post your © compliant result, just email it to me with the tut name in the subject line

:)


Thursday, September 15, 2011

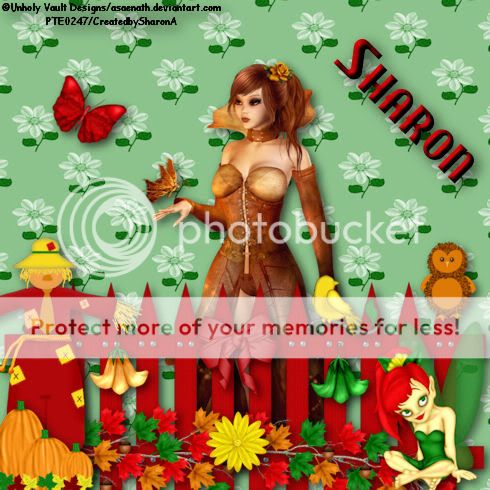
Autumn Surprises

Click for larger view

This tutorial was written by Sharon on Sept 15, 2011
For more info read my TOU

Supplies Needed
Scrapkit Autumn Surprises by me here

The tube I used Firefly is by Unholy Vault Designs, you can purchase this tube from PTE here


Open a new transparent canvas 700x700, we will resize later
Select all
Paste paper 14 into selection
Deselect

Paste fence 3 as a new layer
Resize to 90%
Position at the bottom
Add drop shadow

Paste your tube as a new layer
Resize as needed
Add drop shadow
Move to below the fence layer

Paste branch 2 as a new layer
Resize to 80%
Position at the bottom
Add drop shadow

Paste scarecrow as a new layer
Resize to 75%
Position lower left
Add drop shadow

Paste a pumpkin patch as a new layer
Resize to 40%
Position lower left
Add drop shadow

Paste a fairy as a new layer
Resize to 50%
Position lower right
Add drop shadow

Paste owl as a new layer
Resize to 40%
Position on the right side of the fence
Add drop shadow

Paste a bird as a new layer
Resize to 35%
Position on the fence
Add drop shadow

Paste a flower as a new layer
Resize to 35%
Position on fence near scarecrow
Add drop shadow

Repeat with another flower placing on right side of fence near fairy

Paste a bow as a new layer
Resize to 50%
Position top center of fence 
Add drop shadow

Paste another flower as a new layer
Resize to 50%
Position below the bow

Paste butterfly as a new layer
Resize to 40%
Rotate right 30
Position near your tube
Add drop shadow

Resize all layers to 70%

Add your name & your © info

Merge all

Save as jpg & you're all done!

I hope you enjoyed my tutorial

I would love to post your © compliant result, just email it to me with the tut name in the subject line

:)


Monday, September 12, 2011

Autumn Stroll


Click for larger view

This tutorial was written by Sharon on Sept 12, 2011
For more info read my TOU

Supplies Needed
Template # 120 by me here

An autumn photo

The tube I used Pumpkin Witch is by Unholy Vault Designs, you can purchase this tube from PTE here

The photo I used is by Jon Rattenbury, you can also buy his art at PTE


Open your template, shift D to duplicate & close original
Delete credit layer

Activate the small shape layer
Select all>float>defloat
Paste your photo into selection (If its large you will need to downsize it)

Paste your tube as a new layer
Resize as needed
Add drop shadow

Pick a color from your photo or tube
Floodfill small rectangle layer

Pick a color from your photo or tube
Floodfill large shape layer
Apply inner bevel using bevel #2 width 20

Repeat on large rectangle layer

Pick another color from your photo or tube
Floodfill the bars
Add drop shadow

Pick a lighter shade from your last color
Floodfill raster 1
Apply inner bevel same as before

Resize all layers to 70%

Add your name & your © info

Merge all

Save as jpg & you're all done!

I hope you enjoyed my tutorial

I would love to post your © compliant result, just email it to me with the tut name in the subject line

:)