Showing posts with label Christmas. Show all posts

Wednesday, June 1, 2011

Christmas Candles

Click for larger view

Please read my TOU
This tutorial was written by Sharon on December 8, 2010

You will need:
Template #52 by me here
Scrapkit FM-BT-November 2009 by Fanasty Moments Scraps here
Candle Flame animation here
Plugin VM Extravagana>Holidays in Egypt
Font:  Christmas Trees

I used the fabulous artwork of Elias Chatzoudis
You must have a licence to use his artwork which you can purchase here

UPDATE Elias Chatzoudis artwork is now available here


Open template, shift D to duplicate and close original.  Delete the credits layer

Activate the Circle layer.  Select all>Float>Defloat
Flood fill with a dark green gradient or color
Apply VM Extravagana>Holidays in Egypt, 18 on both sections
Deselect

Flood fill the squares layers with a dark green color or gradient

Open element 60 and paste as new layer
Resize to 27% and position over the bottom squares
Duplicate, mirror and merge down

Paste element 2 as a new layer, resize to 25%
Position over top squares, duplicate, mirror and merge down

Activate Rectangle layer.  Select all>Float>Defloat
Paste your tube as a new layer
Invert selection and press your delete key to remove excess tube
Deselect

Paste element 36 as a new layer, resize to 30% and position near top of circle layer

Paste element 3 as a new layer, resize to 40% and position near bottom of circle layer

Paste element 1 as a new layer, resize to 30% and position near the left side of the rectangle layer.
Duplicate & mirror
I moved the left one up and the bottom one down

Activate raster 1, flood fill with a dark red color or gradient.  I used a gradient, Linear, angle 45 and repeats 20
Effects>Texture Effects>Blinds
Width 4, opacity 40, color black, horizontal checked
Repeat blinds, UNcheck horizontal

Merge all layers

Resize to 75%

Add your © Info and any text you want to add, merge down


Animation

Copy and paste into animation shop, multiply until you have 18 frames.  Go to the first frame and select all

Open the candle flame animation.  Go to the first frame and select all

Grabbing the flame by the first frame, drag onto one of the candle wicks

Go back to the candle flame animation, CTRL Z to undo and repeat the drag

Continue doing this until you have all wicks covered

Frame properties 10

Save as gif and you're all done!

I hope you enjoyed my tut
:)

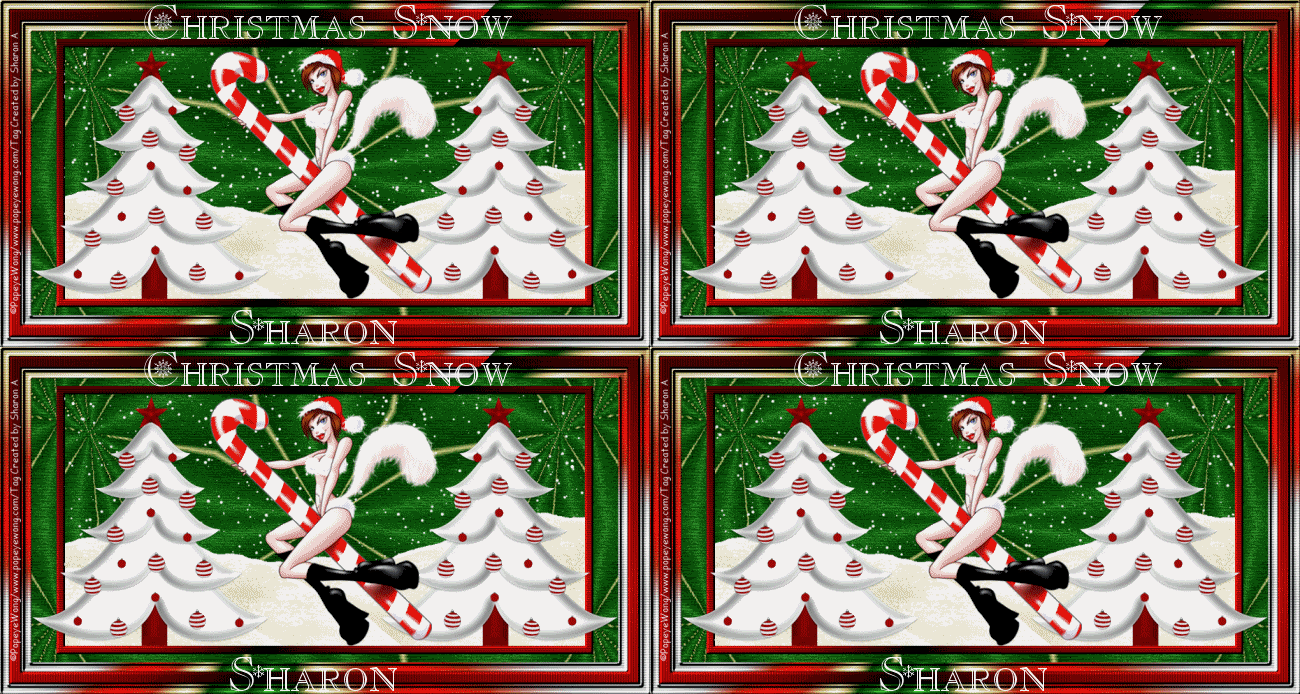
Christmas Snow

Click for larger view

This tutorial was written by Sharon on November 18, 2010
Please read my TOU

Supplies Needed
Scrapkit Xmas Candy Cane by Lacarolita Designz here
Gradients MQC Ribbon Green & MQC Holiday Here
Snow Mound Here
Font Used:  Christmas, you can get it at dafont.com

I used the fabulous artwork of Popeye Wong here

Plugins
Filters Unlimited 2.0
Vanderlee Snowflakes

Open a new transparent canvas 930x450, we can resize later.  I made this for a blog so thats why so big lol

Flood fill with gradient, angle 45 and repeats 4
Apply Filters Unlimited Kaleidoscope 2>Divisions 48 and Variation 192
Apply Filters Unlimited>Paper Textures>Cotton Paper/ Fine>Intensity 128 and lightness 96

Copy and paste as new image, minimize for now

Apply border size 15 all the way around with a contrasting color
Select with your magic wand and flood fill with the Holiday Gradient same settings as above
Effects>Texture Effects>Blinds with the following settings


Effects>3D Effects>Inner Bevel with these settings


Deselect

Add another border size 20
Flood fill with a dark red gradient, select with your magic wand and repeat the blinds effect, UNcheck horizontal
Repeat inner bevel changing the bevel from #12 to #2
Deselect

Add 1 more border size 15, repeat same as the first one
Resize back to 930 pixels wide

Back to your copied image
Add a border 15 pixels all the way around
Flood fill with your red gradient
Apply blinds effect with the same settings as the screenshot shows
Apply inner bevel using bevel #2
Resize to 80% and paste as a new layer on the image with 3 borders, duplicate 3 times for a total of 4

Paste Candy Cane Tree as a new layer, resize to 38%
Move over to the edge of the frame on the larger image, duplicate & mirror.  Merge down.  Using your move tool, press your down arrow one time

Paste your tube as a new layer, resize if needed

Paste the snow mound as a new layer, place below the trees and resize to 93%
Move to the top of your smaller image border

Add your copyright info

Animation

Activate the top layer of your duplicates
Using your selection tool select around the inside of the border

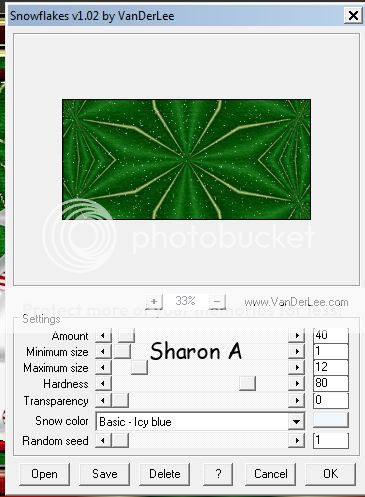
Apply Vanderlee Snow Flakes with the following settings


Rename layer to snow 1
Apply snowflakes on the next layer changing amount from 40 to 38 and random seed to 2, rename to snow 2
On next layer change amount to 36 and random seed to 3, rename to snow 3
On last layer change amount to 34 and random seed to 4, rename to snow 4
Deselect

Merge your copyright info, tube, trees and snow mound layers

Hide the bottom 3 snow layers, merge visible.  Copy and paste to animation shop

Back to PSP, undo your merge.  Hide snow 1 and UNhide snow 2, merge visible and paste after current in animation shop

Repeat with snow layers 3 & 4

I resized mine to 650 pixels wide

Frame properties 15

Save as gif and you're all done

I hope you have enjoyed doing this tutorial

:)