Showing posts with label Angels. Show all posts

Thursday, June 28, 2012

Lil Angel

Click for larger view

This tutorial was written by Sharon A on June 28, 2012 & is copyright protected
For more info read my TOU

Supplies Needed
I used the elements which came with the tube
If you're using a different tube then you'll need a rainbow with clouds

Plugins
Maura Meister Copies
DSB Flux Bright Noise

The tube I used Mischievous Little Angel (12-2) is by  Chrissy Clark, you can purchase this tube from CDO here

The name of the font I used is Applejuiced


Open new transparent canvas 930x375, we will resize later
Floodfill with a color from your tube

Paste your tube as a new layer
Resize as needed
Duplicate & hide the top one
Apply maura meister copies
Preset menu, wallpaper rotate, number 22
Apply gaussian blur>radius 20

Add your background text
I used Applejuiced size 36
Align center & convert to raster
Apply mura meister copies, preset menu on tiling angle, default settings
Change layer properties to soft light

Unhide your tube
Add drop shadow

Paste your rainbow as a new layer
Move to below your tube
Using your magic wand select the rainbow stripes
Apply bright noise, intensity 60, mix checked
Deselect

Select the clouds with your magic wand
Duplicate 2 times
Apply bright noise, intensity 40, mix checked
Repeat on other 2 layers changing intensity to 45 & 50
Deselect
Hide the 2 bottom animation layers

Duplicate your 2nd background layer
Send to the top
Select all, float, defloat
Contract 12
Delete & deselect
Add an inner bevel & drop shadow

Duplicate 2 times
Apply bright noise using same settings as before
Hide the 2 bottom animation layers

Resize all layers to 70%

Add your text, name & © info


Animation:

Hide the middle & bottom animation layers
Copy merged & paste into animation shop

Undo your merge
Hide the top animation layers & unhide the middle ones
Copy merged & paste after current in animation shop

Undo your merge
Hide the middle animation layers & unhide the bottom ones
Copy merged & paste after current in animation shop

View your animation

Save as gif & you're all done!

I hope you enjoyed my tutorial

Your comments are very much appreciated either here on this post or on the chat box.  I've made it easy for you to post on this tut by turning off the requirement of having to type in a confirmation code

I would love to post your © compliant result, just email it to me with ATT Sharon & the tut name in the subject line

You'll find my email blinkie on your left

:)


Result by Kaye W


Monday, June 25, 2012

An Angels Light

Click for larger view

This tutorial was written by Sharon A on June 25, 2012 & is copyright protected
For more info read my TOU

Supplies Needed
Texture, pattern & cloud here

Plugins
Xenofex Constellation

The tube I used Angels Prayer (8-1) is by The Vintange Angel™, you can purchase this tube from CDO here

The name of the font I used is Tagettes


Open new transparent canvas 930x420, we will resize later
Floodfill with a color from your tube
Apply texture, size 125, depth 1

Add a new raster layer
Flood with your lace pattern, scale 75
Duplicate 2 times

Apply constellation, settings on small star constellation, keep original image checked
Repeat on other 2 layers clicking the random seed button each time
Hide the middle & bottom lace layers

Paste your tube as a new layer
Resize as needed
Add drop shadow
Position on one side
Duplicate & mirror

Paste your cloud as a new layer

Add my text or use your own
I used the font Tagettes size 48 using the same color as my bg floodfill
Align center
Add an inner bevel & drop shadow

The warmth of an angel's light
can comfort and illuminate
the whole world

Resize all layers to 70%

Add your text, name & © info


Animation:

Hide animation 2 & 3
Copy merged & paste into animation shop

Undo your merge
Hide animation 1 & unhide #2
Copy merged & paste after current in animation shop

Undo your merge
Hide animation 2 & unhide #3
Copy merged & paste after current in animation shop

View your animation

Save as gif & you're all done!

I hope you enjoyed my tutorial

Your comments are very much appreciated either here on this post or on the chat box.  I've made it easy for you to post on this tut by turning off the requirement of having to type in a confirmation code

I would love to post your © compliant result, just email it to me with ATT Sharon & the tut name in the subject line

You'll find my email blinkie on your left

:)


Monday, April 30, 2012

Angel With Horns


Click for larger view

This tutorial was written by Sharon A on April 30, 2012 & is copyright protected
For more info read my TOU

Supplies Needed
Supplies here

The tube I used Devious is a free tube by Lady Mishka, you can get this tube from PFD here

The name of my font is Tamborine
I used size 60


Open a new transparent canvas 930x375, we will resize later
Floodfill with a color from your tube
Add texture with these settings


Add a new raster layer
Select all
Paste your flower into selection
Deselect
Change layer properties to luminance legacy
Add drop shadow

Paste your tube as a new layer
Resize as needed
Position in a lower corner
Add drop shadow
Duplicate & mirror

Paste your lace as a new layer
Resize to 56%
Position in upper right corner
Duplicate, mirror & merge down
Add drop shadow
Move up so only the lacey part is showing, see my tag
Select around your tag with your selection tool
Crop to selection
Duplicate your lace
Flip & merge down

Paste your floral swirl as a new layer
Duplicate & rotate right 30
Repeat this 8 more times
You'll have 10 swirl layers

Resize all layers to 70%

Add your text, name & © info


Animation:

Hide all your swirl layers except the top one
Merge visible
Copy & paste into animation shop

Undo your merge
Hide your top swirl & unhide your second one
Merge & paste after current in animation shop

Repeat until you have all 10 frames pasted

Select all your frames & copy
Activate your last frame
Paste after current
Repeat 2 more times
You'll have 40 frames

Reverse the last 10 frames and change frame properties to 3

View your animation

Save as gif & you're all done!

I hope you enjoyed my tutorial

Your comments are very much appreciated either here on this post or on the chat box.  I've made it easy for you to post on this tut by turning off the requirement of having to type in a confirmation code

I would love to post your © compliant result, just email it to me with ATT Sharon & the tut name in the subject line

You'll find my email blinkie on your left

:)


Result by Kaye W


Sunday, April 29, 2012

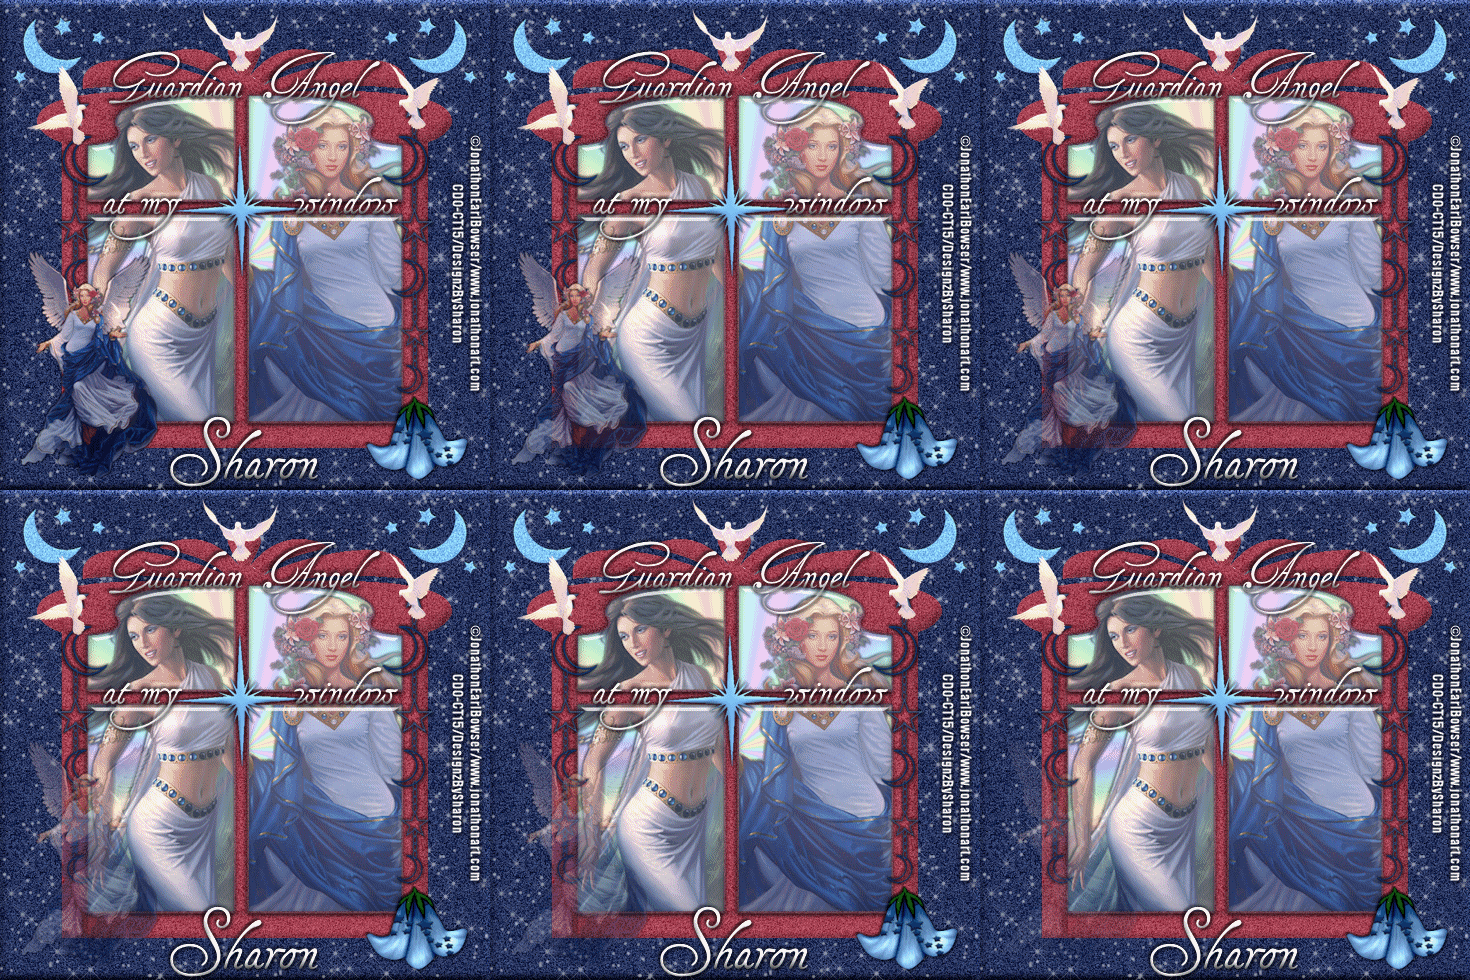
Guardian Angel At My Window

Click for larger view

This tutorial was written by Sharon A on Apr 29, 2012 & is copyright protected
For more info read my TOU

Supplies Needed
Celestial scrapkit by me here

Plugins
DSB Flux Bright Noise
Eyecandy glass
Xenofex Constellation

The tubes I used Tides (1-2) & Celestial (2-1) are by Jonathon Earl Bowser, you can purchase these tubes from CDO here

The name of my font is Tagettes
I used size 36 & 48


Open new transparent canvas 700x700, we will resize later
Floodfill with dark blue
Add an inner bevel
Apply bright noise intensity 50, mix checked
Apply contellation
Settings>medium>keep original image checked

Paste your window as a new layer
Holding down your shift key select all 4 winow panes with your magic wand
Expand 3

Add a new raster layer
Floodfill with a rainbow gradient
I set mine on radial, angle 45, repeats 12
Move to below your frame
Do Not Deselect

Paste your first tube as a new layer
Resize as needed
Add drop shadow
Position on left side of the windown

Paste your second tube as a new layer
Repeat what you did with the first one
Position on right side of window
Merge down
Invert your selection
Delete & deselect

Apply bright noise to your window intensity 35, mix checked

Holding down your shift key click inside the window panes again
Expand 3
Add a new raster layer

Apply eyecandy glass
Settings>clear
Lighting>click on select from file>sky sun & dusk
Deselect

Paste moon & stars 2 as a new layer
Floodfill with a sky blue
Resize to 40%
Add an inner bevel & drop shadow
Position in the upper left corner
Duplicate, mirror & merge down
Repeat bright noise changing intensity to 40, mix checked

Paste moon & star chain as a new layer
Resize to 50%
Position on right side of your window
Add drop shadow
Duplicate & mirror

If you're using the same tube as I am:
Paste layer 7 from your tube as a new layer
Resize to 50%

Select around the lower left dove
Copy, cut & deselect
Paste as a new layer
Position at the upper left of your frame covering the top of your moon & star chain

Repeat with the lower right dove
Position on upper right of your frame

Move the remaining dove to the very top of your window frame

If you're using a different tube then you can subsititute the doves with something else

Paste flower 5 as a new layer
Erase the hook
Resize to 30%
Position on lower right corner of your window
Add drop shadow

Paste flare 3 as a new layer
Floodfill with your sky blue
Resize to 60%
Position on your window as shown on my tag
Add an inner bevel & drop shadow

Paste your angel as a new layer
Resize as needed to make her small
Position on the bottom left of your window frame
Add drop shadow

Duplicate
Change layer opacity to 90

Keep duplicating decreasing layer opacity by 10 until you're down to 20
You'll have 9 angel layers

Resize all layers to 70%

Add your text, name & © info


Animation:

Hide all your angel layers except the bottom one
Merge visible
Paste into animation shop

Hide your bottom angel & unhide the next one up
Merge visible & paste after current in animation shop

Keep doing this until all 9 frames are pasted

I changed the frame properties on frames 2 - 8 at 45
Frames 1 & 9 at 90

View your animation

Save as gif & you're all done!

I hope you enjoyed my tutorial

Your comments are very much appreciated either here on this post or on the chat box.  I've made it easy for you to post on this tut by turning off the requirement of having to type in a confirmation code

I would love to post your © compliant result, just email it to me with ATT Sharon & the tut name in the subject line

You'll find my email blinkie on your left

:)


Result by Kaye W


Friday, April 20, 2012

Darling Angels

Click for larger view

This tutorial was written by Sharon A on Apr 20, 2012 & is copyright protected
For more info read my TOU

Supplies Needed
Deko here

Plugins
DC Special Nylon
Graphics Plus Cross Shadow
DSB Flux Bright Noise

The tube I used Miracles (16-2) is by Rachel Anderson, you can purchase this tube from CDO here

The name of the font I used is Applejuiced
I used size 48 & 60


Open new transparent canvas 930x375, we will resize later
Floodfill with a color from your tube
Apply dc special nylon using default settings
Apply graphics plus cross shadow changing the 2 bottom #'s to 80

Paste your deko as a new layer
Duplicate, mirror & merge down
Duplicate, flip & merge down
Positon at the top center
Change layer properties to luminance legacy
Add drop shadow

Paste your tube as a new layer
If you're using the same tube as me resize to 93% and position in the lower right corner, otherwise resize as needed
Duplicate, mirror & merge down
Add drop shadow

Using your magic wand, tolerance set on 20, hold down your shift key & select around the wings & the cats
Or you can use your freehand selection tool

Duplicate 2 times
Apply dsb flux bright noise intensity 35, darker checked
Repeat on other 2 layers changing intensity to 40 & 45
Deselect

Resize all layers to 70%

Add your text, name & © info


Animation:

Hide animation 2 & 3
Merge visible
Copy & paste into animation shop

Undo your merge
Hide animation 1 & unhide #2
Merge & paste after current in animation shop

Undo your merge
Hide animation 2 & unhide #3
Merge visible & paste after current in animation shop

View your animation

Save as gif & you're all done!

I hope you enjoyed my tutorial

Your comments are very much appreciated either here on this post or on the chat box.  I've made it easy for you to post on this tut by turning off the requirement of having to type in a confirmation code

I would love to post your © compliant result, just email it to me with ATT Sharon & the tut name in the subject line

You'll find my email blinkie on your left

:)


Thursday, April 19, 2012

Lilac Angel

Click for larger view

This tutorial was written by Sharon A on Apr 19, 2012 & is copyright protected
For more info read my TOU

Supplies Needed
White Lilac here

Plugins
Mura Meister Copies
Tramages Tow The Line
Graphics Plus Cross Shadow
DSB Flux Bright Noise


The tube I used Angel in Lilac is by Jasmine Becket-Griffith, you can purchase this tube from CDO here

The name of the font I used is Tagettes
I used size 48 & 60


Open new transparent canvas 930x375, we will resize later
Floodfill with a color from your tube
Apply tramages tow the line
Change the top # to 45
Apply graphics plus cross shadow changing the 2 bottom #'s to 90

Paste your lilac as a new layer
Resize to 42%
Duplicate & hide the original for now

On the duplicated lilac:
Use your eraser tool to erase the leave
Resize to 30%
Apply mura meister copies
Line>number 39
Change layer properties to luminance legacy
Duplicate 2 times

Effects>distortion effects>wave
Use these settings


Repeat on other 2 layers increasing the horizontal displacement by 1 each time
Rename these layers to animation 1, 2 & 3

Paste your tube as a new layer
Resize as needed and add drop shadow

Unhide your lilac layer & move to the top
Position on the left
Add drop shadow
Change layer properties to luminance legacy
Duplicate, mirror & merge down
Change layer opacity to 40
Add another drop shadow

Resize all layers to 70%

Add your text, name & © info

I merged my text & name
I then applied dsb flux bright noise, intensity 55, mix checked


Animation:

Hide animation 2 & 3
Merge visible
Copy & paste into animation shop

Undo your merge
Hide animation 1 & unhide #2
Merge & paste after current in animation shop

Undo your merge
Hide animation 2 & unhide #3
Merge visible & paste after current in animation shop

View your animation

Save as gif & you're all done!

I hope you enjoyed my tutorial

Your comments are very much appreciated either here on this post or on the chat box.  I've made it easy for you to post on this tut by turning off the requirement of having to type in a confirmation code

I would love to post your © compliant result, just email it to me with ATT Sharon & the tut name in the subject line

You'll find my email blinkie on your left

:)


Sunday, April 15, 2012

Tranquility Forever

Click for larger view

This tutorial was written by Sharon A on Apr 15, 2012 & is copyright protected
For more info read my TOU

Supplies Needed
Beautiful scrapkit Twilight Forever PT 2 Honeymoon by Jenny here

Plugins
DC Special Nylon
Graphics Plus Cross Shadow
DSB Flux Bright Noise
Eyecandy Texture Noise


The tube I used Tranquility (7-3) is by The Vintage Angel™, you can purchase this tube from CDO here

The name of my font is Aquarelle
I used size 48


Open new transparent canvas 700x700, we will resize later
Select all
Paste paper 3 into selection
Deselect
Apply dc special nylon using default settings
Apply graphics plus cross shadow, change the 2 bottom #'s to 70

Paste your tube as a new layer
Resize as needed & position on the lower right corner
Add drop shadow
Duplicate
Hide your top tube layer

Using your freehand selection tool, select around the wings
Copy & cut
Duplicate 2 times
Apply eyecandy texture noise
Settings>crinkle noise
Repeat on other 2 layers clicking on the random seed button each time
Deselect
Rename these layers to animation 4, 5 & 6
Hide all 3

Unhide the top tube layer
Using your freehand selection tool select around the ball
Copy & cut
Paste as a new layer & position back into place
Hide & unhide this layer, if you see any movement then move the ball
Do this until you see no movement

Duplicate 2 times
Apply dsb flux bright noise intensity 40, mix checked
Repeat on other 2 layers changing intensity to 45 & 50
Deselect
Rename these layers to animation 1, 2 & 3

Delete the tube layer you just cut the ball from

You'll have 3 tube layers & 3 ball layers

Paste flower 5 as a new layer
Resize to 10%
Position in lower left corner
Add drop shadow
Duplicate & mirror
Resize to 75%
Position next to the other one

Paste flower 4 as a new layer
Resize to 35%
Position over flower 5
Add drop shadow
Duplicate & mirror
Resize to 75%
Position next to the other one

Paste flower deco as a new layer
Resize to 60%
Move to lower left corner
Add drop shadow
Move to between the flower 5 layers
Change layer properties to luminance

Open dust 3
Resize all layers to 700x700
Copy & paste as a new layer
Close original dust, dont save changes
Duplicate & mirror
Merge down
Duplicate & flip
Merge down

If using the same tube I am:
Copy & paste the flower layer from your tube
Resize 50%
Add drop shadow
Positon upper right corner
Duplicate & mirror
Merge down

If using a different tube:
Use a flower from the kit

Resize all layers to 70%

Add your text, name & © info


Animation:

Hide your middle & bottom animation layers
Merge visible
Copy & paste into animation shop

Undo your merge
Hide your top animation layers & unhide the middle ones
Merge & paste after current in animation shop

Undo your merge
Hide your middle animation layers & unhide the bottom ones
Merge visible & paste after current in animation shop

View your animation

Save as gif & you're all done!

I hope you enjoyed my tutorial

Your comments are very much appreciated either here on this post or on the chat box.  I've made it easy for you to post on this tut by turning off the requirement of having to type in a confirmation code

I would love to post your © compliant result, just email it to me with ATT Sharon & the tut name in the subject line

You'll find my email blinkie on your left

:)


Wednesday, April 11, 2012

Spring Dreams

Click for larger view

This tutorial was written by Sharon A on Apr 11, 2012 & is copyright protected
For more info read my TOU

Supplies Needed
New scrapkit Spring Dreams by Jenny at Jennys Designz here

Plugins
DC Special Nylon
Eyecandy Texture


The tube I used Lily Bloom (4-1) is by Samantha Nowak, you can purchase this tube from CDO here

The name of my font is Tagettes
I used size 36 for my text & 48 for my name


Open new transparent canvas 700x700, we will resize later
Select all

Open paper 3, resize to 700x700 pixels
Copy & paste into selection
Deselect
Apply dc special nylon with these settings

Repeat

Paste your tube as a new layer
Add drop shadow
Using your magic wand, tolerance 25, hold down your shift key & click around on the blue circle
If your using a different tube then use your freehand selection tool & select around the wings
Duplicate 2 times

Apply eyecandy texture noise set on sparkle
Repeat on other 2 layers clicking on the random seed button each time
Deselect

Paste grass as a new layer
Resize to 75%
Move to lower left corner
Add drop shadow
Duplicate & mirror
Duplicate & move to the center
Merge these 3 layers

Paste flower 3 as a new layer
Resize to 10%
Position lower right side
Add drop shadow
Move to below your grass layer
Duplicate & mirror

Paste grass 2 as a new layer
Resize to 60%
Add drop shadow
Positon on left side
Duplicate & mirror
Move to below your grass layer

Paste flower 5 as a new layer
Resize to 10%
Position near the left, as shown on my tag
Add drop shadoe
Duplicate & mirror

Paste flower 1 as a new layer
Resize to 60%
Add drop shadow
Move to near the right side
Move to below your grass 2 layer

Paste flower 2 as a new layer
Resize to 10% then again to 75%
Position near the left bottom of your tube
Add a drop shadow
Move to below your grass layer
Duplicate & mirror
Duplicate again & position in between the other flower 2 layers

Paste geese as a new layer
Reize to 50%
Position near lower left
Add drop shadow
Duplicate & mirror
I moved them up a bit

Paste dog as a new layer
Resize to 35%
Position lower center
Add drop shadow

Resize all layers to 70%

Add your text, name & © info


Animation:

Hide animation 2 & 3
Merge visible
Copy & paste into animation shop

Undo your merge
Hide animation 1 & unhide #2
Merge & paste after current in animation shop

Undo your merge
Hide animation 2 & unhide #3
Merge visible & paste after current in animation shop

View your animation

Save as gif & you're all done!

I hope you enjoyed my tutorial

Your comments are very much appreciated either here on this post or on the chat box.  I've made it easy for you to post on this tut by turning off the requirement of having to type in a confirmation code

I would love to post your © compliant result, just email it to me with ATT Sharon & the tut name in the subject line

You'll find my email blinkie on your left

:)


Result by Kaye W


My Little Angel

Click for larger view

This tutorial was written by Sharon A on Apr 10, 2012 & is copyright protected
For more info read my TOU

Supplies Needed
Flower mist here

Plugins
DC Special Nylon
Graphics Plus Cross Shadow
Xenofex Constellation


The tube I used Little Souls (79-3) is by Karen Middleton, you can purchase this tube from CDO here

The name of the font I used is Tagettes
I used size 36 for the 1st 2 words, 42 for the word Angel & 48 for my name


Open new transparent canvas 940x400, we will resize later
Floodfill with a color from your tube
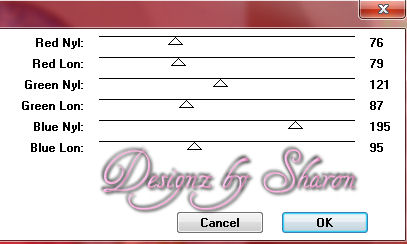
Apply dc special nylon, I played with the red to change the shade a bit
Apply graphics plus cross shadow changing the 2 bottom #'s to 70

Paste flower mist as a new layer
Resize to 90%
Position to one side, not quite all the way, leave a little space
Duplicate & mirror
Merge down
Change layer properties to overlay

Duplicate 2 times
Apply constellation, click on settings then on low density stars
Make sure the keep original image box is checked
Repeat on your other 2 layers clicking the random seed button each time

Paste your tube as a new layer
Resize as needed
Add drop shadow

Duplicate & resize to 40%
Position in upper left corner
Duplicate & mirror
Position in lower right corner

Add a new raster layer
Floodfill with your color
Select all
Contract 8
Delete & deselect
Add an inner bevel & drop shadow

Add a new raster layer
Floodfill with your color
Select all
Contract 20
Invert your selection
Delete
Deselect

Select all>float>defloat
Contract 8
Delete & deselect
Add an inner bevel & drop shadow
Move to below your tube layers

Resize all layers to 70%

Add your text, name & © info


Animation:

Hide animation 2 & 3
Merge visible
Copy & paste into animation shop

Undo your merge
Hide animation 1 & unhide #2
Merge & paste after current in animation shop

Undo your merge
Hide animation 2 & unhide #3
Merge visible & paste after current in animation shop

View your animation

Save as gif & you're all done!

I hope you enjoyed my tutorial

Your comments are very much appreciated either here on this post or on the chat box.  I've made it easy for you to post on this tut by turning off the requirement of having to type in a confirmation code

I would love to post your © compliant result, just email it to me with ATT Sharon & the tut name in the subject line

You'll find my email blinkie on your left

:)


Result by Kaye W


Tuesday, April 10, 2012

Angel of Spring

Click for larger view

This tutorial was written by Sharon A on Apr 10, 2012 & is copyright protected
For more info read my TOU

Supplies Needed
Template # 145 by me here

A dove if you're using a different tube than I am

Plugins
Krustys FX Vol II Pattern Q
Xenofex Constellation
Eyecandy Texture Noise


The tube I used Celestial (2-1) is by Jonathon Earl Bowser, you can purchase this tube from CDO here

The name of my font is Tamborine
I used size 60


Open your template, shift D to duplicate & close original
Delete credit layer

Activate your top frame layer
Paste your tube as a new layer
Resize as needed
Positon over the bottom rectangle
Line up the bottom up your tube with the bottom of the frame

Using your freehand selection tool select around the wings
Duplicate 2 times
Apply eyecandy texture noise set on transparent haze, random seed 1
Repeat on the other 2 layers clicking on the random seed button each time
Deselect

Floodfill your bg layer with a color from your tube
Apply krustys pattern Q using default settings, you'll need to play with the color sliders
Duplicate 2 times
Apply graphics plus cross shadow using default settings

Duplicate 2 times
Apply xenofex constellation, click on settings then on medium, make sure keep original image is checked
Repeat on other 2 layers clicking on the random seed button each time

Floodfill your rectangles with your 1st color
Select all>float>defloat
Apply pattern Q with the same settings as before

Pick a another color from your tube & floodfill your frames
Add an inner bevel & drop shadow

Paste one of the dove layers from your tube
Select around 1, copy & paste as a new layer
Position in the upper rectangle
Paste into animation shop
Effects>insert image effect>zoom
Change effect length to 1.9
Select all & change frame properties to 15
Resize to 70%
Activate the 1st frame & select all
Set aside for now

Copy & paste one of the other doves
Resize to 40%
Position to one side of the large dove
Duplicate & mirror

Floodfill your small rectangle layer with another color from your tube
Add drop shadow

Activate your flowers layer
Select all>float>defloat
Add a new raster layer
Floodfill with one of your colors
Deselect
Change layer properties to overlay

Merge your butterfly layer
Do the same you did with the flowers

Resize all layers to 70%

Add your text, name & © info


Animation:

Hide your large dove, keep it hidden on all frames

Hide middle & bottom animation layers
Merge visible
Copy & paste into animation shop

Undo your merge
Hide your top animation layers & unhide the middle ones
Merge & paste after current in animation shop

Undo your merge
Hide your middle animation layers & unhide the bottom ones
Merge visible & paste after current in animation shop

You'll have 3 frames but your dove has 12
Select all, copy, activate your last frame & paste after current
Do this until you have 12 frames
Select all & change frame properties to 15
Activate frame 1

Grab your dove by frame 1 & drop him onto the center of the top rectangle of frame 1 on your tag

View your animation

Save as gif & you're all done!

I hope you enjoyed my tutorial

Your comments are very much appreciated either here on this post or on the chat box.  I've made it easy for you to post on this tut by turning off the requirement of having to type in a confirmation code

I would love to post your © compliant result, just email it to me with ATT Sharon & the tut name in the subject line

You'll find my email blinkie on your left

:)


Result by Priscie


Sunday, April 8, 2012

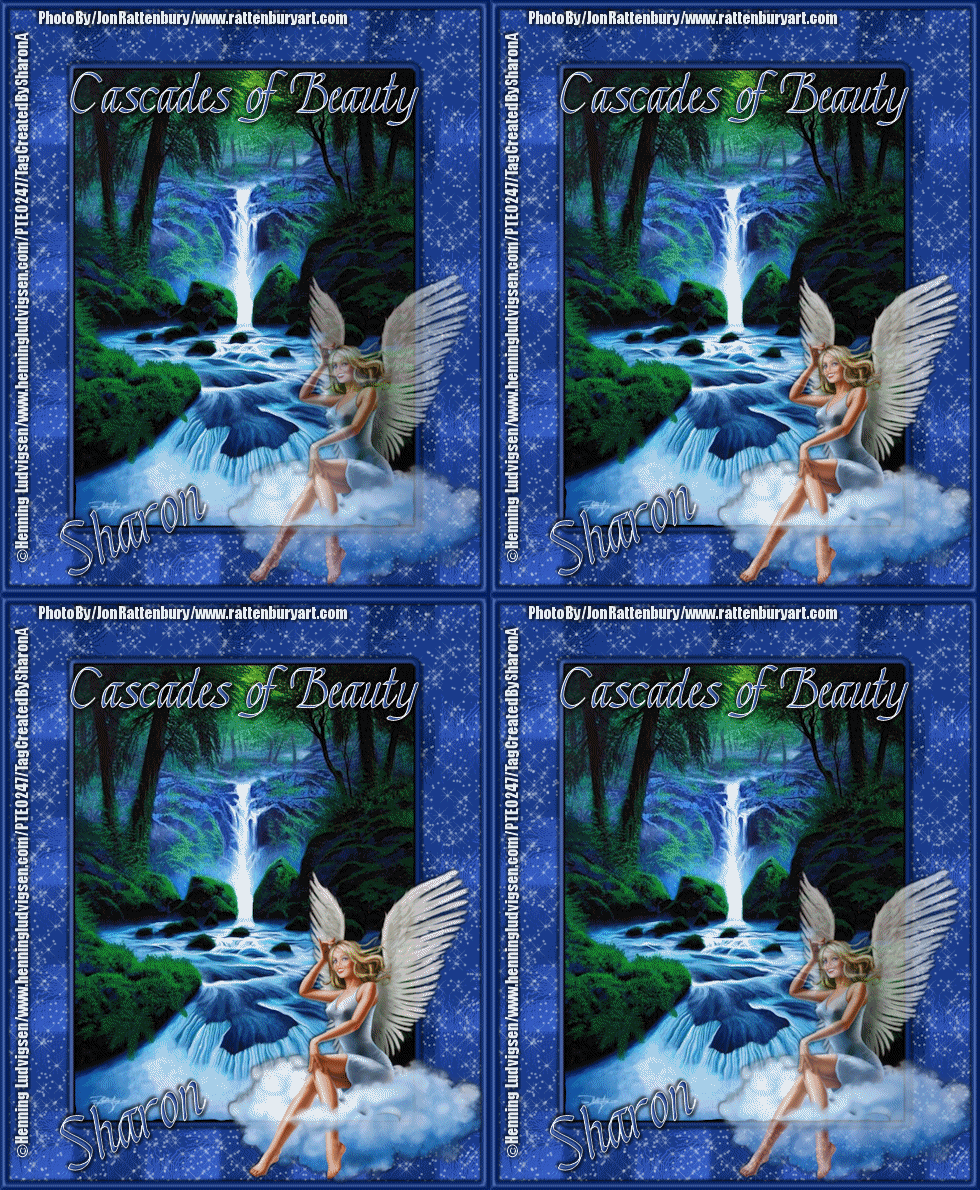
Cascades of Beauty

Click for larger view

This tutorial was written by Sharon A on April 8, 2012 & is copyright protected
For more info read my TOU

Supplies Needed
Photo of your choice
The photo I used is called Cascades of Beauty and is by Jon Rattenbury
You can purchase his photos at PTE here

Plugins
Xenofex Constellation
Eyecandy Jiggle


The tube I used Angel is by Henning Ludvigsen, you can purchase this tube from PTE here


The font I used is called Chancery Cursive
I used size 55 for my text & 72 for my name


Open a new transparent canvas 700x850, we will resize later
Floodfill with a color from your tube
Add texture with these settings


Apply xenofex constellation with these settings
Click on settings
Click on medium
Check keep original image
Repeat on the same layer clicking the random seed button

Paste your photo as a new layer
Add drop shadow

Add a new raster layer
Floodfill with your color

Activate your photo layer
Select all>float>defloat
Expand 8

Invert your selection
Delete & deselect
Move to below your photo
Add an inner bevel & drop shadow

Activate your photo layer
Zoom in on the waterfall area
Using your freehand selection tool select around the water
You don't need to be exact

Duplicate 3 times
Apply eyecandy jiggle with these settings
Movement type>bubbles
Size 15, warp amount 3, twist 4, random seed 1

Repeat on other 3 layers clicking on the random seed button each time

Add your tube as a new layer
Resize as needed
Position lower right corner
Add drop shadow
Change layer opacity to 60

Resize all layers to 70%

Add your text, name & © info


Animation:

Hide animation 2 & 3 & 4
Merge visible
Copy & paste into animation shop

Undo your merge
Hide animation 1 & unhide #2, change the layer opacity on your tube to 70
Merge & paste after current in animation shop

Undo your merge
Hide animation 2 & unhide #3, change the layer opacity on your tube to 80
Merge visible & paste after current in animation shop

Undo your merge
Hide animation 3 & unhide #4, change the layer opacity on your tube to 90
Merge visible & paste after current in animation shop

View your animation

Save as gif & you're all done!

I hope you enjoyed my tutorial

Your comments are very much appreciated either here on this post or on the chat box.  I've made it easy for you to post on this tut by turning off the requirement of having to type in a confirmation code

I would love to post your © compliant result, just email it to me with ATT Sharon & the tut name in the subject line

You'll find my email blinkie on your left

:)


Result by Kaye W