Showing posts with label Marco Guaglione. Show all posts

Wednesday, April 25, 2012

Playing With Tigers

Click for larger view

This tutorial was written by Sharon A on April 25, 2012 & is copyright protected
For more info read my TOU

Plugins
Graphics Plus Cross Shadow
Tramages Holiday in Eygpt
VM Extravaganza Shoutin
DSB Flux Bright Noise
Screenworks Fabric Weave

The tube I used Tiger (PTE0391) is by Marco Guaglione, you can purchase this tube from PTE here

The font I used is called Tamborine
I used size 48 & 60

For more paw print divider visit my other blog


Open a new transparent canvas 930x375, we will resize later
Floodfill with a color from your tube
Duplicate

Apply tramages holiday in eygpt size 10

Apply vm extravaganz shoutin with these settings


Add an inner bevel & drop shadow
Apply dsb flux bright noise intensity 60, mix checked

Back to your bg layer
Apply screenworks fabric weave

Paste your background tube as a new layer
Add drop shadow
Position at the center bottom
Click around on the circle with your magic wand
Duplicate 2 times
Apply graphics plus cross shadow using default settings
Repeat on other 2 layers changing the 2 bottom #'s to 108 & 88
Deselect

Paste your main tube as a new layer
Resize as needed
Position in a lower corner
Add drop shadow
Duplicate & mirror
Resize to 75%
Position in opposite corner

Resize all layers to 70%

Activate your elipse shape tool, width 1, foreground white, background null
Draw around the circle of your tube
Align center & resize if needed it the same size as the circle on your tube
Align center

Add a new vector layer
Hove your text tool over your shape, when you see the little A right click & type your text
Align horizontal
Add inner bevel & drop shadow
Delete your shape layer
Apply bright noise intensity 50, mix checked

Add your name & © info


Animation:

Hide animation 2 & 3
Merge visible
Copy & paste into animation shop

Undo your merge
Hide animation 1 & unhide #2
Merge & paste after current in animation shop

Undo your merge
Hide animation 2 & unhide #3
Merge visible & paste after current in animation shop

View your animation

Save as gif & you're all done!

I hope you enjoyed my tutorial

Your comments are very much appreciated either here on this post or on the chat box.  I've made it easy for you to post on this tut by turning off the requirement of having to type in a confirmation code

I would love to post your © compliant result, just email it to me with ATT Sharon & the tut name in the subject line

You'll find my email blinkie on your left

:)


Result by Kaye W


Monday, October 17, 2011

Buddies

Click for larger view

This tutorial was written by Sharon on Oct 17, 2011
For more info read my TOU

Supplies Needed
Template # 135 by me here

Plugins
Xero Fritillary
Graphics Plus Cross Shadow

The tube I used Tiger is by Marco Guaglione, you can purchase this tube from PTE here

Open your template, shift D to duplicate & close original
Delete credit layer

Activate diamond shape layer
Select all>float>defloat
Floodfill with a pattern

Paste your tube as a new layer
Resize as needed
Invert your selection
Delete
Deselect
Add drop shadow

Activate diamond frame layer
Select all>float>defloat
Floodfill with a color from your tube
Deselect
Apply an inner bevel of your choice
Add drop shadow

Activate the circle layer
Select all>float>defloat
Floodfill with a gradient Style Linear, angle 0, repeats 0
Apply xero fritillary changing top & bottom #'s to 10
Apply graphics plus cross shadow using default settings
Deselect

Activate the bars layer
Select all>float>defloat
Floodfill with the same pattern you used before
Apply inner bevel & drop shadow

Floodfill raster 1 with the same color you used before

Resize all layers to 70%

Add your name, text & your © info

Merge all

Save as jpg & you're all done!

I hope you enjoyed my tutorial

I would love to post your © compliant result, just email it to me with the tut name in the subject line

:)

Result by Kaye W


Friday, September 16, 2011

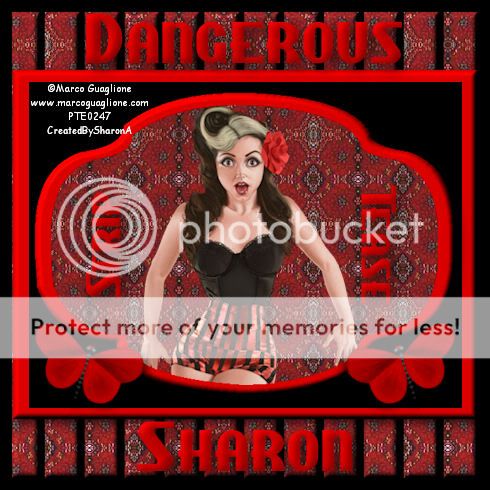
Dangerous Striptease

Click for larger view

This tutorial was written by Sharon on Sept 16, 2011
For more info read my TOU

Supplies Needed
Template # 120 by me here

A red butterfly

The tube I used Dangerous Striptease is by Marco Guaglione, you can purchase this tube from PTE here

Today my dad would have turned 84 but he died at a young age on Sept 1, 1979 just before turning 52.  So today all my tuts are dedicated to him.
Love you dad!


Open your template, shift D to duplicate & close original
Delete credit layer

Activate the bars layer
Floodfill with a red pattern
Apply inner bevel using bevel #2 width 10
Add drop shadow

Floodfill the small shape layer with the same pattern
Select all>float>defloat

Paste your tube as a new layer
Resize as needed
Invert your selection
Delete
Deselect

Activate the large shape layer
Floodfill with red
Apply inner bevel using bevel #2 width 10
Add drop shadow

Do the same with the large rectangle

Floodfill raster 1 and small rectangle with black

Paste your butterfly as a new layer
Resize as needed
Position lower left of the small rectangle area
I rotated right 25
Add drop shadow
Duplicate & mirror

Resize all layers to 70%

Add your text

Add your name & your © info

Merge all

Save as jpg & you're all done!

I hope you enjoyed my tutorial

I would love to post your © compliant result, just email it to me with the tut name in the subject line

:)


Saturday, August 27, 2011

Broken Love

Click for larger view

This tutorial was written by Sharon on August 27, 2011
For more info read my TOU

Supplies Needed
Scrapkit Hope by Bea here

Red Frame # 1 made by me here

The tube I used is by Marco Guaglione, you will need a license to use which you can purchase from PTE here


Open new transparent canvas 700x700, we will resize later

Paste your frame as a new layer
Using your magic wand click inside the frame
Hold down your shift key and click in the corner sections of the frame

Paste paper 14 as a new layer
Invert your selection
Delete
Deselect
Move to below the frame

Paste doodle 1 as a new layer
Move to one side
Add drop shadow
Duplicate & mirror 

Paste your tube as a new layer
Resize if needed
Move to below the frame layer
Add drop shadow

Working just below the frame layer paste flower 3 as a new layer
Move to the left side
Add drop shadow

Paste flower 11 as a new layer
Resize to 75%
Add drop shadow
Position on flower 3 as shown on my tag
Duplicate & mirror
Reposition as shown on my tag

Paste flower 5 as a new layer
Resize to 35%
Add drop shadow
Position on the stem of flower 3
Duplicate & position at the top of flower 3
Duplicate
Position in upper right corner
Duplicate & flip

Paste flower 9 as a new layer
Resize to 60%
Position lower right
Add drop shadow

Paste deco as a new layer
Resize to 40%
Position as shown on my tag
Add drop shadow

Paste butterfly 2 as a new layer
Resize to 50%
Add drop shadow
Rotate left 45
Position as shown on my tag
Duplicate
Resize to 75%
Rotate right 90
Send layer to top
Position on the lower left of frame
Duplicate
Position between the flowers and the head of your tube

Working above the frame layer now
Paste bow 7 as a new layer
Resize to 50%
Add drop shadow
Move to above the frame layer
Position top center of frame

Paste heart 3 as a new layer
Resize to 35%
Rotate right 30
Position as shown on my tag
Add drop shadow

Paste corset 2 as a new layer
Resize to 40%
Position as shown on my tag
Rotate right 45
Add drop shadow

Resize all layers to 75%

Add your name & your © info

Merge all

Save as jpg & you're all done!

I hope you enjoyed my tutorial

I would love to post your © compliant result, just email it to me with the tut name in the subject line

:)


Friday, August 26, 2011

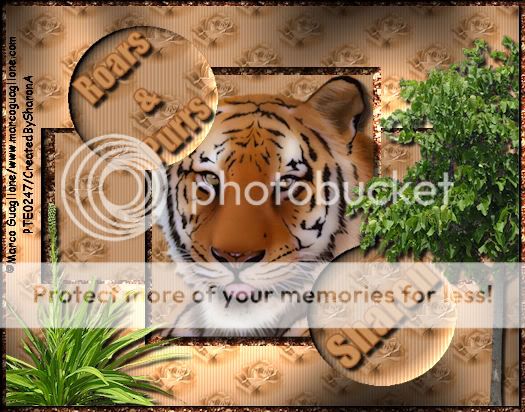
Roars & Purrs

Click for larger view

This tutorial was written by Sharon on August 26, 2011
For more info read my TOU

Supplies Needed
Template #115 by me here

These patterns
Right click to save


Plugins
Graphics Plus Cross Shadow
Xero Porcelain

The tube I used is by Marco Guaglione, you will need a license to use which you can purchase from PTE here


Open your template, shift D to duplicate & close original
Delete credit layer

Activate raster 5
Select all>float>defloat
Paste your tube as a new layer
Resize as needed
Invert your selection
Delete
Deselect
Apply xero porcelain effect using default setting

Floodfill rasters 1, 3, 6 & 7 with the rose pattern (Set pattern scale to 50%)

Apply inner bevel on rasers 6 & 7 using bevel #2 width 25

Floodfill rasters border, 2 & 4 with the brown pattern
Inner bevel on all 3 using same as above

Activate raster 1
Apply graphics plus cross shadow using default settings

Repeat cross shadow on rasters 2 & 4 and the border

Using your tube tool add a few things to decorate, I'm using an autumn theme
Add a new raster layer for each new element
Add drop shadow to each

Resize all layers to 75%

Add your name & your © info

Merge all layers

Save as jpg & you're all done!

I hope you enjoyed my tutorial

I would love to post your © compliant result, just email it to me with the tut name in the subject line

:)


Result by Kaye