Showing posts with label Jamie Kidd. Show all posts

Thursday, July 12, 2012

So Sexy

Click for larger view

This tutorial was written by Sharon A on July 12, 2012 & is copyright protected
For more info read my TOU

Plugins
Eyecandy Texture Swirl
Graphics Plus Cross Shadow
Xenofex Constellation
DSB Flux Bright Noise
Xero Porcelain
Mura Meister Copies

The tube I used Busty Wench (60-2) is by Jamie Kidd, you can purchase this tube from CDO here

The name of the font I used is Honey Script Light



Open new transparent canvas 930x420, we will resize later
Floodfill with a color from your tube
Apply eyecandy texture swirl
Settings on random large no twist long streaks
Apply cross shadow using default settings

Duplicate 2 times
Apply constellation
Settings on star field, keep original image checked
Repeat on other 2 layers clicking on the random seed button each time

Add a new raster layer
Activate your selection tool, set on rectangle
Starting at point 0, 90 and ending at 930, 200 make your selection
Floodfill with your bg color
Apply bright noise, intensity 35, mix checked

Contract selection 12
Selections>modify>select selection borders
Settings on Outside, width 12, anti alias checked

Adjust>brightness/contrast
Brightness -50 contrast 12
Add an inner bevel
Deselect

Paste your tube as a new layer
Resize as needed
Apply porcelain using default settings
Add drop shadow

Add a new raster layer
Activate your selection tool, set on rounded rectangle
Select around your tube, making the selection slightly bigger than your tube
Floodfill with a lighter or darker shade of your bg color
Deselect
Click with your magic wand
Contract 26
Delete & deselect

Click inside your frame with your magic wand
Expand 5
Activate your tube layer
Invert your selection
Delete & deselect

Click inside your frame again with the magic wand
Expand 5
Add a new raster layer
Floodfill with another shade of your bg color
Apply the same effects as on your bg
Move to below your tube layer

Click on your frame with the magic wand
Selections>modify>inside/outside feather 25

Selections>modify>contract>25

Adjust>brightness/contrast
Brightness at 75, contrast at 12
Deselect
(This will give it that nice rounded look)

Duplicate your bg layer and send to the top
Select all
Contract 12
Delete & deselect

Click on the border with your magic wand
Inside/outside feather 15

Activate your bg layer
Brightness/contrast -50 +12

Activate your border layer
Contract 15
Brightness/contrast 75 & 12
Add an inner bevel

Activate your text tool
I used honey script light size 36
Use a slightly different shade than your bg layer
Type your words
Apply mura meister copies
Preset menu on tiling angle, default settings
Move to above your bg layer

Resize all layers to 70%

Add your text, name & © info
Apply constellation to your name & text, same as before


Animation:

Hide animation 2 & 3
Copy merged & paste into animation shop

Undo your merge
Hide animation 1 & unhide #2
Copy merged & paste after current in animation shop

Undo your merge
Hide animation 2 & unhide #3
Copy merged & paste after current in animation shop

View your animation

Save as gif & you're all done!

I hope you enjoyed my tutorial

Your comments are very much appreciated either here on this post or on the chat box.  I've made it easy for you to post on this tut by turning off the requirement of having to type in a confirmation code

I would love to post your © compliant result, just email it to me with ATT Sharon & the tut name in the subject line

You'll find my email blinkie on your left

:)


Sunday, May 6, 2012

Praying for You

Click for larger view

This tutorial was written by Sharon A on May 6, 2012 & is copyright protected
For more info read my TOU

Supplies Needed
Flowers & frame I made for this tut here

Plugins
Eyecandy Weave

The tube I used Girl 6 (13-2) is by Jamie Kidd, you can purchase this tube from CDO here

The name of the font I used is Honey Script


Open new transparent canvas 700x700, we will resize later
Floodfill with a color from your tube
Apply eyecandy weave
Settings on plain distorted smeared dark shadows
Basic>change pattern to twill>gap width 4>click on fill with solid color and select your bg color

Paste your frame as a new layer
Click inside with your magic wand
Expand 3
Add a new raster layer
Paste your bg into selection
Move to below your frame
Do Not Deselect

Paste your close up tube as a new layer
Resize as needed & position into place
Invert your selection
Delete & deselect
Add drop shadow
Move to below your frame

Add drop shadow to your frame

Activate your bg layer
Select all
Add a new raster layer
Paste your main tube into selection
Move down
Change layer properties to soft light
Change layer opacity to 70
Using your selection too select around your tag & crop to selection

Back to the top

Paste your main tube as a new layer
Resize as needed
Position in the lower left corner
Add drop shadow

Paste your flowers as a new layer
Resize to 60%
Rotate left 35
Add drop shadow
Position near the left center of your frame
Duplicate, mirror & merge down
Duplicate & flip
Move into position just below your other one
Merge down
Move to below your frame

Duplicate your bg layer & send to the top
Select all
Contract 10
Delete & deselect
Add an inner bevel & drop shadow

Resize all layers to 70%

Add your text, name & © info

Merge all

Save as jpg & you're all done!


I hope you enjoyed my tutorial

Your comments are very much appreciated either here on this post or on the chat box.  I've made it easy for you to post on this tut by turning off the requirement of having to type in a confirmation code

I would love to post your © compliant result, just email it to me with ATT Sharon & the tut name in the subject line

You'll find my email blinkie on your left

:)


Result by Kaye W


Thursday, May 3, 2012

Fasinating

Click for larger view

This tutorial was written by Sharon A on May 3, 2012 & is copyright protected
For more info read my TOU

Supplies Needed
Forum Template by me here

The tube I used Fasinating (62-2) is by Jamie Kidd, you can purchase this tube from CDO here

The name of the font I used is Selfish
I used size 60 & 72


Open your template, shift D to duplicate & close original
Delete info layer

Activate your bg layer & floodfill with a color from your tube

Activate your middle frame
Floodfill with a lighter shade of your bg color

Click inside with your magic wand
Expand 3

Add a new raster layer
Floodfill with a lighter shade of your frame color
Move to below your middle frame
Do Not Deselect

Paste your tube as a new layer
Resize as needed
Invert your selection
Delete & deselect
Add drop shadow
Move to below your middle frame

Add drop shadow to your frame

Repeat the above steps for your other 2 frames using your close up tube
No need to add a floodfill layer for these
Duplicate & mirror the tube

Move lace to below your tube
Change layer properties to luminance legacy
Add drop shadow

Activate your border layer
Add a new raster layer
Floodfill with your light color
On your border layer select all>float>defloat
On your floodfill layer
Invert your selection, delete & deselect
Change layer properties to overlay
Merge down
Add an inner bevel & drop shadow

Move your left & middle frames to below your right frame
Merge all 3

Add 3 new raster layers
Floodfill with 3 shades of another color (I picked a color from the lips)
Hide all 3 floodfill layers for now

Activate your magic wand
Holding down your shift key click insdie all the little holes of your frames
Expand 3
On your floodfill layers
Unhide all 3
Invert your selection & delete
Hit delete on the other 2 layers then deselect
Rename these layers to animation 1, 2 & 3

Move your frame layer to above your floodfill layers

Resize all layers to 70%

Add your text, name & © info


Animation:

Hide animation 2 & 3
Merge visible
Copy & paste into animation shop

Undo your merge
Hide animation 1 & unhide #2
Merge & paste after current in animation shop

Undo your merge
Hide animation 2 & unhide #3
Merge visible & paste after current in animation shop

View your animation

Save as gif & you're all done!

I hope you enjoyed my tutorial

Your comments are very much appreciated either here on this post or on the chat box.  I've made it easy for you to post on this tut by turning off the requirement of having to type in a confirmation code

I would love to post your © compliant result, just email it to me with ATT Sharon & the tut name in the subject line

You'll find my email blinkie on your left

:)



Wednesday, May 2, 2012

Lets Snuggle

Click for larger view

This tutorial was written by Sharon A on May 2, 2012 & is copyright protected
For more info read my TOU

Supplies Needed
Frame & flower & made for this tut here
Plugins
DC Special Nylon
Xenofex Constellation

The tube I used Lulu (16-1) is by Jamie Kidd, you can purchase this tube from CDO here

The name of the font I used is Lyonesse
I used size 48


Open new transparent canvas 930x375, we will resize later
Floodfill with a color from your tube
Apply dc special nylon
I had to play with the colors, here's the settings I used for my color which is #8edaeb


Paste your frame as a new layer
Click inside with your magic wand
Add a new raster layer
Floodfill with a darker shade of your bg color
Deselect & move to below your frame

Activate your frame
Add a new raster layer
Floodfill with a lighter shade of your frame color
On your frame layer select all>float>defloat
On your floodfill invert your selection
Delete & deselect
Change layer properties to overlay
Merge down & add drop shadow

Paste your main tube as a new layer
Resize as needed
Add drop shadow

Activate your selection tool
Select an area on one side of your frame
You want it the same height as your frame and not all the way to the edge of your tag
Add a new raster layer
Paste your close up tube into selection
Deselect
Duplicate & mirror

Change layer properties on the left one to soft light & the right one to luminance legacy
Add drop shadow to both
Move the right one to the left & move to below your frame layer as shown on my tag

Paste your flower as a new layer
Position on the right side of your tag
Change layer properties to burn
Add drop shadow

Duplicate
Move to below your frame layer & position in the upper left area of your frame floodfill

Add a new raster layer
Floodfill with your dark color
Select all
Contract 10
Delete & deselect
Add an inner bevel & drop shadow

Duplicate 2 times
Apply constellation
Settings>star field>keep original image checked
Repeat on other 2 layers clicking the random seed button each time

Resize all layers to 70%

Add your text, name & © info


Animation:

Hide animation 2 & 3
Merge visible
Copy & paste into animation shop

Undo your merge
Hide animation 1 & unhide #2
Merge & paste after current in animation shop

Undo your merge
Hide animation 2 & unhide #3
Merge visible & paste after current in animation shop

View your animation

Save as gif & you're all done!

I hope you enjoyed my tutorial

Your comments are very much appreciated either here on this post or on the chat box.  I've made it easy for you to post on this tut by turning off the requirement of having to type in a confirmation code

I would love to post your © compliant result, just email it to me with ATT Sharon & the tut name in the subject line

You'll find my email blinkie on your left

:)


Sunday, April 29, 2012

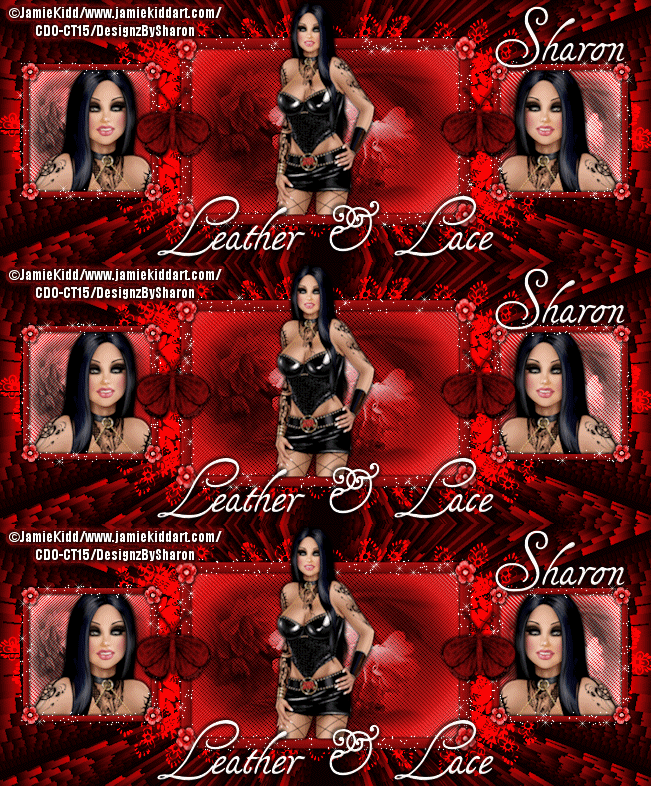
Leather & Lace

Click for larger view

This tutorial was written by Sharon A on Apr 29, 2012 & is copyright protected
For more info read my TOU

Supplies Needed
Forum Template 65 by me here

Plugins
Plugins 08 AB Wire Meshings
Xenofex Constellation

The tube I used Tiamat (45-3) is by Jamie Kidd, you can purchase this tube from CDO here

The name of the font I used is Tagettes
I used size 42


Open your template, shift D to duplicate & close original
Delete credit layer

Activate your bg layer
Add a new raster layer
Floodfill with red
Layer properties>color

Activate your lace layer
Layer properties>dodge
Duplicate & merge down
Add drop shadow

Floodfill your rectangle & squares with dark red
Apply wire meshings using default settings

Change layer properties on your center, left & right flowers to hard light
Add drop shadow

Activate your left frame
Floodfill with dark red
Add an inner bevel & drop shadow

Click inside the frame with your magic wand
Paste your close up tube as a new layer
Resize as needed and add drop shadow
Position into place
Invert your selection
Delete & deselect
Add drop shadow
Move to below your frame

Duplicate & mirror your tube

Floodfill your middle frame with dark red
Add an inner bevel & drop shadow

Paste your main tube as a new layer
Resize as needed & add drop shadow

Floodfill your right frame with dark red
Add an inner bevel & drop shadow

Merge your butterflies
Select all>float>defloat
Add a new raster layer
Floodfill with dark red
Deselect
Layer properties>overlay
Merge down & add drop shadow

Repeat with your frame flowers
Layer properties>color

Move your left & center frames up to the right frame
Merge all 3
Duplicate 2 times
Apply constellation
Settings>star field>keep original image checked
Repeat on other 2 layers clicking the random seed button each time

Resize all layers to 70%

Add your text, name & © info


Animation:

Hide animation 2 & 3
Merge visible
Copy & paste into animation shop

Undo your merge
Hide animation 1 & unhide #2
Merge & paste after current in animation shop

Undo your merge
Hide animation 2 & unhide #3
Merge visible & paste after current in animation shop

View your animation

Save as gif & you're all done!

I hope you enjoyed my tutorial

Your comments are very much appreciated either here on this post or on the chat box.  I've made it easy for you to post on this tut by turning off the requirement of having to type in a confirmation code

I would love to post your © compliant result, just email it to me with ATT Sharon & the tut name in the subject line

You'll find my email blinkie on your left

:)


Result by Kaye W


Tuesday, April 24, 2012

ABC 123

 Click for larger view

This tutorial was written by Sharon A on Apr 24, 2012 & is copyright protected
For more info read my TOU

Supplies Needed
Scrapkit Back to School Collab Pt 2 here
WA right click to save


Plugins
DSB Flux Bright Noise

The tubes I used Missy (54-1) Girl 1 (14-2) & Girl 4 (12-3) are by Jamie Kidd, you can purchase these tubes from CDO here

The name of my font is Crayon L


Open new transparent canvas 700x700, we will resize later
Select all
Paste paper 7 into selection
Deselect
Add texture>Default settings>letters>depth 1

Paste school as a new layer
Using your magic wand (I had to set my tolerance on 25) click inside all the window squares
Add a new raster layer
Open paper 12 & resize to 50%
Copy & close without saving changes
Paste into selection
Deselect
Move to below your school layer
Add drop shadow

Select the roof part with your magic wand, you may have to increase your tolerance.  I also had to click inside the o's in the word school
Expand 3
Add a new raster layer
Paste paper 12 into selection
Deselect
Add an inner bevel & drop shadow

Duplicate 2 times
Apply dsb flux bright noise intensity 35
Repeat on other 2 layers changing intensity to 40 & 45
Rename these layers to 1, 2 & 3

Change layer properties on the school to darken
Add drop shadow

Paste your close up tube as a new layer
Resize to fit over one of the side windows
Add drop shadow
Duplicate & mirror
Merge down
Move to below the school layer

Paste your girl tubes as new layers
Resize as needed
Add drop shadow

Add a new raster layer
Activate your picture tubes tool
Select grass
Click a few times along the bottom part
Add drop shadow
Move to below your girl tubes

Paste chalk board as a new layer
Resize to 45%
Add drop shadow
Positon in front of the school doors

Using your magic wand select the frame of your chalk board
Paste paper 8 as a new layer
Invert your selection
Delete & deselect
Add an inner bevel & drop shadow

Paste ruler as a new layer
Resize to 40%
Positon at the top of your chalk board
Add drop shadow

Paste crayon as a new layer
Resize to 15%
Rotate left 30
Positon in hand of the girl
Add drop shadow

Paste crayon box as a new layer
Resize to 15%
Rotate right 15
Add drop shadow
Position near the girl

Paste back pack as a new layer
Resize to 30%
Position near the bottom & add drop shadow

Paste folder as a new layer
Resize to 20%
Rotate left 15
Add drop shadow
Positon near back pack

Paste notebook as a new layer
Resize to 20%
Rotate right 15
Add drop shadow
Position in front of your folder

Paste bow as a new layer
Resize to 15%
Add drop shadow
Position on your back pack

Paste tack as a new layer
Resize to 20%
Positon on an upper corner of your chalk board
Duplicate, mirror & merge down

Paste tag as a new layer
Resize to 25%
Rotate left 25
Add drop shadow
Position on back pack

Add a new raster layer
Select all
Paste paper 8 into selection
Contract 12
Delete & deselect
Add an inner bevel & drop shadow
Repeat bright noise changing intensity to 50

Resize all layers to 70%

Paste your WA as a new layer
Position onto your chalkboard
Move to just above the chalkboard
Recolor if you want & add drop shadow

Add your text, name & © info


Animation:

Hide animation 2 & 3
Merge visible
Copy & paste into animation shop

Undo your merge
Hide animation 1 & unhide #2
Merge & paste after current in animation shop

Undo your merge
Hide animation 2 & unhide #3
Merge visible & paste after current in animation shop

View your animation

Save as gif & you're all done!

I hope you enjoyed my tutorial

Your comments are very much appreciated either here on this post or on the chat box.  I've made it easy for you to post on this tut by turning off the requirement of having to type in a confirmation code

I would love to post your © compliant result, just email it to me with ATT Sharon & the tut name in the subject line

You'll find my email blinkie on your left

:)


Friday, April 20, 2012

Ruby Kiss

Click for larger view

This tutorial was written by Sharon A on Apr 19, 2012 & is copyright protected
For more info read my TOU

Supplies Needed
Forum Template # 63 by me here
Lips by me here

Plugins
Mura Meister Copies
DSB Flux Bright Noise
Graphics Plus Cross Shadow

The tube I used Ruby is by Jamie Kidd, you can purchase this tube from CDO here

The name of the font I used is Tagettes
I used size 36 & 42


Open your template, shift D to duplicate.  Close original
Delete the credit layer
Floodfill the bg layer with red
Apply dsb flux bright noise intensity 25, mix checked
Apply graphics plus cross shadow, change the 2 bottom #'s to 90

Paste your lips as a new layer
Duplicate & hide original
Resize to 35%

Apply mura meister copies
Line, number 17

Effects>distortion effects>wave
Use these settings


Duplicate, mirror & merge down
Duplicate, flip & merge down
Merge down again
Add drop shadow

Duplicate 2 times
Apply dsb flux bright noise intensity 40, mix checked
Repeat on other 2 layers changing intensity to 45 & 50

Activate your top frame layer
Click inside the frame with your magic wand
Expand 3

Paste your close up tube as a new layer
I didn't resize this, I just moved it up so mostly just the lip area shows
Invert your selection
Delete & deselect

Unhide your lips layer
Duplicate & rehide original
Resize to 75%
Position on an upper corner of your top frame
Add drop shadow

Activate your bottom frame
Click inside with your magic wand
Expand 3

Activate your bottom rectangle
Floodfill with your red

Paste your other tube as a new layer
I didn't resize very much on this one
I moved it to the left side of the frame
Invert your selection
Delete & deselect
Add drop shadow
Duplicate & mirror
Position back into place in the right side of the bottom frame
Move both layers to below the bottom frame layer

On the right tube layer change the layer properties to to luminance & opacity to 35
On the left tube layer change the layer properties to overlay & opacity to 60

Activate your left rectangle layer
Floodfill with black
Select all>float>defloat

Unhide your lips layer
Duplicate & hide original again

Resize to 30%
Position in the center of the left rectangle

Apply mura meister copies
Wallpaper, default settings
Add drop shadow

Paste your main tube as a new layer
Resize as needed & position over the left rectangle, on top of the frame layer

Floodfill your frames with red & black
Add inner bevel & drop shadow

Activate one of your butterfly layers
Select all>float>defloat
Add a new raster layer
Floodfill with red or black
Change layer properties to overlay
Deselect & add drop shadow

Repeat this with the other 3 butterflies
Merge all the butterfly layers

Uhide your lips layer
Move to the top
Add an inner bevel & drop shadow
Duplicate 2 times
Apply dsb flux bright noise intensity 40, mix checked
Repeat on other 2 layers changing intensity to 45 & 50

Resize all layers to 70%

Add your text, name & © info


Animation:

Hide animation 2 & 3
Merge visible
Copy & paste into animation shop

Undo your merge
Hide animation 1 & unhide #2
Merge & paste after current in animation shop

Undo your merge
Hide animation 2 & unhide #3
Merge visible & paste after current in animation shop

View your animation

Save as gif & you're all done!

I hope you enjoyed my tutorial

Your comments are very much appreciated either here on this post or on the chat box.  I've made it easy for you to post on this tut by turning off the requirement of having to type in a confirmation code

I would love to post your © compliant result, just email it to me with ATT Sharon & the tut name in the subject line

You'll find my email blinkie on your left

:)


Thursday, April 19, 2012

Story Time

Click for larger view

This tutorial was written by Sharon A on Apr 19, 2012 & is copyright protected
For more info read my TOU

Supplies Needed
Rainbow here

Plugins
Graphics Plus Cross Shadow
DSB Flux Bright Noise

The tube I used Girl 4 (12-3) is by Jamie Kidd, you can purchase this tube from CDO here

The name of my font is Crayon E
I used size 60


Open new transparent canvas 700x700, we will resize later
Floodfill with a color from your tube
Add texture>letters>depth 2

Duplicate 2 times
Apply graphics plus cross shadow changing the 2 bottom #'s to 100
Repeat on other 2 layers changing the 2 bottoms #'s to 90 & 80
Rename these layers to animation 1, 2 & 3

Paste your rainbow as a new layer
Flip & position in lower left corner
Duplicate, mirror & merge down
Duplicate, flip & merge down
Merge down again
Change layer properties to luminance
Add drop shadow
Apply dsb flux bright noise intensity 35, mix checked

Paste your main tube, close up & cat as new layers
Resize as needed
Add drop shadow
Position as shown on my tag

Add a new raster layer
Floodfill with a darker shade of your color
Select all
Contract 12
Delete & deselect
Add inner bevel & drop shadow
Apply dsb flux bright noise intensity 50, mix checked

Resize all layers to 70%

Add your text, name & © info


Animation:

Hide animation 2 & 3
Merge visible
Copy & paste into animation shop

Undo your merge
Hide animation 1 & unhide #2
Merge & paste after current in animation shop

Undo your merge
Hide animation 2 & unhide #3
Merge visible & paste after current in animation shop

I set my frame properties at 15

View your animation

Save as gif & you're all done!

I hope you enjoyed my tutorial

Your comments are very much appreciated either here on this post or on the chat box.  I've made it easy for you to post on this tut by turning off the requirement of having to type in a confirmation code

I would love to post your © compliant result, just email it to me with ATT Sharon & the tut name in the subject line

You'll find my email blinkie on your left

:)


Result by Kaye W


Monday, April 16, 2012

Girls & Butterflies

Click for larger view

This tutorial was written by Sharon A on Apr 16, 2012 & is copyright protected
For more info read my TOU

Supplies Needed
You'll need a butterfly if your tube doesn't have one
Take a look through your scrapkits for one

Plugins
Mura Meister Copies
Eyecandy Texture Swirl
Graphics Plus Cross Shadow
DSB Flux Bright Noise
Eyecandy Texture Noise


The tube I used Girl 1 (14-2) is by Jamie Kidd, you can purchase this tube from CDO here

The name of the font I used is Fiolex Girls
I used size 48 for my text & 60 for my name


Open new transparent canvas 930x375, we will resize later
Floodfill with a color from your tube

Paste your butterfly as a new layer
Resize as needed (I resized mine to 25%)
Add drop shadow
Duplicate & resize to 75%
Hide your original butterfly layer for now

Apply mura meister copies
Wallpaper, change # to 200
Duplicate, mirror, flip & merge down

Apply eyecandy texture swirl
Settings>features, medium, no twist
Duplicate, mirror & merge down

Change layer properties to overlay
Apply graphics plus cross shadow changing the 2 bottom #'s to 80

Paste your tube as a new layer
Resize as needed
Position on one side
Add drop shadow

Paste your close up tube as a new layer
Resize as needed
Position on opposite side of your main tube
Add drop shadow

Unhide your butterfly layer
Move to top
Duplicate & hide the duplicated layer

Move to near the upper left side of your right tube
Duplicate & resize to 75%
Repeat until you have 4 butterflies
Merge all 4
Duplicate & mirror
Merge down
Duplicate 2 times

Apply dsb flux bright noise intensity 60, mix checked
Repeat on other 2 layers changing intensity to 65 & 70
Rename these layers to animation 1, 2 & 3

Unhide your butterfly layer
Duplicate 2 times
Apply eycandy texture nose
Settings>tie dye
Repeat on other 2 layers clicking on the random seed button each time
Rename these layers to animation 4, 5 & 6

Resize all layers to 70%

Add your text, name & © info


Animation:

Hide your middle & bottom animation layers
Merge visible
Copy & paste into animation shop

Undo your merge
Hide your top animation layers & unhide the middle ones
Merge & paste after current in animation shop

Undo your merge
Hide your middle animation layers & unhide the bottom ones
Merge visible & paste after current in animation shop

View your animation

Save as gif & you're all done!

I hope you enjoyed my tutorial

Your comments are very much appreciated either here on this post or on the chat box.  I've made it easy for you to post on this tut by turning off the requirement of having to type in a confirmation code

I would love to post your © compliant result, just email it to me with ATT Sharon & the tut name in the subject line

You'll find my email blinkie on your left

:)


Result by Kaye W


Wednesday, September 28, 2011

Diabetes Awareness

Click for larger view

This tutorial was written by Sharon on Sept 28, 2011
For more info read my TOU

Supplies Needed
Scrapkit Naturally Sweet here

Plugins
Eyecandy 4 HSB Noise

The tube I used is by Jamie Kidd, you can purchase this tube from CDO here


Open new transparent canvas 700x700, we will resize later
Select all
Paste paper 5 into selection
Deselect

Paste ball dangle as a new layer
Resize to 95%
Move up
Add drop shadow
Duplicate 2 times
Rename these layers to animation 1, 2 & 3
On animation 1 apply hsb noise using default settings

Repeat on animations 2 & 3 clicking the random seed button each time

Paste your tube as a new layer
Position lower left
Add drop shadow

Paste sofa as a new layer
Resize to 60%
Position lower right
Add drop shadow

Paste chandelier as a new layer
Resize to 40%
Position upper right
Add drop shadow

Paste streamer as a new layer
Resize to 50%
Position upper left
Add drop shadow

Paste glitter butterfly as a new layer
Resize to 25%
Position near the chandelier
Add drop shadow

Paste clock as a new layer
Resize to 40%
Position near the top
Add drop shadow

Resize all layers to 70%

Add your text

Add your name & your © info

Hide animations 2 & 3
Merge visible
copy & paste into animation shop

Undo your merge
Hide animation 1
Unhide animation 2
Merge visible
copy & paste after current in animation shop

Undo your merge
Hide animation 2
Unhide animation 3
Merge visible
copy & paste after current in animation shop

Set frame properties at 15

View your animation

Save as gif & you're all done!

I hope you enjoyed my tutorial

I would love to post your © compliant result, just email it to me with the tut name in the subject line

:)

Result by Priscie


Monday, August 29, 2011

First Love Mini Tut

Click for larger view

This tutorial was written by Sharon on August 29, 2011
For more info read my TOU

Supplies Needed
Scrapkit First Love by Bea here

Pink tag back # 3 here

The tube I used called Missy #54-2 is by Jamie Kidd, you can purchase it from CDO here


Open your tag back

Paste heart deco 1 as a new layer
Resize to 55%
Change layer properties to luminance
Add drop shadow

Paste your tube as a new layer
Resise as needed and position on one side, depending on your tube
Add drop shadow

Paste wrap 4 as a new layer
Resize to 72%
Position lower right corner
Add drop shadow
Duplicate & mirror
Merge down
Change opacity to 70

Paste ticket 2 as a new layer
Resize to 70%
Add drop shadow

Add your name & your © info

Save as jpg & you're all done!

I hope you enjoyed my tutorial

I would love to post your © compliant result, just email it to me with the tut name in the subject line

:)