Showing posts with label Mini Tut. Show all posts

Monday, May 21, 2012

Kiss My Ass - SAC

Click for larger view

This tutorial was written by Sharon A on May 21, 2012 & is copyright protected
For more info read my TOU

Supplies Needed
Flowers here

Plugins
Xero Fritillary

The tube I used 18-3 is by  Amy Matthews, you can purchase this tube from CDO here

The name of the font I used is Honey Script Light


Open new transparent canvas 930x375, we will resize later
Floodfill with a color from your tube
Apply fritillary changing the top & bottom #'s to 20

Paste your flowers as a new layer
Change layer properties to overlay
Add drop shadow

Paste your main tube as a new layer
Resize as needed
Add drop shadow
Position on one side

Paste a close up tube as a new layer
Resize as needed & add drop shadow
I mirrored mine
Position on one side
Change layer properties to soft light

Duplicate your bg layer
Send to the top
Select all
Contract 8
Delete & deselect
Add an inner bevel & drop shadow

Duplicate 4 times for a total of 5
Change the layer properties on each
Starting from the top I used
Multiply, overlay, dodge, burn & hard light

Move your main tube layer to above your border

Resize all layers to 70%

Add your text, name & © info


Animation:

Hide all your border layers except the top one
Merge visible
Copy & paste into animation shop

Undo your merge
Hide your top border layer & unhide the next one down
Merge & paste after current in animation shop

Undo your merge
Hide your 2nd border & unhide the 3rd
Merge visible & paste after current in animation shop

Repeat until you have all 5 frames pasted

I set my frame properties at 25

View your animation

Save as gif & you're all done!

I hope you enjoyed my tutorial

Your comments are very much appreciated either here on this post or on the chat box.  I've made it easy for you to post on this tut by turning off the requirement of having to type in a confirmation code

I would love to post your © compliant result, just email it to me with ATT Sharon & the tut name in the subject line

You'll find my email blinkie on your left :)


Result by Kaye W


Tuesday, May 15, 2012

Beautiful Delights

Click for larger view

This tutorial was written by Sharon A on May 15, 2012 & is copyright protected
For more info read my TOU

Plugins
DSB Flux Bright Noise

The tubes I used are by Karina Dale, you can purchase these tubes from PTE here

The name of my font is Honey Script Light


Open a new transparent canvas 930x420, we will resize later
Floodfill with a gradient of your choice, radial, angle 0, repeats 0
I used a hue tint gradient
Apply bright noise intensity 20, mix checked

Paste your main tube as a new layer
Resize as needed
Add drop shadow
Position at the bottom center

Paste your close up tubes
Resize as needed
Position into place
Add drop shadow
Move to below your main tube layer

Paste your full size side tubes
Resize as needed
Position on the sides
Add drop shadow

Activate your picture tube tool
Select confetti
I set my scale to 35
Click around on random areas of your tag

Add a new raster layer & repeat

Add a 3rd raster layer & repeat

Duplicate your bg layer & send to the top
Select all
Contract 15
Delete & deselect
Add an inner bevel & drop shadow

Resize all layers to 70%

Add your text, name & © info


Animation:

Hide animation 2 & 3
Merge visible
Copy & paste into animation shop

Undo your merge
Hide animation 1 & unhide #2
Merge & paste after current in animation shop

Undo your merge
Hide animation 2 & unhide #3
Merge visible & paste after current in animation shop

View your animation

Save as gif & you're all done!

I hope you enjoyed my tutorial

Your comments are very much appreciated either here on this post or on the chat box.  I've made it easy for you to post on this tut by turning off the requirement of having to type in a confirmation code

I would love to post your © compliant result, just email it to me with ATT Sharon & the tut name in the subject line

You'll find my email blinkie on your left

:)


 Result by Kaye W


Monday, May 14, 2012

Purple Apples

Click for larger view

This tutorial was written by Sharon A on May 14, 2012 & is copyright protected
For more info read my TOU

Supplies Needed
Purple Apple I made for this tut here

Plugins
Xero Fritillary
Mura Meister Copies
DSB Flux Bright Noise

The tube I used Eve is by Alfadesire, you can purchase this tube from PFD here

The name of my font is Honey Script Light


Open a new transparent canvas 930x420, we will resize later
Floodfill with a color from your tube
Apply fritillary changing the top & bottom #'s to 16

Paste your apple as a new layer
Duplicate & hide the duplicated one
Resize original to 25%
Add drop shadow
Apply mura meister copies
Preset menu on line, number 19
Position at the bottom of your tag
Duplicate & position at the top
Merge down

Duplicate 2 times
Apply bright noise intensity 35, mix checked
Repeat on other 2 layers changing the intensity to 40 & 45

Paste your tube as a new layer
Resize as needed
Add drop shadow

Unhide your duplicated apple
Send to the top
Add drop shadow
Move to the left side of your tube
Duplicate & mirror

Duplicate your bg layer & position below your apple lines
Select all
Contract 12
Delete & deselect
Add an inner bevel & drop shadow

Resize all layers to 70%

Add your text, name & © info


Animation:

Hide animation 2 & 3
Merge visible
Copy & paste into animation shop

Undo your merge
Hide animation 1 & unhide #2
Merge & paste after current in animation shop

Undo your merge
Hide animation 2 & unhide #3
Merge visible & paste after current in animation shop

View your animation

Save as gif & you're all done!

I hope you enjoyed my tutorial

Your comments are very much appreciated either here on this post or on the chat box.  I've made it easy for you to post on this tut by turning off the requirement of having to type in a confirmation code

I would love to post your © compliant result, just email it to me with ATT Sharon & the tut name in the subject line

You'll find my email blinkie on your left

:)


Result by Kaye W


Tuesday, May 1, 2012

Cats Have It All

Click for larger view

This tutorial was written by Sharon A on May 1, 2012 & is copyright protected
For more info read my TOU

Supplies Needed
Word Art by me here
Lace here

Plugins
Eyecandy Texture

The tube I used Two Fluffy Kitties (80-3) is by Jasmine Becket-Griffith, you can purchase this tube from CDO here

The name of the font I used is Shutup
I used size 60


Open new transparent canvas 930x375, we will resize later
Floodfill with a color from your tube
Duplicate 2 times
Apply eyecandy texture marble
Settings>sharp calcite
Click on basic
Change the bedrock color to your bg color
Change vein color to a lighter shade of your color
Repeat on other 2 layers clicking on the random seed button each time

Paste your tube as a new layer
Resize as needed and add drop shadow
Position on one side

Paste word art as a new layer
Resize to 75%
Position into place
Add a new raster layer
Floodfill with a lighter shade of your bg color
On your WA layer select all>float>defloat
On your floodfill layer invert your selection
Delete, deselect & merge down
Add an inner bevel & drop shadow

Paste your lace as a new layer
Resize to 57%
Position on the upper right side
Duplicate, mirror & merge down
Move up so only the lacey bottom part shows

Select around your tag with your selection tool
Crop to selection

Duplicate your lace
Flip & merge down

Resize all layers to 70%

Add your text, name & © info


Animation:

Hide animation 2 & 3
Merge visible
Copy & paste into animation shop

Undo your merge
Hide animation 1 & unhide #2
Merge & paste after current in animation shop

Undo your merge
Hide animation 2 & unhide #3
Merge visible & paste after current in animation shop

View your animation

Save as gif & you're all done!

I hope you enjoyed my tutorial

Your comments are very much appreciated either here on this post or on the chat box.  I've made it easy for you to post on this tut by turning off the requirement of having to type in a confirmation code

I would love to post your © compliant result, just email it to me with ATT Sharon & the tut name in the subject line

You'll find my email blinkie on your left

:)


Result by Kaye W



Monday, April 2, 2012

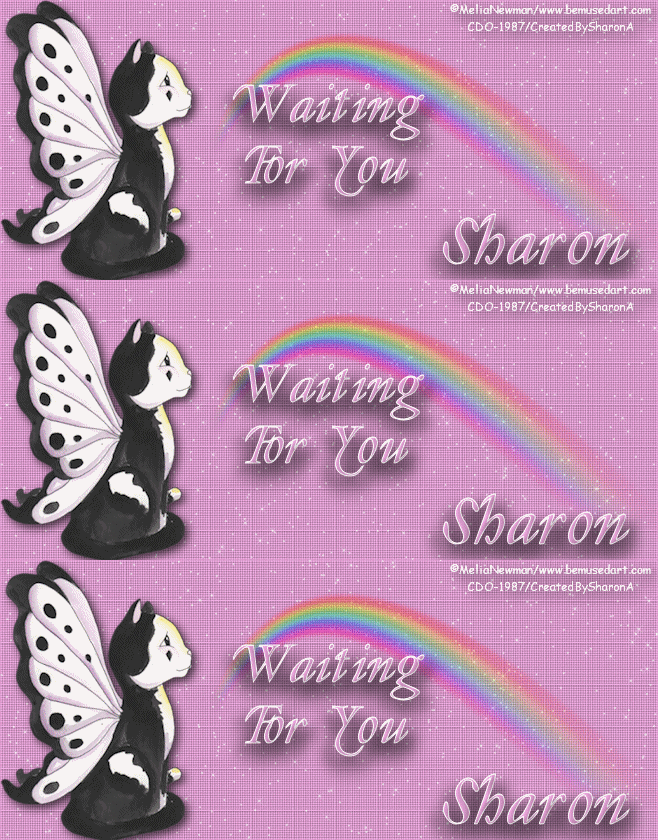
Waiting For You

Click for larger view

This tutorial was written by Sharon A on Apr 2, 2012 & is copyright protected
For more info read my TOU

Supplies Needed
Rainbow here

Plugins
Xenofex Constellation

The tube I used # 4-3 is by Melia Newman, you can purchase this tube from CDO here

The name of the font I used is Lynoesse
I used size 48 for my text & 60 for my name after resizing


Open new transparent canvas 940x400, we will resize later
Floodfill with a color from your tube
Effects>texture effects>texture>fine canvas>scale 60
Duplicate 2 times
Apply xenofex constellation with these settings
Size 4, variation 3, edge density 1, overall density 1, overdrive 75, twinklw amount 75, rotation 45, keep original image checked, random seed 1

Repeat on other 2 layers clicking on the random seed button each time

Paste your tube as a new layer
Resize as needed
Position on one side
Add drop shadow

Paste your rainbow as a new layer
Move a bit to one side

Resize all layers to 70%

Add your text, name & © info


Animation:

Hide animation 2 & 3
Merge visible
Copy & paste into animation shop

Undo your merge
Hide animation 1 & unhide #2
Merge & paste after current in animation shop

Undo your merge
Hide animation 2 & unhide #3
Merge visible & paste after current in animation shop

View your animation

Save as gif & you're all done!

I hope you enjoyed my tutorial

Your comments are very much appreciated either here on this post or on the chat box.  I've made it easy for you to post on this tut by turning off the requirement of having to type in a confirmation code

I would love to post your © compliant result, just emaail it to me with ATT Sharon & the tut name in the subject line

You'll find my email blinkie on your left 

:)


Result by Kaye W


Saturday, March 31, 2012

Lilac Fairy

Click for larger view

This tutorial was written by Sharon A on Mar 31 2012 & is copyright protected
For more info read my TOU

Supplies Needed
Flower here

Lilac here

Plugins
Xero Porcelain
Graphics Plus Cross Shadow

The tube I used Lilac is by Sara Butcher, you can purchase this tube from CDO here

The name of the font I used is King Things Willow
I used size 60 for the text & size 48 for my name afer resizing 


Open new transparent canvas 940x400, we will resize later
Floodfill with a color from your tube
Effects>texture effets>texture>fine canvas>scale 50>depth 3
Apply graphics plus cross shadow, change the bottom 2 #'s to 65

Paste lilacs as a new layer
Resize to 110%
Add drop shadow
change layer properties to overlay

Paste your tube as a new layer
Resize as needed
Position on one side
Add drop shadow
Duplicate & mirror

Duplicate 2 times
Apply xero porcelain, click on the random button until you see something you like
Repeat on the other 2 layers
Rename these layers to A1, A2 & A3

Activate your other tube layer and change layer properties to lighten

Paste the floral corner as a new layer
Positon in a corner
Add drop shadow
Duplicate & mirror
Merge down
Dupicate & flip
Merge down
Merge down again

Resize all layers to 70%

Add your text, name & © info


Animation:

Hide animation 2 & 3
Merge visible
Copy & paste into animation shop

Undo your merge
Hide animation 1 & unhide #2
Merge & paste after current in animation shop

Undo your merge
Hide animation 2 & unhide #3
Merge visible & paste after current in animation shop

View your animation

Save as gif & you're all done!

I hope you enjoyed my tutorial

Your comments are very much appreciated either here on this post or on the chat box.  I've made it easy for you to post on this tut by turning off the requirement of having to type in a confirmation code

I would love to post your © compliant result, just emaail it to me with ATT Sharon & the tut name in the subject line

You'll find my email blinkie on your left 

:)


Fantasy Mermaid

Click for larger view

This tutorial was written by Sharon A on Mar 31, 2012 & is copyright protected
For more info read my TOU

Supplies Needed
Accent here
Flower here

Plugins
Graphics Plus Cross Shadow
Xenofex Constellation
Eyecandy 4 HSB Noise

The font I used is Cynthia June Two
Size 72 for my text & size 60 for my name after resizing

The tube I used 12-3 is by Sara Butler, you can purchase this tube from CDO here


Open new transparent canvas 940x400, we will resize later
Floodfill with a color from your tube
Effects>texture effects>texture
Mosiac weave, default settings, scale 50
Apply graphics plus cross shadow, change the bottom 2 #'s to 65
Apply xenofex constellation with these settings
Size 2, variation 1, edge density 1, overall density 15, overdrive 75, twinkle amount 75, rotation 45, keep original image checked, random seed 1

Paste your flower as a new layer
Resize to 50%
Add drop shadow
Change layer properties to luminance legacy

Paste your accent as a new layer
Duplicate & flip
Merge down
Add drop shadow
Change layer properties to luminance legacy

Duplicate 2 times
Apply eyecandy hsb noise, default settings, pattern smooth fractal
Repeat on other 2 layers clicking on the random seed button each time
Rename these layers to A1, A2 & A3

Paste your tube as a new layer
Resize as needed
Add drop shadow
Duplicate & mirror
On one of your tube layers chnage the properties to luminance legacy

Resize all layers to 70%

Add your text, name & © info


Animation:

Hide animation 2 & 3
Merge visible
Copy & paste into animation shop

Undo your merge
Hide animation 1 & unhide #2
Merge & paste after current in animation shop

Undo your merge
Hide animation 2 & unhide #3
Merge visible & paste after current in animation shop

View your animation

Save as gif & you're all done!

I hope you enjoyed my tutorial

I would love to post your © compliant result, just emaail it to me with ATT Sharon & the tut name in the subject line

You'll find my email blinkie on your left 
:-)


Leo Queen

Click for larger view

This tutorial was written by Sharon A on March 31, 2012 & is copyright protected
For more info read my TOU

Plugins
Xero Fritillary
Graphics Plus Cross Shadow
DSB Flus Bright Noise
Xenofex Constellation

The tube I used Leo is by Maxine Gadd, you can purchase this tube from PTE here

The name of my font is Carrington
I used size 72 after resizing


Open a new transparent canvas 940x400, we will resize later
Floodfill with a color from your tube
Apply xero fritillary changing the top # to 18 and the bottom # to 12
Apply graphics plus cross shadow, change the bottom 2 numbers to 70
Apply dsb flux bright noise intensity 50, mix checked

Paste your tube as a new layer
Resize as needed
Add drop shadow
Activate your magic wand
Mode replace, RGB Value, tolerance 50 (Your tolerance may be different depending on your tube)
Hold down your shift key and select around the outer areas of her hair
Duplicate 2 times

Apply eyecandy hsb noise using default settings
Repeat on other 2 layers clicking on the random seed button each time

Making sure you're on the top layer add a new raster layer
Floodfill with black
Select all
Contract 15
Delete
Deselect
Add an inner bevel and 2 drop shadows

Resize all layers to 70%

Add your text, name & © info
Merge your text & name layers
Apply xenofex constellation with a setting of your choice


Animation:

Hide animation 2 & 3
Merge visible
Copy & paste into animation shop

Undo your merge
Hide animation 1 & unhide #2
Merge & paste after current in animation shop

Undo your merge
Hide animation 2 & unhide #3
Merge visible & paste after current in animation shop

View your animation

Save as gif & you're all done!

I hope you enjoyed my tutorial

I would love to post your © compliant result, just emaail it to me with ATT Sharon & the tut name in the subject line

You'll find my email blinkie on your left 

:)


Result by Kaye W


Friday, March 30, 2012

No More Kissing Frogs

Click for larger view

This tutorial was written by Sharon A on March 30, 2012 & is copyright protected
For more info read my TOU

Supplies Needed
Flower, right click to save

Plugins
DSB Flux Bright Noise
Graphics Plus Cross Shadow
Eyecandy 4 HSB Noise
Maura Meister copies

The tube I used No More Kiss Frogs is by Alicia Mujica, you can purchase this tube from her blog here

The font I used is called Gabrielle


Open a new transparent canvas 700x700, we will resize later
floodfill with a color from your tube
Apply dsb flux bright noise intensity 30, mix checked
Apply graphics plus cross shadow, change brigtness & intensity to 70
Add an inner bevel

Paste flower as a new layer
Apply mura meister copies with these settings
Wallpaper, random, change # to 25
Duplicate & mirror
Merge down
Duplicate & flip
Merge down
Change layer properties to luminance legacy

Duplicate 2 times
Apply eyecandy hsb noise using default settings
Repeat on other 2 layers clicking on the random seed button each time
Rename these layers to A1, A2 & A3

Paste your tube as a new layer
Resize as needed
Add drop shadow
Position on left side
Duplicate
Resize to 75%
Mirror & position on right

Resize all layers to 70%

Add your text, name & © info


Animation:

Hide animation 2 & 3
Merge visible
Copy & paste into animation shop

Undo your merge
Hide animation 1 & unhide #2
Merge & paste after current in animation shop

Undo your merge
Hide animation 2 & unhide #3
Merge visible & paste after current in animation shop

View your animation

Save as gif & you're all done!

I hope you enjoyed my tutorial

I would love to post your © compliant result, just emaail it to me with ATT Sharon & the tut name in the subject line

You'll find my email blinkie on your left 

:)


Thursday, March 29, 2012

Her Tranquility

Click for larger view

This tutorial was written by Sharon A on Mar 29 2012 & is copyright protected
For more info read my TOU

Supplies Needed
Stars here
Corner here

Plugins
Xero Fritillary
Eyecandy HSB Noise

The tube I used Her Tranquility is by Sara Butcher, you can purchase this tube from CDO here

The name of my font is Cancellaresca


Open new transparent canvas 700x700, we will resize later
Floodfill with a color from your tube
Apply xero fritillary changing the top & bottom #'s to 12
Apply dsb flux bright noise intensity 30, mix checked

Paste lace as a new layer
Resize to 200%
Change layer properties to burn
Add drop shadow, twice

Paste your tube as a new layer
Select all>float>defloat
Duplicate 2 times
Apply hsb noise using default settings
Repeat on other 2 layers clicking on the random seed button each time
Rename these layers to A1, A2 & A3

Paste stars as a new layer
Position center top
Duplicate & flip
Duplicate
Rotate left 90
Duplicate & mirror
Merge these 4 layers

Paste corner as a new layer
Resize to 60%
Position in upper left corner
Change layer properties to luminance legacy

Duplicate & mirror
Merge down
Duplicate & flip
Merge down

Resize all layers to 70%

Add your text, name & © info


Animation:

Hide animation 2 & 3
Merge visible
Copy & paste into animation shop

Undo your merge
Hide animation 1 & unhide #2
Merge & paste after current in animation shop

Undo your merge
Hide animation 2 & unhide #3
Merge visible & paste after current in animation shop

View your animation

Save as gif & you're all done!

I hope you enjoyed my tutorial

I would love to post your © compliant result, just emaail it to me with ATT Sharon & the tut name in the subject line

You'll find my email blinkie on your left 

:)


Sleeping Angels

Click for larger view


This tutorial was written by Sharon A on March 29, 2012
For more info read my TOU

Supplies Needed
Accent here

Plugins
DSB flux Bright Noise
Eyecandy 4 HSB Noise

The tube I used Day of Joy is by Sara Butcher, you can purchase this tube from from CDO here

The name of my font is Cancellaresca


Open a new transparent canvas 940x400, we will resize later
Floodfill with a color from your tube
Apply dsb bright noise intensity 40, mix checked
Add an inner bevel

Paste your element as a new layer
Position in the lower left corner
Duplicate, Mirror, Flip & mirror again
Duplicate & mirror
Merge down
Add drop shadow

Paste your tube as a new layer
Resize as needed
Because of the style of my tube I add an inner bevel & a drop shadow

Using your freehand selection tool select around the angel
Duplicate 2 times
Apply hsb noise using default settings
Repeat on other 2 layers clicking the random seed button each time

Resize all layers to 65%

Add your text, name & © info


Animation:

Hide animation 2 & 3
Merge visible
Copy & paste into animation shop

Undo your merge
Hide animation 1 & unhide #2
Merge & paste after current in animation shop

Undo your merge
Hide animation 2 & unhide #3
Merge visible & paste after current in animation shop

View your animation

Save as gif & you're all done!

I hope you enjoyed my tutorial

I would love to post your © compliant result, just emaail it to me with ATT Sharon & the tut name in the subject line

You'll find my email blinkie on your left 

:)