Showing posts with label Jose Cano. Show all posts

Monday, March 26, 2012

Diamond Blues

Click for larger view

This tutorial was written by Sharon A on March 26, 2012
For more info read my TOU

Supplies Needed
Template #142 by me here
Diamond frame by me here

Plugins
Xero Fritillary
Graphics Plus Cross Shadow
Eyecandy 4 HSB Noise

The tube I used Toon 10 is by Jose Cano, you can purchase this tube from PTE here

The font I used is called Heather


Open your template, shift D to duplicate & close original
Delete credit layer

Floodfill large circle 2 with a color from your tube
Apply xero fritillary changing the top & bottom #'s to 12
Select all>float>defloat

Paste your close up tube as a new layer
Resize as needed
Invert your selection
Delete
Deselect
Change layer properties to soft light

Paste diamond frame as a new layer
Resize to 85%
Add drop shadow

Activate circles 1
Floodfill with same color as large circle 1
Add an inner bevel & drop shadow

Activate circles 2
Floodfill with same color as large circle 2
Repeat fritillary
Duplicate 2 times
Apply eyecandy hsb noise using default settings 
Repeat on other 2 layers clicking the random seed button each time

Floodfill bg layer with same color as circles 2
Apply graphics plus cross shadow using default settings

Back to top
Paste your full size tube as a new layer
Resize if needed
Position lower left
Add drop shadow

Resize all layers to 65%

Add your text, name & © info


Animation:

Hide animation 2 & 3
Merge visible
Copy & paste into animation shop

Undo your merge
Hide animation 1 & unhide #2
Merge & paste after current in animation shop

Undo your merge
Hide animation 2 & unhide #3
Merge visible & paste after current in animation shop

View your animation

Save as gif & you're all done!

I hope you enjoyed my tutorial

I would love to post your © compliant result, just email it to me with the tut name in the subject line

:)


Thursday, March 22, 2012

Easter Time

Click for larger view

This tutorial was written by Sharon A on March 22, 2012
For more info read my TOU

Supplies Needed
Scrapkit Easter 2012 here

The tube I used Hot Bunny is by Jose Cano, you can purchase this tube from PTE here


Open a new transparent canvas 700x700, we will resize later
Select all
Paste paper 18 into selection
Deselect

Paste Element_¸ R11_romiposer_ 03
Add drop shadow

Paste your tube as a new layer
Resize as needed
Add drop shadow

Paste egg 2 as a new layer
Resize to 20%
Add drop shadow
Position near bottom right

Paste flower doodle 1 as a new layer
Resize to 50%
Mirror
Position upper right corner
Add drop shadow
Move to below the element 1 layer
Duplicate & mirror

Paste chicks as a new layer
Resize to 50%
Position near egg
Add drop shadow
Duplicate & mirror
Reposition over the original one
Rename these layers to animation 1 & 2

Resize all layers to 70%

Add your text, name & © info


Animation:
Hide animation 1
Merge visible
Copy & paste into animation shop

Undo your merge
Unhide animation 1 & hide animation 2
Copy & paste after current

I set the frame properties on 75

Veiw you animation

Save as gif & you're all done!

I hope you enjoyed my tutorial

I would love to post your © compliant result, just email it to me with the tut name in the subject line

:)


.Result by Kaye W


Result by Anita


Tuesday, March 20, 2012

Hoppy Easter

Click for larger view

This tutorial was written by Sharon A on March 20, 2012
For more info read my TOU

Supplies Needed
Easter Template #1 by me here

Plugins
Xero Fritillary & Porcelain

The tube I used Hot Bunny is by Jose Cano, you can purchase this tube from PTE here


Open your template, shift D to duplicate & close original
Delete credit layer

Activate raster 1
Apply Xero Fritillary changing the top & bottom #'s to 12

Activate shape 1

Paste your tube as a new layer
Resize as needed
Apply Xero Porcelain using default settings

Activate the bunny frame layer
Click inside with your magic wand
Add a new raster layer
Floodfill with a color from the template or your tube
Invert your selection
Delete
Apply Xero Fritillary changing the top & bottom #'s to 10
Do Not Deselect

Paste a close up of your tube
Resize as needed
Invert your selection
Delete
Deselect

Activate Flower 1
Add inner bevel using these settings
Bevel 2, width 31, smoothness 35, depth 3,ambience 0, shiness 30, angle 315, intensity 50, elvation 30, color white
Add drop shadow

Repeat on flowers 2 & 3

Activate your large tube layer
Zoom in
Using your freehand selection too select around the folded part of the right ear
Duplicate
Copy
Delete
Paste as a new layer
Reposition back into place
Deselect
Rotate left 15

Hide the orginal large tube layer

Use your clone brush on your new layer to cover up the seam
Merge down

Resize all layers to 70%

Add your text, name & © info

Animation:


Hide the duplicated tube layer
Merge visible
copy & paste into animation shop

Undo your merge
Unhide the duplicated tube layer & hide the other tube layer
Merge visible
Copy & paste after currnent in animation shop

Change frame properties on frame 2 to 200

Save as gif & you're all done!

I hope you enjoyed my tutorial

I would love to post your © compliant result, just email it to me with the tut name in the subject line

:)


You EggCite Me

Click for larger view

This tutorial was written by Sharon A on March 20, 2012
For more info read my TOU

Supplies Needed
I used a wonderful kit called Easter Babe by Teresa at Scraps by Randy's Sin here

Mask #225 by Vix here

Animation Shop

Plugins
DSB Flux Bright Noise

The tube I used Hot Bunny is by Jose Cano, you can purchase this tube from PTE here


Open a new transparent canvas 700x700, we will resize later
Select all
Paste paper 16 into selection
Deselect

Add a new raster layer
Floodfill with white
Apply mask
Merge group
Add drop shadow

Paste wreath 1 as a new layer
Add drop shadow
Duplicate 2 times
Rename these layers to animation 1, 2 & 3

On animation 1:
Apply DSB Flux Bright Noise, default settings, intensity 35

On animation 2 change intensity to 40
On animation 3 change intensity to 45

Paste your tube as a new layer
Resize as needed
Add drop shadow

Paste bow as a new layer
Resize to 80%
Move toward the right
Add drop shadow
Move to below your tube

Paste hanging egg as a new layer
Resize to 75%
Position left side
Add drop shadow

Paste lily of the valley 1 as a new layer
Resize to 30%
Position near the bottom
Add drop shadow

Repeat with #2 resizing to 25%

Paste lily 2 as a new layer
Resize to 30%
Position near the bottom
Add drop shadow

Repeat with lily 4 resizing to 25%

Paste pussywillow 3 as a new layer
Resize to 25%
Position near the bottom
Add drop shadow

Repeat with #1 resizing to 20%

Paste egg 2 as a new layer
Resize to 20%
Duplicate
Resize to 75%

Paste Chicks as a new layer
Resize to 25%
Position on eggs
Add drop shadow

Paste word art as a new layer
Resize to 50%
Position near lower right
Add drop shadow

Resize all layers to 70%

Add your name & © info

Animation:
Hide animation 2 & 3
Merge visible
Copy & paste into animation shop

Undo your merge
Hide animation 1 & unhide #2
Merge & paste after current in animation shop

Undo your merge
Hide animation 2 & unhide #3
Merge visible & paste after current in animation shop

View your animation

Save as gif & you're all done!

I hope you enjoyed my tutorial

I would love to post your © compliant result, just email it to me with the tut name in the subject line

:)


Result by Kaye W


Thursday, March 8, 2012

Shamrocks

Click for larger view

This tutorial was written by Sharon A on March 8, 2012
For more info read my TOU

Supplies Needed
FTU scrapkit Luck O The Irish by Teresa here


Template #76 by me here

Plugins
Xero Porcelain


The tube I used is Cowgirl 6 by Jose Cano, you can purchase this tube from PTE here


Open your template, shift D to duplicate & close original
Delete credit layer

Activate raster 5
Select all>float>defloat
Paste paper 9 into selection
Do Not Deselect

Paste your tube as a new layer, resize as needed
Invert your selection
Delete
Deselect
Apply Xero Porcelain Effect with these settings


Activate raster 1
Select all>float>defloat
Paste paper 12 into selection
Deselect

Activate the Shamrocks layer
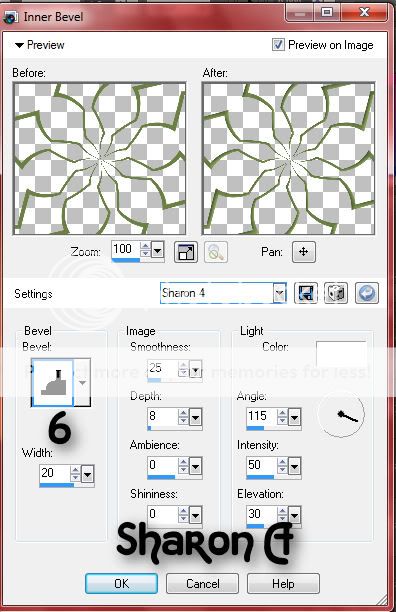
Add inner bevel with these settings


Add drop shadow

Activate raster 2
Select all>float>defloat
Floodfill with a gold gradient, linear, angle 45, repeats 12
Add inner bevel, same settings as before
Deselect

Repeat on border & raster 4

Activate raster 3
Select all>float>defloat
Floodfill with a rainbow gradient, radial, angle 45, repeats 6
Effects>Artistic Effects>Enamel, I used the Blurred Green Line setting
Deselect

Paste shamrock bouquet as a new layer
Resize to 20%
Position upper left corner, add drop shadow
Duplicate & mirror

Paste rainbow 3 as a new layer
Move to below your tube layer
Add drop shadow

Paste WA Kiss Me I'm Irish
Resize to 50%
Postion over center of your tube
Add drop shadow

Resize all layers to 70%

Add your name & your © info

Merge all

Save as jpg & you're all done!

I hope you enjoyed my tutorial

I would love to post your © compliant result, just email it to me with the tut name in the subject line

:)


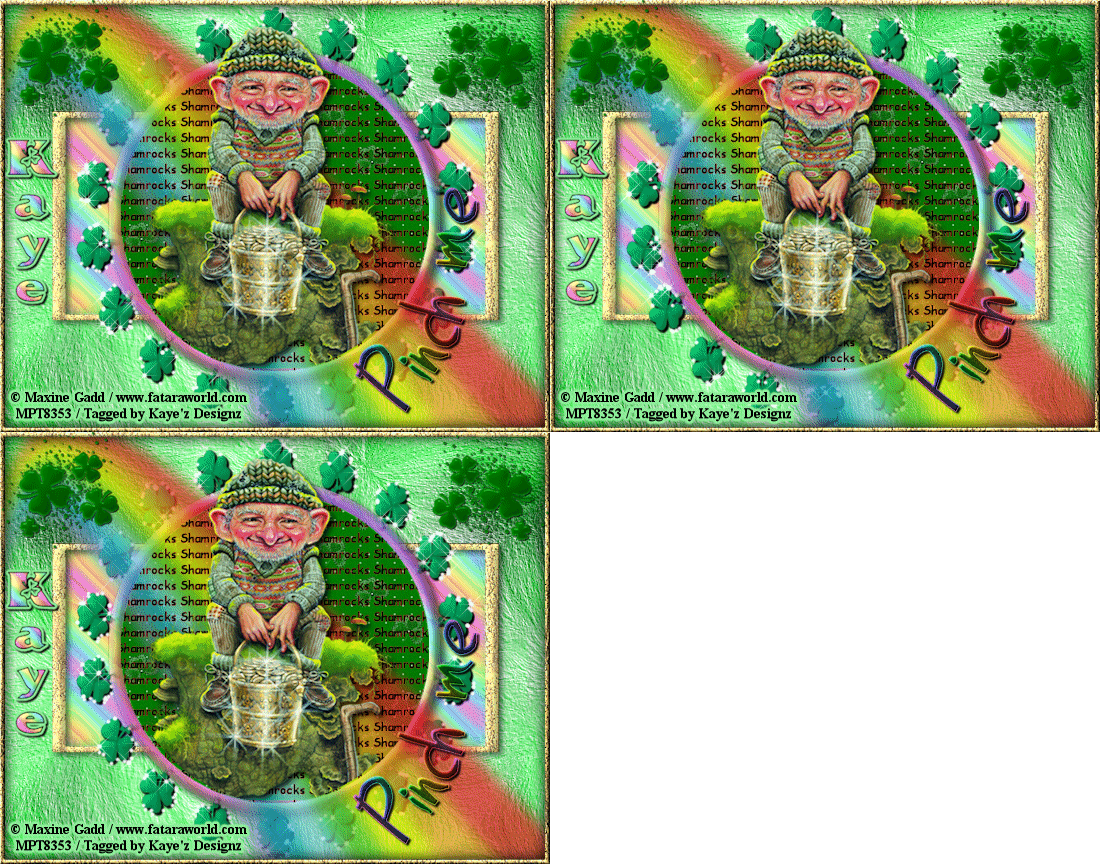
Result by Kaye W


Sunday, October 16, 2011

Sexy Cowgirl


Click for larger view

This tutorial was written by Sharon on Oct 16, 2011
For more info read my TOU

Plugins
Xero Fritillary
Graphics Plus Cross Shadow
Eyecandy 4 HSB Noise

The tube I used Cowgirl 6 is by Jose Cano, you can purchase this tube from PTE here


Open a new transparent canvas 600x225
Floodfill with a color from your tube
Apply xero fritillary, change top & bottom #'s to 12
Apply graphics plus cross shadow using default settings

Activate your shapes tool, select rectangle
Foreground null, background same as your floodfill color
Starting at x0 y100, ending at x600 y115, draw a rectangle
Effects>Reflection effects>Kaliedoscope with these settings


Add inner bevel using these settings


Add drop shadow

Duplicate 2 times
Rename these layers to animation 1, 2 & 3

On animation 1 apply eyecandy hsb noise, default settings, random seed on 1

Repeat on animation 2 & 3 clicking on random seed each time

Paste your tube as a new layer
Resize as needed
Add drop shadow
Duplicate & mirror
Change layer properties to luminance legacy

Hide all layers except your main tube, animation 1 and background
Activate your selection tool, set on rectangle.  click on customize
Top 10, left 450, right 600, bottom 160
Copy & paste as a new image
Add your © info and intinial
Save as jpeg

Back to your main tag

Undo your merge

Add your text

Add your name & your © info

Make sure animations 2 & 3 are hidden

Merge visible
Copy & paste into animation shop

Undo your merge
Hide animation 1 & unhide animation 2
Merge visible
Copy & paste after current in animation shop

Undo your merge
Hide animation 2 & unhide animation 3
Merge visible
Copy & paste after current in animation shop

I left the frame properties on the default of 10

Save as gif & you're all done!

I hope you enjoyed my tutorial

I would love to post your © compliant result, just email it to me with the tut name in the subject line

:)


Monday, September 12, 2011

Reaching for the Stars

Click for larger view

This tutorial was written by Sharon on Sept 12, 2011
For more info read my TOU

Supplies Needed
Template # 129 by me here

The tube I used Angel is by Jose Cano, you can purchase this tube from PTE here


Open your template, shift D to duplicate & close original
Delete credit layer

Floodfill the small stars layers with pale yellow or white
Merge down
Duplicate 2 times
Rename these layers to animation 1, 2 & 3

On animation 1 add noise, Gaussian & Monochrome checked, 35%

Repeat on animation 2 changing to 40%

Repeat on animation 3 changing to 45%

Pick a dark color from your tube
Floodfill the big star layer
Select all>float>defloat

Paste your tube as a new layer
Resize as needed
Invert your selection
Delete
Deselect

Floodfill the bars layer with the same color as above

Pick a lighter color from your tube
Floodfill the circle and raster 1

Apply inner bevel on raster 1 using bevel # 2 width 20

Pick a lighter color from your tube
Floodfill the word art layers

Add noise same as above 45% to word art 1 & 4
Add inner bevel same as before to these 2 layers

Resize all layers to 70%

Add your name & your © info

Merge all

Save as jpg & you're all done!

I hope you enjoyed my tutorial

I would love to post your © compliant result, just email it to me with the tut name in the subject line

:)


Wednesday, August 31, 2011

Moonlight Dreams

Click for larger view

This tutorial was written by Sharon on August 25, 2011
For more info read my TOU

Supplies Needed
Template 43 by me here

A photo

Twinks Animation
Right click to save

Animation shop

The font I used is called English, you can get it here

Plugins
Graphics plus cross shadow
Xero Porcelain

The tube I used called Angel is by Jose Cano, you can purchase this tube from PTE here

The photo I used called Moonlight Dream is by Jon Rattenbury, also available at PTE


Open your template, shift D to duplicate & close original
Delete credit layer

Activate small square
Select all>float>defloat
Paste your photo into selection
Deselect

Activate large square
Floodfill with a pattern
Apply graphics plus cross shadow using default settings
Apply inner bevel using bevel #2 width 30

Activate the rectangles layer
Floodfill with another pattern
Apply graphics plus cross shadow same as above

Paste your tube as a new layer
Resize as needed
Position on right side of photo area
Apply xero porcelain using default settings

Activate raster 1
Floodfill with a cloud pattern

Resize all layers to 70%

Add text

Add your name & your © info

Merge all

Copy & paste into animation shop

Animation

Mulitiply your tag until you have 16 frames
Activate frame 1 and select all

Open the twinks animation
Activate frame 1 and select all

Grab the twinks by the first frame and drop it into place on frame 1 of your tag

View your animation

Save as gif & you're all done!

I hope you enjoyed my tutorial

I would love to post your © compliant result, just email it to me with the tut name in the subject line

:)


Result by Kaye

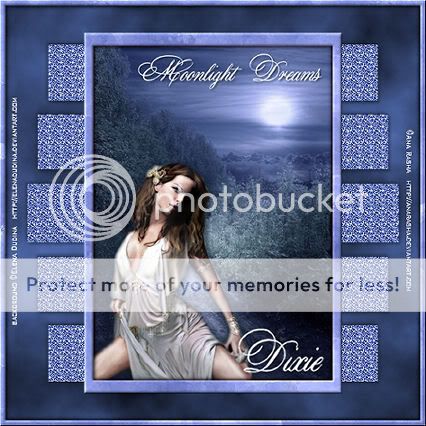
Result by Dixie


Thursday, August 25, 2011

A Cat Massages The Heart

Click for larger view

This tutorial was written by Sharon on August 25, 2011
For more info read my TOU

Supplies Needed
Scrapkit Cream here

Cat word art here

Frame I made for this tut here

The tube I used is by Jose Cano, you will need a license to use which you can purchase from PTE here


Open new transparent canvas 700x750, we will resize later
Select all
Paste paper 12 into selection
Deselect

Open your frame
Using your magic wand click inside the frame
Expand 5
Paste paper 4 as a new layer
Invert your selection
Deselect

Past your tube as a new layer
Resize as needed

Move the paper & tube layers to below the frame layer

Paste element 1 as a new layer
Resize to 60%
Position on upper right corner of frame
Add drop shadow
Duplicate & mirror

Paste element 8 as a new layer
Resize to 35%
Position on left side of frame
Add drop shadow
Duplicate & mirror

Paste element 5 as a new layer
Resize to 40%
Position on left lower corner of frame
Add drop shadow
Duplicate & mirror

Paste element 10 as a new layer
Resize to 40%
Position on the bottom center of frame
Add drop shadow

Paste your wordart as a new layer
Zoom out and floodfill with a color from your tag
Resize to 50%

Resize all layers to 75%

Add your name & your © info

Save as jpg & you're all done!

I hope you enjoyed my tutorial

I would love to post your © compliant result, just email it to me with the tut name in the subject line

:)


Tuesday, June 7, 2011

My Lil Fluff Ball~Forum Size

Click for larger view

This tutorial was written by Sharon on Feb 23, 2011
For more information read my TOU

Supplies Needed
Bow here

Plugins
Xero Porcelain
Filters Unlimited

Font
Odstemplik

The tube I used is by Jose Cano.  You will need a license to use which you can purchase here

New transparent canvas 725x325, we will resize later
Floodfill with a gradient which will look nice with your tube, radial angle 45 repeats 5
Apply filters unlimited>Tile & Mirror>Mirrored & Scaled, default settings
Repeat 2 more times

Paste your tube as a new layer
Resize as needed and move to one side
Apply xero porcelain, default settings
Duplicate
Mirror
Luminance Legacy
Opacity 65

New layer
Floodfill with your gradient
Select all
contract 5
Delete
Deselect
Apply inner bevel using bevel #3 width 1
Effects>Edge Effects>Enhance

Paste the bow as a new layer
Resize to 30%
Edge enhance

Activate your text tool and select your font, I used the font named above size 48
With your gradient in the background type the words My Lil Fluff Ball
Repeat edge enhance
Luminance

Resize all layers to 80%

Add your © info and name

Merge all

Save as jpg and you're all done!

I hope you enjoyed my tutorial

I would love to post your result, just email it to me

:)