Showing posts with label Roman Zaric. Show all posts

Tuesday, April 17, 2012

Tennessee Thunderstorm

Click for larger view

This tutorial was written by Sharon A on April 16, 2012 & is copyright protected
For more info read my TOU

Plugins
Krustys FX Vol II
Xenofex Constellation
Mura Meister Cloud


The tubes I used Tennessee Thunderstorm (PTE5637) & Roberta (PTE5602) are by Roman Zaric, you can purchase these tubes from PTE here

The font I used is called Tagettes
I used size 36 & 48


Open a new transparent canvas 700x700, we will resize later
Floodfill with a color from your tube
Apply krustys pattern P
You'll need to play with the colors

Paste your main horse tube as a new layer
Resize as needed
Add drop shadow

Activate your rectangle shape tool
Foreground green, background null, width 18
Draw a frame around your tube
Align center
Resize a bit if needed
Add an inner bevel
Move to below your horse

Using your magic wand click inside your frame
Expand 3
Add a new raster layer
Floodfill with a medium or dark blue
Move to below your horse layer
Select all>float>defloat

Apply xenfofex constellation
Click on settings then on medium
Click on the keep original image box
Do Not Deselect

Apply mura meister cloud
Preset on thin clouds, uncheck the light & background boxes, change amount to 60
Do Not Deselect

Add a new raster layer
Activate your picture tube tool, scale 50
Add some grass, make it hilly looking

Add a new raster layer
Add a tree from your tubes tool
Add drop shadow

Repeat for each new tube you want to add
Merge these when you're done

Add a drop shadow to your frame
Change layer properties to hard light

Add a new raster layer
Using your tubes tool, scale 50, add a flower
Position on the upper left of your frame
Add an inner bevel & drop shadow
Duplicate, mirror & merge down

Paste your close up horse as a new layer
Resize as needed
Add drop shadow
Position lower left corner

Paste your other tube as a new layer
Resize as needed
Add drop shadow
Position lower right corner
(I mirrored mine)

Add a new raster layer
Floodfill with your first color
Select all
Contract 12
Delete & deselect
Add an inner bevel & drop shadow
Change layer properties to hard light

Activate the floodfilled layer from your frame
Duplicate 2 times
Apply xenofex lightening
Click on settings then on distant lightening
Repeat on other 2 layers clicking on the random seed button each time

Resize all layers to 70%

Add your text, name & © info

Merge all

Save as jpg and you're all done!

I hope you enjoyed my tutorial

Your comments are very much appreciated either here on this post or on the chat box.  I've made it easy for you to post on this tut by turning off the requirement of having to type in a confirmation code

I would love to post your © compliant result, just email it to me with ATT Sharon & the tut name in the subject line

You'll find my email blinkie on your left

:)


Result by Kaye W


Thursday, March 29, 2012

Purple Passion

Click for larger view

This tutorial was written by Sharon A on March 29, 2012 & is copyright protected
For more info read my TOU

Supplies Needed
Flowers here
Accent here

Plugins
Eyecandy 4 HSB NOise
DSB Flux Bright Noise

The tube I used Daisy is by Roman Zaric, you can purchase this tube from PTE here

The font I used is called Franklin Cascaes


Open a new transparent canvas 700x700, we will resize later
Floodfill with a color from the flowers
Apply dsb flux bright noise intensity 30, mix checke
Add an inner bevel

Paste flowers as a new layer
Resize to 120%
Add drop shadow using white as the color
Change layers properties to overlay
Duplicate 2 times

Apply eyecandy noise using default settings
Repeat on other 2 layers clicking the random seed button each time
Rename these layers to A1, A2, & A3

Paste your tube as a new layer
Resize as needed
Add drop shadow

Paste your accent as a new layer
Duplicate & mirror
Duplicate & flip
Duplicate & mirror again

Merge these 4 layers
Position at the top

Duplicate & flip
Merge down
Add drop shadow using white as your color

Resize all layers to 70%

Add your text, name & © info


Animation:

Hide animation 2 & 3
Merge visible
Copy & paste into animation shop

Undo your merge
Hide animation 1 & unhide #2
Merge & paste after current in animation shop

Undo your merge
Hide animation 2 & unhide #3
Merge visible & paste after current in animation shop

View your animation

Save as gif & you're all done!

I hope you enjoyed my tutorial

I would love to post your © compliant result, just emaail it to me with ATT Sharon & the tut name in the subject line

You'll find my email blinkie on your left 

:)


Result by Kaye W


Monday, March 26, 2012

Its A Dogs Life

Click for larger view

This tutorial was written by Sharon A on March 26, 2012
For more info read my TOU

Supplies Needed
Frame I made for this tut here

Plugins
Filters Unlimited Paper Textures
Eyecandy 5 Textures Swirl
Graphics Plus Cross Shadow
Eyecandy 4 HSB Noise

The tubes I used are by Roman Zaric, you can purchase these tubes from PTE here

You don't have to use animal tubes for this tut, use any type you want, I just wanted an excuse to play with all these dogs lol

The font I used is called Enobled Pet


Open a new transparent canvas 700x700, we will resize later
floodfill with a color from your tube
Apply filters unlimited>paper textures>japanese paper
Apply eyecandy textures>swirls using default settings
Apply graphics plus cross shadow using default settings

Paste your frame as a new layer

Paste your tubes as new layers, one at a time
Position into place

On some of the frames you'll need to click in them with your magic wand, activate your tube, invert your selection, delete & deselect
On 2 of them I left the tube outside the frame

Activate your frame layer
Floodfill with a gradient which will look nice with your tubes
Add an inner bevel
Add drop shadow, twice
Duplicate 2 times
Apply eyecandy hsb noise using default settings
Repeat on other 2 layers clicking on the random seed button each time

Resize all layers to 70%

Add your text, name & © info


Animation:

Hide animation 2 & 3
Merge visible
Copy & paste into animation shop

Undo your merge
Hide animation 1 & unhide #2
Merge & paste after current in animation shop

Undo your merge
Hide animation 2 & unhide #3
Merge visible & paste after current in animation shop

View your animation

Save as gif & you're all done!

I hope you enjoyed my tutorial

I would love to post your © compliant result, just email it to me with the tut name in the subject line

:)


Result by Kaye W


Sunday, March 25, 2012

Dazzling

Click for larger view

This tutorial was written by Sharon A on March 25, 2012
For more info read my TOU

Supplies Needed
Template #4 by Judith here

Plugins
Xero porcelain
Graphics Plus Cross Shadow
Eyecandy 4 HSB Noise

The tube I used Daisy is by Roman Zaric, you can purchase this tube from PTE here


Open your template, shift D to duplicate & close original
Delete credit & doodle with stroke layers

Click inside frame 2 with your magic wand

Paste your tube as a new layer
Resize as needed and position into place
Move to below your frame layer
Invert your selection
Delete
Deselect
Apply xero porcelain using default settings
Add drop shadow

Activate bg 2
Floodfill with a color from your tube
Apply graphics plus cross shadow using default settings

Activate bg 1
Floodfill with same color as before
Apply cross shadow, default settings

Activate frame 1
Follow the same steps you did with frame 2 using your close up tube
Add drop shadow
Change layer properties to Lumiance Legacy
Change opacity to 75

Floodfill your 2 frame layers with a darker shade of your color
Add an inner bevel & drop shadow

Activate one of your flower layers
Select all>float>defloat
Add a new raster layer
Floodfill with a lighter shade of your last color
Deselect
Change layer properties to overlay
Merge down
Add drop shadow

Repeat on other flower changing the color slightly

Floodfill the lines with your flower colors
Add an inner bevel & drop shadow

Floodfill background with a dark shade of your color
Duplicate 2 times
Apply eyecandy hsb noise, change the pattern to smooth fractal
Repeat on other 2 layers clicking on the random seed button each time

Activate one of the dotted lines
Add a new raster layer
Floodfill with a light shade of your color
Go back to the dotted line layer
Select all>float>defloat
Back to your floodfilled layer
Invert your selection
Delete
Deselect
Add drop shadow, twice

Repeat on other dotted line

Repeat on the doodle layer using a different shade of your color
Add an inner bevel & drop shadow

Repeat on dazzling layer
Change layer properties to darken
Add an inner bevel & drop shadow
Resize to 75% & position on the top dotted line

Resize all layers to 85%

Add your text, name & © info


Animation:

Hide animation 2 & 3
Merge visible
Copy & paste into animation shop

Undo your merge
Hide animation 1 & unhide #2
Merge & paste after current in animation shop

Undo your merge
Hide animation 2 & unhide #3
Merge visible & paste after current in animation shop

View your animation

Save as gif & you're all done!

I hope you enjoyed my tutorial

I would love to post your © compliant result, just email it to me with the tut name in the subject line

:)


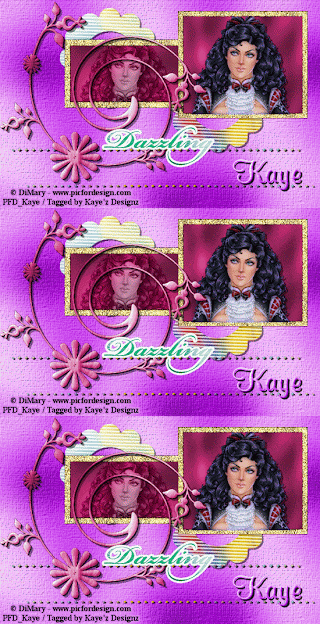
Result by Kaye W


Friday, March 23, 2012

White Destiny

Click for larger view

This tutorial was written by Sharon A on March 23, 2012
For more info read my TOU

Supplies Needed
Frame I made for this tut, if you would like to use it please email me

Photo of your choice
The photo I used is called Mountain Bliss by Jon Rattenbury, you can purchase this photo from PTE here

Plugins
Eyecandy 4 HSB Noise
Xero Fritillary
Graphics Plus Cross Shadow

The tube I used White Destiny is by Roman Zaric, you can purchase this tube from PTE here


Open a new transparent canvas 700x700, we will resize later
Floodfill with a color from your photo
Apply Xero Fritillary changing the top # to 12 & the bottom # to 8
Apply Graphics Plus Cross Shadow using default settings

Paste frame as a new layer
Resize to 90%
Using your magic wand, click inside the frame, hold down the shift key to click inside small areas on the right
Add a new raster layer
Expand 3
Paste photo into selection
Deselect

Add drop shadow to the frame

Back to the top
Paste your tube as a new layer
Resize as needed and position in desired place
I wanted mine to look like he's jumping out of the frame
Add a drop shadow, twice

Resize all layers to 70%

Add your text, name & © info


Animation:
Merge your text & name layers
Duplicate 2 times
Apply Eyecandy HSB Noise using default settings
Repeat on other 2 layers clicking the random seed button each time

Follow the usual steps on merging, copy, pasting into animation shop
If you need instructions here feel free to email me

View your animation

Save as gif & you're all done!

I hope you enjoyed my tutorial

I would love to post your © compliant result, just email it to me with the tut name in the subject line

:)


Sunday, March 11, 2012

It Wasn't Me

Click for larger view

This tutorial was written by Sharon A on March 11, 2012
For more info read my TOU

Supplies Needed
Bone here

Plugins
Graphics Plus Cross Shadow

The tube I used Destroyer is by Roman Zaric, you can purchase this tube from PTE here
http://psptubesemporium.com


Open a new transparent canvas 700x700, we will resize later
Floodfill with a pattern or gradient
Apply Graphics Plus Cross Shadow using default settings

Paste your tube as a new layer

Activate your rectangle tool, foreground on same pattern or gradient you used to floodfill raster 1, width 25
Draw rectangle around your tube
Add inner bevel with these settings


Erase any part of your tube hanging outside the frame

Using your magic wand click inside the frame
Expand 3
Add a new raster layer
Floodfill with a color from your pattern or gradient
Apply Graphics Plus Cross Shadow using default settings, twice
Move to below your tube layer

Paste bone as a new layer
Resize to 75%
Rotate right 15
Position across a corner
Add drop shadow, 2 times
Duplicate & mirror

Resize all layers to 70%

Add your text name & © info

Merge all

Save as jpg & you're all done!

I hope you enjoyed my tutorial

I would love to post your © compliant result, just email it to me with the tut name in the subject line

:)


Result by Kaye W