

Click for larger view
This tutorial was written by Sharon A on March 25, 2012
For more info read my TOU
Supplies Needed
Template #4 by Judith here
Plugins
Xero porcelain
Graphics Plus Cross Shadow
Eyecandy 4 HSB Noise
The tube I used Daisy is by Roman Zaric, you can purchase this tube from PTE here
Open your template, shift D to duplicate & close original
Delete credit & doodle with stroke layers
Click inside frame 2 with your magic wand
Paste your tube as a new layer
Resize as needed and position into place
Move to below your frame layer
Invert your selection
Delete
Deselect
Apply xero porcelain using default settings
Add drop shadow
Activate bg 2
Floodfill with a color from your tube
Apply graphics plus cross shadow using default settings
Activate bg 1
Floodfill with same color as before
Apply cross shadow, default settings
Activate frame 1
Follow the same steps you did with frame 2 using your close up tube
Add drop shadow
Change layer properties to Lumiance Legacy
Change opacity to 75
Floodfill your 2 frame layers with a darker shade of your color
Add an inner bevel & drop shadow
Activate one of your flower layers
Select all>float>defloat
Add a new raster layer
Floodfill with a lighter shade of your last color
Deselect
Change layer properties to overlay
Merge down
Add drop shadow
Repeat on other flower changing the color slightly
Floodfill the lines with your flower colors
Add an inner bevel & drop shadow
Floodfill background with a dark shade of your color
Duplicate 2 times
Apply eyecandy hsb noise, change the pattern to smooth fractal
Repeat on other 2 layers clicking on the random seed button each time
Activate one of the dotted lines
Add a new raster layer
Floodfill with a light shade of your color
Go back to the dotted line layer
Select all>float>defloat
Back to your floodfilled layer
Invert your selection
Delete
Deselect
Add drop shadow, twice
Repeat on other dotted line
Repeat on the doodle layer using a different shade of your color
Add an inner bevel & drop shadow
Repeat on dazzling layer
Change layer properties to darken
Add an inner bevel & drop shadow
Resize to 75% & position on the top dotted line
Resize all layers to 85%
Add your text, name & © info
Animation:
Hide animation 2 & 3
Merge visible
Copy & paste into animation shop
Undo your merge
Hide animation 1 & unhide #2
Merge & paste after current in animation shop
Undo your merge
Hide animation 2 & unhide #3
Merge visible & paste after current in animation shop
View your animation
Save as gif & you're all done!
I hope you enjoyed my tutorial
I would love to post your © compliant result, just email it to me with the tut name in the subject line
:)
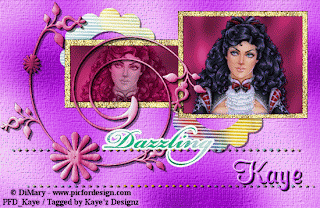
Result by Kaye W
No comments:
Post a Comment
Please keep your language clean, thank you!