

Click for larger view
This tutorial was written by Sharon A on March 12, 2012
For more info read my TOU
Supplies Needed
Scrapkit Girls Rule by babsbitzbeez here
Plugins
Eyecandy 4 HSB Noise
The tube I used Cameo Heart is by Pinup Toons, you can purchase this tube from CDO here

Open new transparent canvas 700x550, we will resize later
Select all
Paste paper 9 into selection
Deselect
Paste your tube as a new layer
Add drop shadow
Paste frame 9 as a new layer
Using your magic wand click inside the frame
Expand 3
Add a new raster layer
Paste paper 17 into selection
Move to below your tube layer
Deselect
Go back to your tube layer & resize as needed
Activate your rectangle tool
Foreground null, background set to a color from your tube
Draw a rectangle across the width of your tag
Align Center
Effects>Distortion Effects>Warp
Use these settings
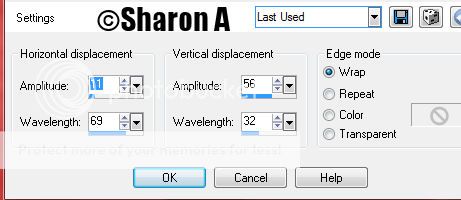
Add an inner bevel with these settings
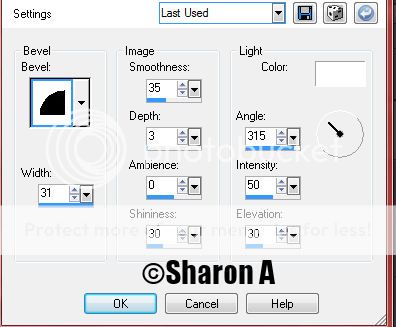
Move to just above your background layer
Duplicate 2 times
Rename these layers to animation 1, 2 & 3
On animation 1 apply Eyecandy HSB noise using default settings
Repeat on other 2 layers clicking the random seed button each time
Activate your top layer
Paste eyeshadow as a new layer
Resize to 20%
Rotate left 30
Position near bottom left
Add drop shadow
Paste blush as a new layer
Resize to 20%
Rotate left 25
Position near eyeshadow
Add drop shadow
Paste compact as a new layer
Resize to 15%
Position near the last 2 elements
Add drop shadow
Paste lipstick as a new layer
Resize to 20%
Rotate right 25
Position with other makeup layers
Add drop shadow
Paste heart charm as a new layer
Resize to 35%
Position on left side
Add drop shadow
Paste glasses as a new layer
Resize to 20%
Rotate left 25
Position left side of frame
Add drop shadow
Resize all layers to 70%
Add your text
Add your text, name & your © info
Animation
Hide animation 2 & 3
Merge visible
Copy & paste into animation shop
Undo your merge
Hide animation 1 & unhide #2
Merge & paste after current in animation shop
Undo your merge
Hide animation 2 & unhide #3
Merge visible & paste after current in animation shop
View your animation
Save as gif & you're all done!
I hope you enjoyed my tutorial
I would love to post your © compliant result, just email it to me with the tut name in the subject line
:)
No comments:
Post a Comment
Please keep your language clean, thank you!