
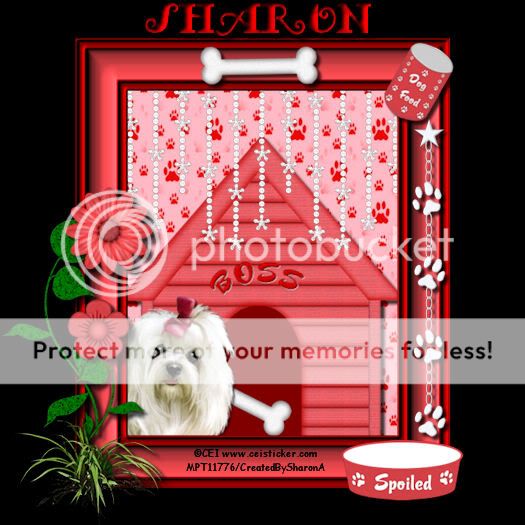
Click for larger view
This tutorial was written by Sharon on August 22, 2011
For more info read my TOU
Supplies Needed
Scrapkit Puppy Love by me here
The font I used is called Fancy Pants, you can get it here
The tube I used is by CEI, you will need a license to use which you can purchase from MPT here
(Note: As of last week MPT no longer sells tubes, if you know where CEI is selling please let me know)

Open a new transparent canvas, 700x700. We will resize later
Floodfill with black
Paste a frame as a new layer
Using your magic wand click inside the frame
Expand 5
Paste paper of your choice as a new layer
Invert your selection
Delete
Deselect
Paste dog house as new layer
Position at the bottom of the frame
Move this layer to below the frame layer
Add drop shadow
Paste your tube as a new layer
Resize as needed
Add drop shadow
Paste a crystal curtain as a new layer
Resize to 60%
Move this layer to below the frame layer
Position as shown on my tag, you will probably need to use your pick tool to move
Paste a can of dog food as a new layer
Resize to 35%
Position on upper right corner of the frame
Rotate right 30
Add a drop shadow
Paste a bowl as a new layer
Resize to 75%
Position on the right side of your frame
Add a drop shadow
Paste a paw chain as a new layer
Position on right side of frame
Add drop shadow
Paste bone as a new layer
Rotate right 28
Position on the upper center of the frame
Add a drop shadow
Paste leaf 2 as a new layer
Position on the left side of the frame
Add a drop shadow
Duplicate & mirror
Resize the mirrored layer to 75%
Reposition the mirrored layer
Paste a flower as a new layer
Resize to 35%
Position on the smaller leaf
Add drop shadow
Repeat with another flower resizing this one to 45% and positioning on the larger leaf
Add drop shadow
Add a new raster layer
Activate your tube tool
Add some greenery around the bottom of the leaves
Add drop shadow
Merge all the floral & leaves layers
Add another drop shadow
Add your name
Resize all layers to 75%
Add your © info
Save as jpg & you're all done!
I hope you enjoyed my tutorial
I would love to post your © compliant result, just email it to me with the tut name in the subject line
:)
Result by Dean
No comments:
Post a Comment
Please keep your language clean, thank you!