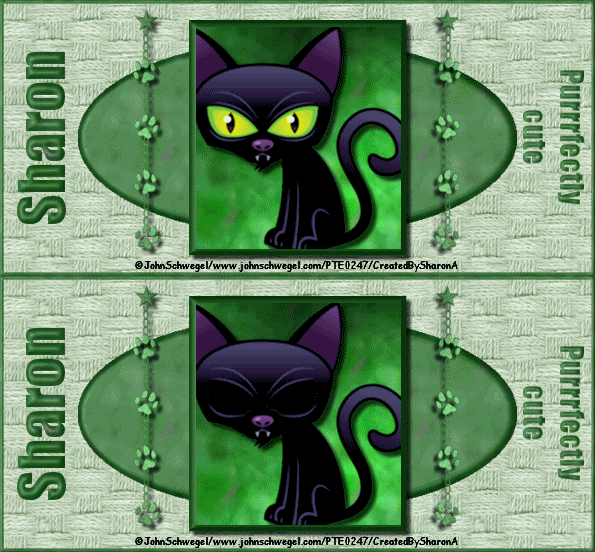
Click for larger view
This tutorial was written by Sharon on August 24, 2011
For more info read my TOU
Supplies Needed
Forum template #52 by me here
Plugins
Graphics Plus Cross Shadow
Paw Chain
Shown actual size, just right click to save

I made this paw chain for this tut. Its for personal use only, do not share!
The tube I used is by John Schwegel, you will need a license to use which you can purchase from PTE here
Note: I went to PTE to look for more John Schwegel art but he is no longer there. I googled him but couldn't find his tubes so I sent him an email. I will let you know later where he is selling his tubes if he is. Sorry about that. Ash Evans at CDO has a similar cat, product # Ash 2-2

Open template, shift D to duplicate, close original
Delete the credit layer
Activate raster 4
Floodfill with a green pattern
Apply graphics plus cross shadow using default settings
Select all>float>defloat
Paste your tube as a new layer
Resize as needed
Invert your selection
Delete
Deselect
Add drop shadow
Activate raster 3
Floodfill with dark green
Add inner bevel using bevel #2 width 30
Add drop shadow
Activate raster 2
Floodfill with the same pattern as above
Add inner bevel using bevel #2 width 10
Activate raster 1
Floodfill with a green textured pattern
Floodfill the border layer with the first pattern you used
Apply inner bevel using bevel #2 width 30
Delete the paws layer
Paste paw chain as a new layer
Position as shown on my tag
Apply graphics plus cross shadow
Add drop shadow
Duplicate & mirror
Activate your tube layer
(I'm not sure if it will look right doing it this way on another tube. Another way to do this is to use your clone tool)
Duplicate
Select around one of the eyes using your freehand selection tool
You may have to expand or contract a bit
Add new raster layer
Floodfill with black
Repeat for other eye
Merge your 2 floodfilled layers
Merge down with your top tube layer
Rename these layers to animation 1 & 2
Add your name and text
Resize all layers to 85%
Add your © info
Animation
Hide animation 1
Merge visible
Copy & paste into animation shop
Undo your merge
Unhide animation 1
Hide animation 2
Merge visible
Copy & paste after current in animation shop
On the open eyes frame set frame properties at 250
On the closed eyes frame set frame properties at 20
View your animation
Save as gif & you're all done!
I hope you enjoyed my tutorial
I would love to post your © compliant result, just email it to me with the tut name in the subject line
:)

Result by Dixie

Result by Kaye

Result by Karen


No comments:
Post a Comment
Please keep your language clean, thank you!