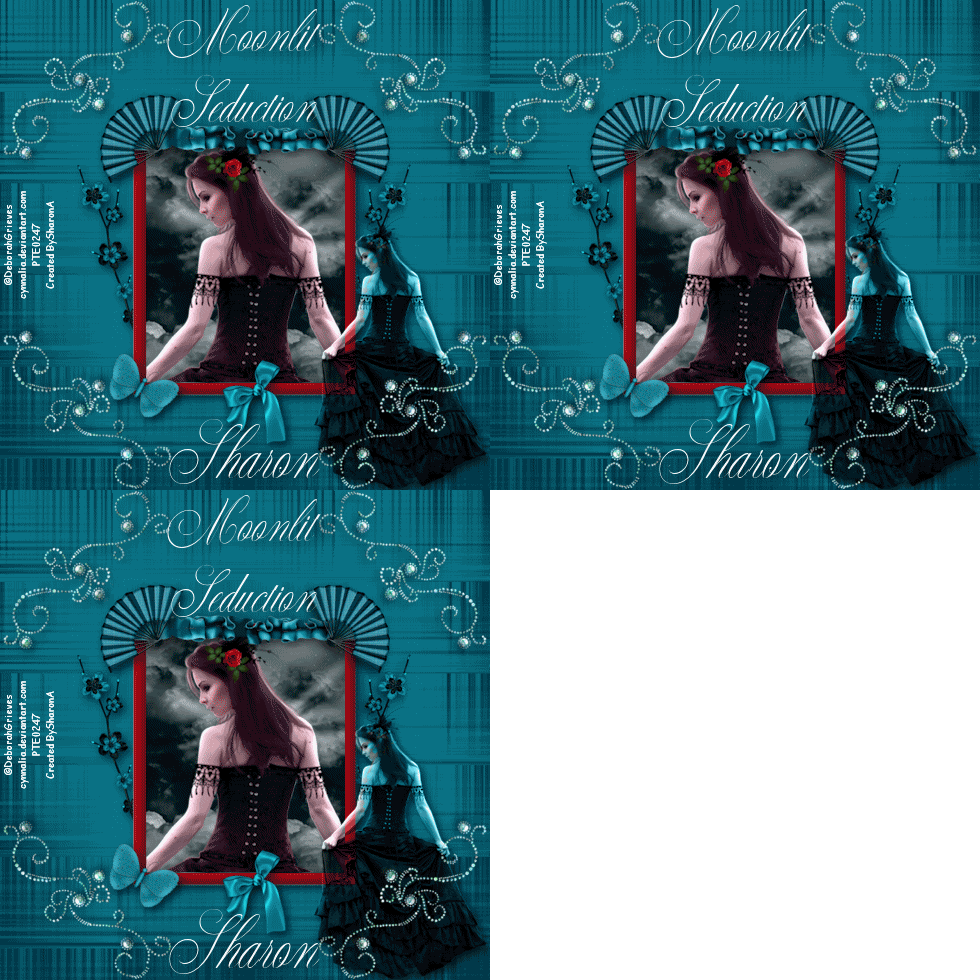
Click for larger view
This tutorial was written by Sharon on Oct 18, 2011
For more info read my TOU
Supplies Needed
Scrapkit Nightlife by Bea here
(Click on the 4 shared link near the top & scroll down about 1/2 way)
Plugins
Eyecandy 4 HSB Noise
The tube I used Moonlit Seduction is by Deborah Grieves, you can purchase this tube from PTE here
Open a new transparent canvas 700x700, we will resize later
Select all
Paste paper 2 into selection
Deselect
Activate your shapes tool set on rectangle, width 20
Foreground a color from your tube, background null
Draw out a rectangle begging at x200 y200 ending at x500 y555
Add an inner bevel
Using your magic wand click inside your frame
Expand 3
Paste paper 13 as a new layer
Resize to 50%
Move down a bit with your move tool
Invert your selection
Delete
Do Not Deselect
Paste the close up of your tube as a new layer
Resize as needed
Invert your selection
Delete
Deselect
Add a drop shadow to the frame
Paste the full size layer of your tube as a new layer
Resize as needed (I resized mine to 75%)
Add drop shadow
Change layer properties to luminance legacy
Paste bling swirl 2 as a new layer
Resize to 50%
Rotate left 45
Position upper left corner
Apply an inner bevel & drop shadow
Duplicate & mirror
Merge down
Duplicate & flip
Merge down
Duplicate 2 times
Rename these layers to animation 1, 2 & 3
Apply eyecandy hsb noise using default settings, random seed on 1
Repeat on animations 2 & 3 clicking on the random seed button each time
Paste bow 4 as a new layer
Resize to 35%
Position on bottom of frame
Add drop shadow
Paste flower 1 as a new layer
Resize to 50%
Position on left side of frame
Add drop shadow
Duplicate and mirror
Merge down
Move to below your frame layer
Back to the top
Paste butterfly 7 as a new layer
Resize to 40%
Rotate right 30
Position lower left corner of frame
Add drop shadow
Paste ruffle 3 as a new layer
Resize to 50%
Position at top of frame
Add drop shadow
Paste fan 1 as a new layer
Resize to 35%
Position upper left corner of frame
Add drop shadow
Duplicate & mirror
Merge down
Resize all layers to 70%
Add your text, name & your © info
Make sure animations 2 & 3 are hidden
Merge visible
Copy & paste into animation shop
Undo your merge
Hide animation 1 & unhide animation 2
Merge visible
Copy & paste after current in animation shop
Undo your merge
Hide animation 2 & unhide animation 3
Merge visible
Copy & paste after current in animation shop
I left the frame properties on the default of 10
Save as gif & you're all done!
I hope you enjoyed my tutorial
I would love to post your © compliant result, just email it to me with the tut name in the subject line
:)


No comments:
Post a Comment
Please keep your language clean, thank you!